Image morphing is a digital technique for smoothly transforming one image into another. It involves creating a sequence of intermediate images that blend the characteristics of the original images. The process typically begins with selecting corresponding points or features on the two images to establish correspondences. These points serve as anchor points for the morphing algorithm.
Introduction
Morphing was invented in the 80s and utilized majorly by movie directors and their special effects teams to create transitions within movies and cartoons. At that time, only power computers could perform morphing tasks due to their heavy CPU utilization. Over the years, morphing has evolved to become a visual effect for transforming one shape into another in smooth transitions. WinMorph , Adobe After Effect , and FantaMorph are examples of software for morphing images.
Within this lab blog post, you will learn about image morphing, its uses and examples, how it works, and steps of how to morph photos using the WinMoprh software.
Uses Of Morphing
Morphing is used across various digital industries to create captivating effects and clips. Some of the areas where morphing is being used include;
Brand advertisements.
Movie special effects
One of the greatest uses of facial morphing was in Michael Jackson's Black or white video released in 1991. Facial morphing was used in the music video to change the faces of various people from black or white races.
How Does Morphing Work?
Most software such as WinMorph rely on the point warping technique where pixels within a location from the input image are mapped to a new position in the output image. This technique uses a weighting function relying on the distance of the pixel to each control point in the images.
When learning about Morphing, you might come across Tweening. Tweening focuses on the animations effects between keyframes while changing images to create a movement.
When choosing the image to morph, you must choose images with certain similarities such as the orientation, size, or color.
Lecture Lab Practice
Before you morph your images, here is a preview of my trial at morphing vintage and modern cars of the same brand, model, and color.
The following example shows a well-mapped Winmorph project that morphs the vintage 1992 Mercedes AMG E-Class series with the 2014 Mercedes AMG E-Class series.
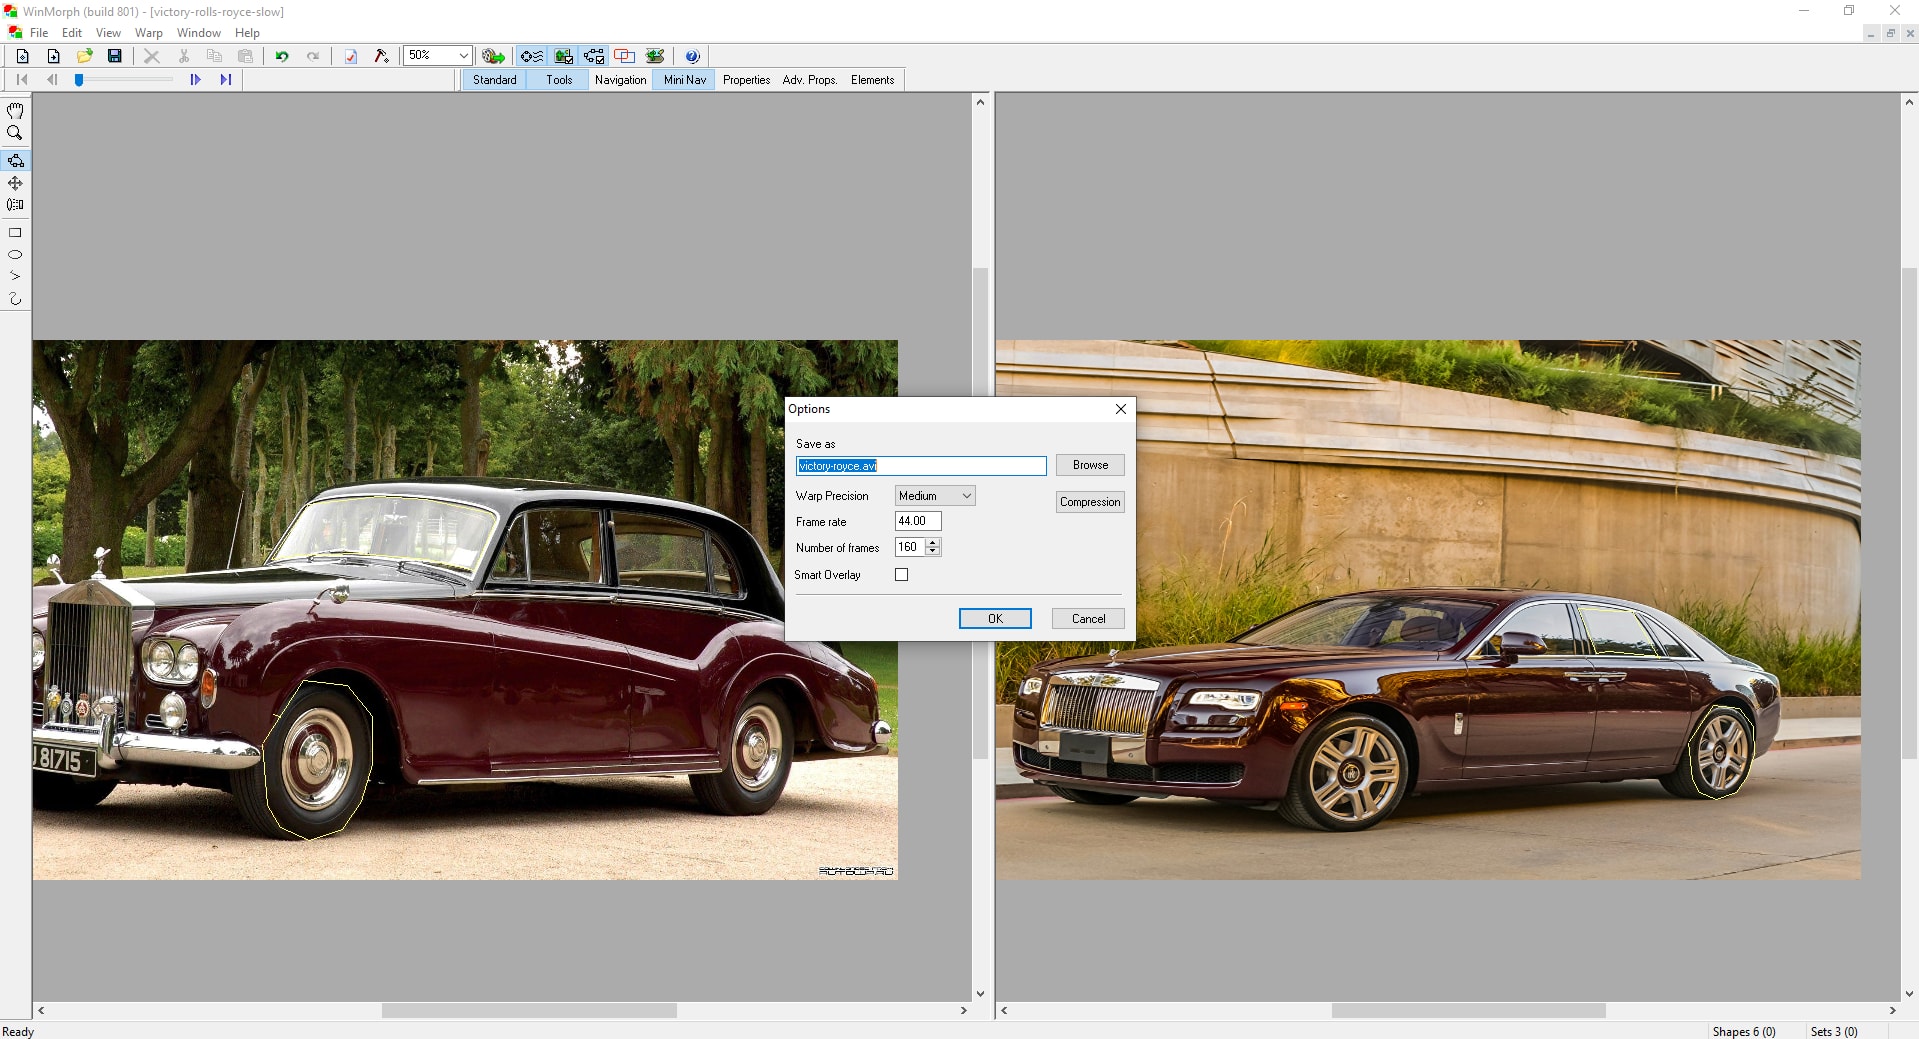
The next example shows a badly mapped Winmorph project that morphs a vintage Rolls Royce Phantom with a 2013 Rolls Royce Phantom. Notice how the resulting morph is warped due to the bad morph.
The morphing above is bad because the bumper part of the vintage Rolls Royce was wrongly mapped to the rear part of the modern Rolls Royce. This example shows the results of mapping morph points incorrectly.
Step 1: Creating a Morph project on WinMorph.
Before morphing, you must create a Morph project within the WinMorph software. The project will contain your transformation files and whatever points you create.
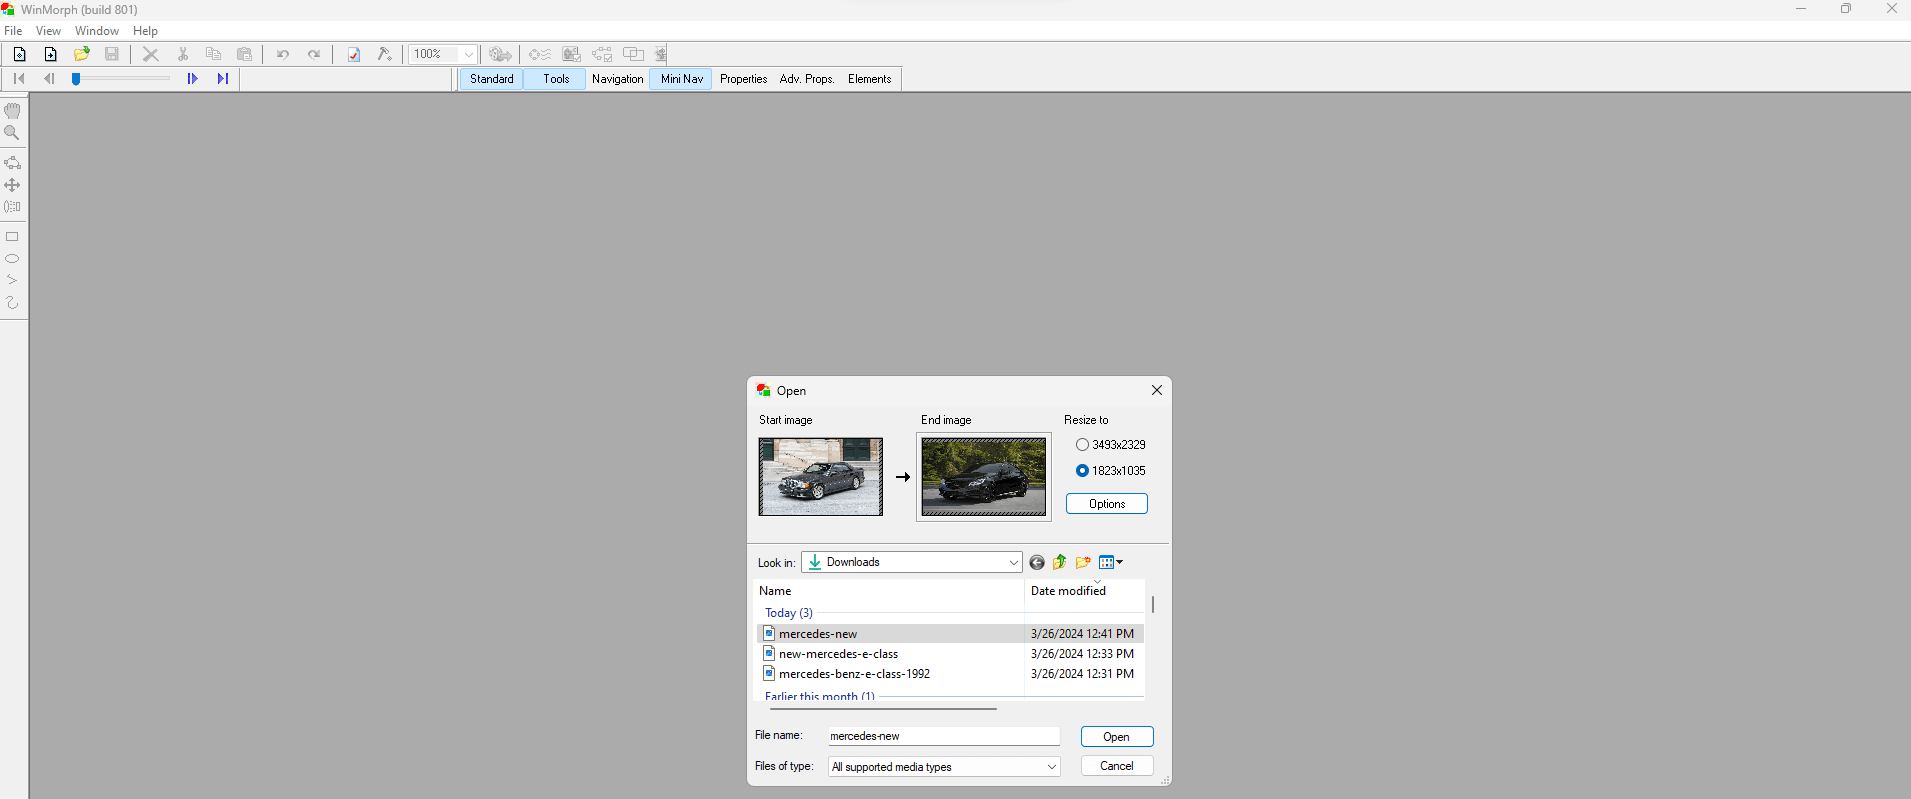
Step 2: Selecting Your Start and End Images
As the name implies, the start image is the one you morph from while the end image is the one you want to morph into.
As recommended by Carl my module leader, below are important points to consider when choosing images for morphing;
Use a Camera or some software to produce two images suitable for a morph.
Image sizes and orientation should be similar and not too large
For good results, the features and dimensions of the image should be similar
Framing the morph will prevent the edges from distorting.
After selecting the morphing project, WinMorph will prompt you to select your start and end images as shown below;
Step 3: Saving Your Morph Project
To avoid losing all your work when WinMorph closes, you must save the Morph project. WinMorph also requires that you save your project before you can render it.
Click on the Save icon or ( CTRL + S ) to save the project with your preferred name having a .avi extension as shown in the next image.
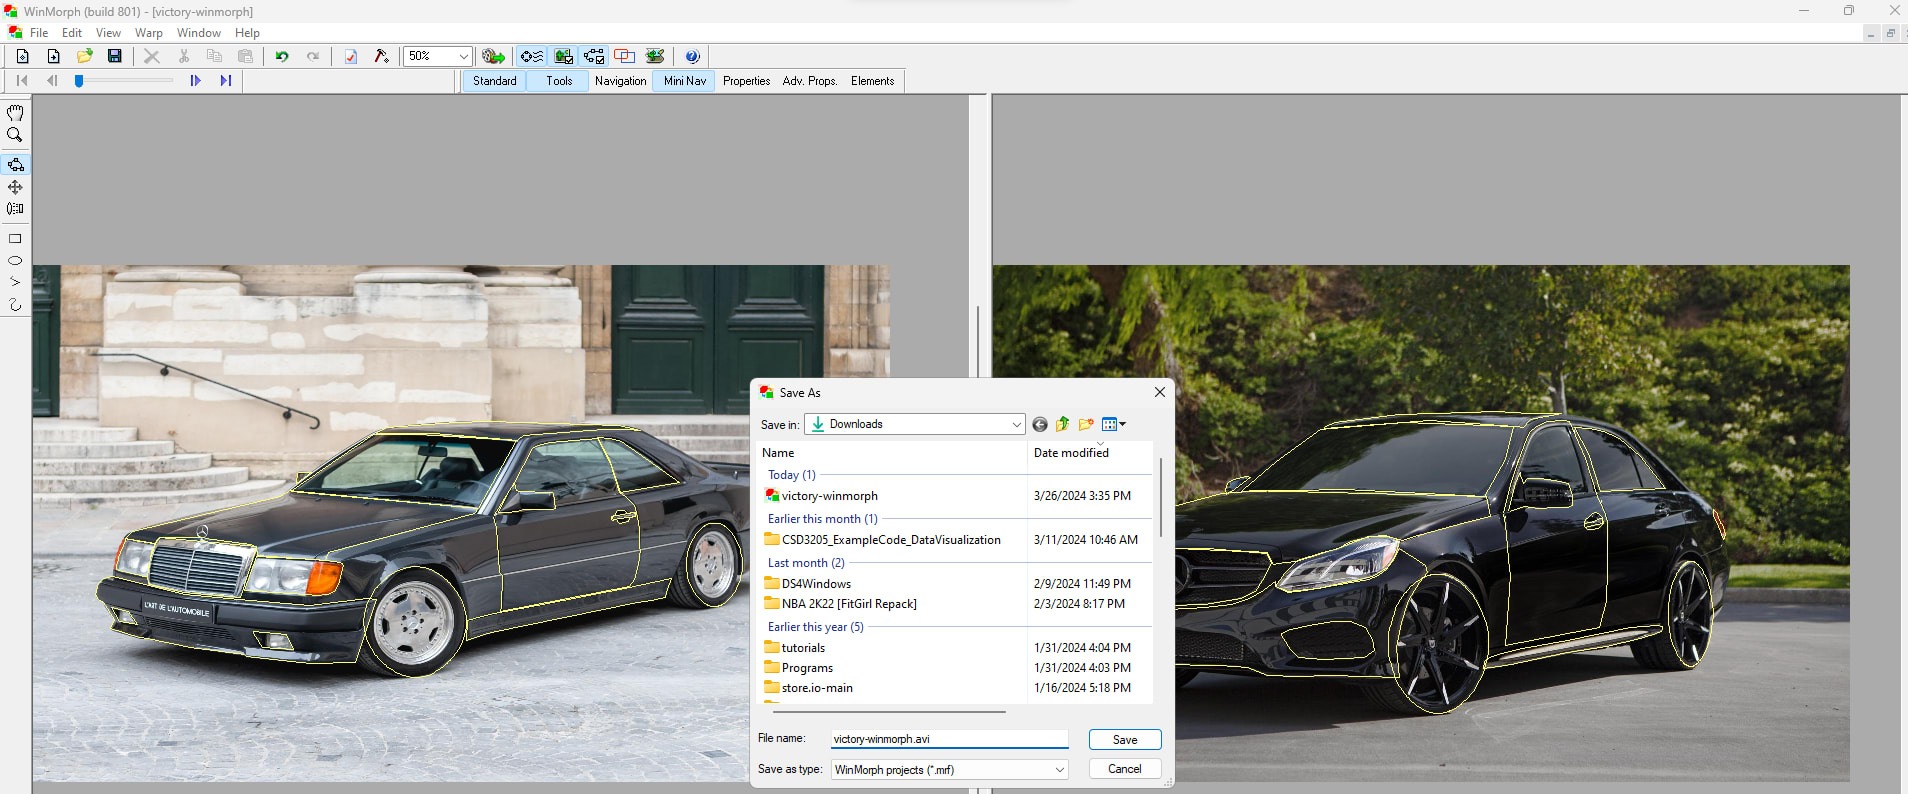
The file for your morph project will be saved with a .mrf extension. After saving you can always reopen it and make adjustments to your morph project.
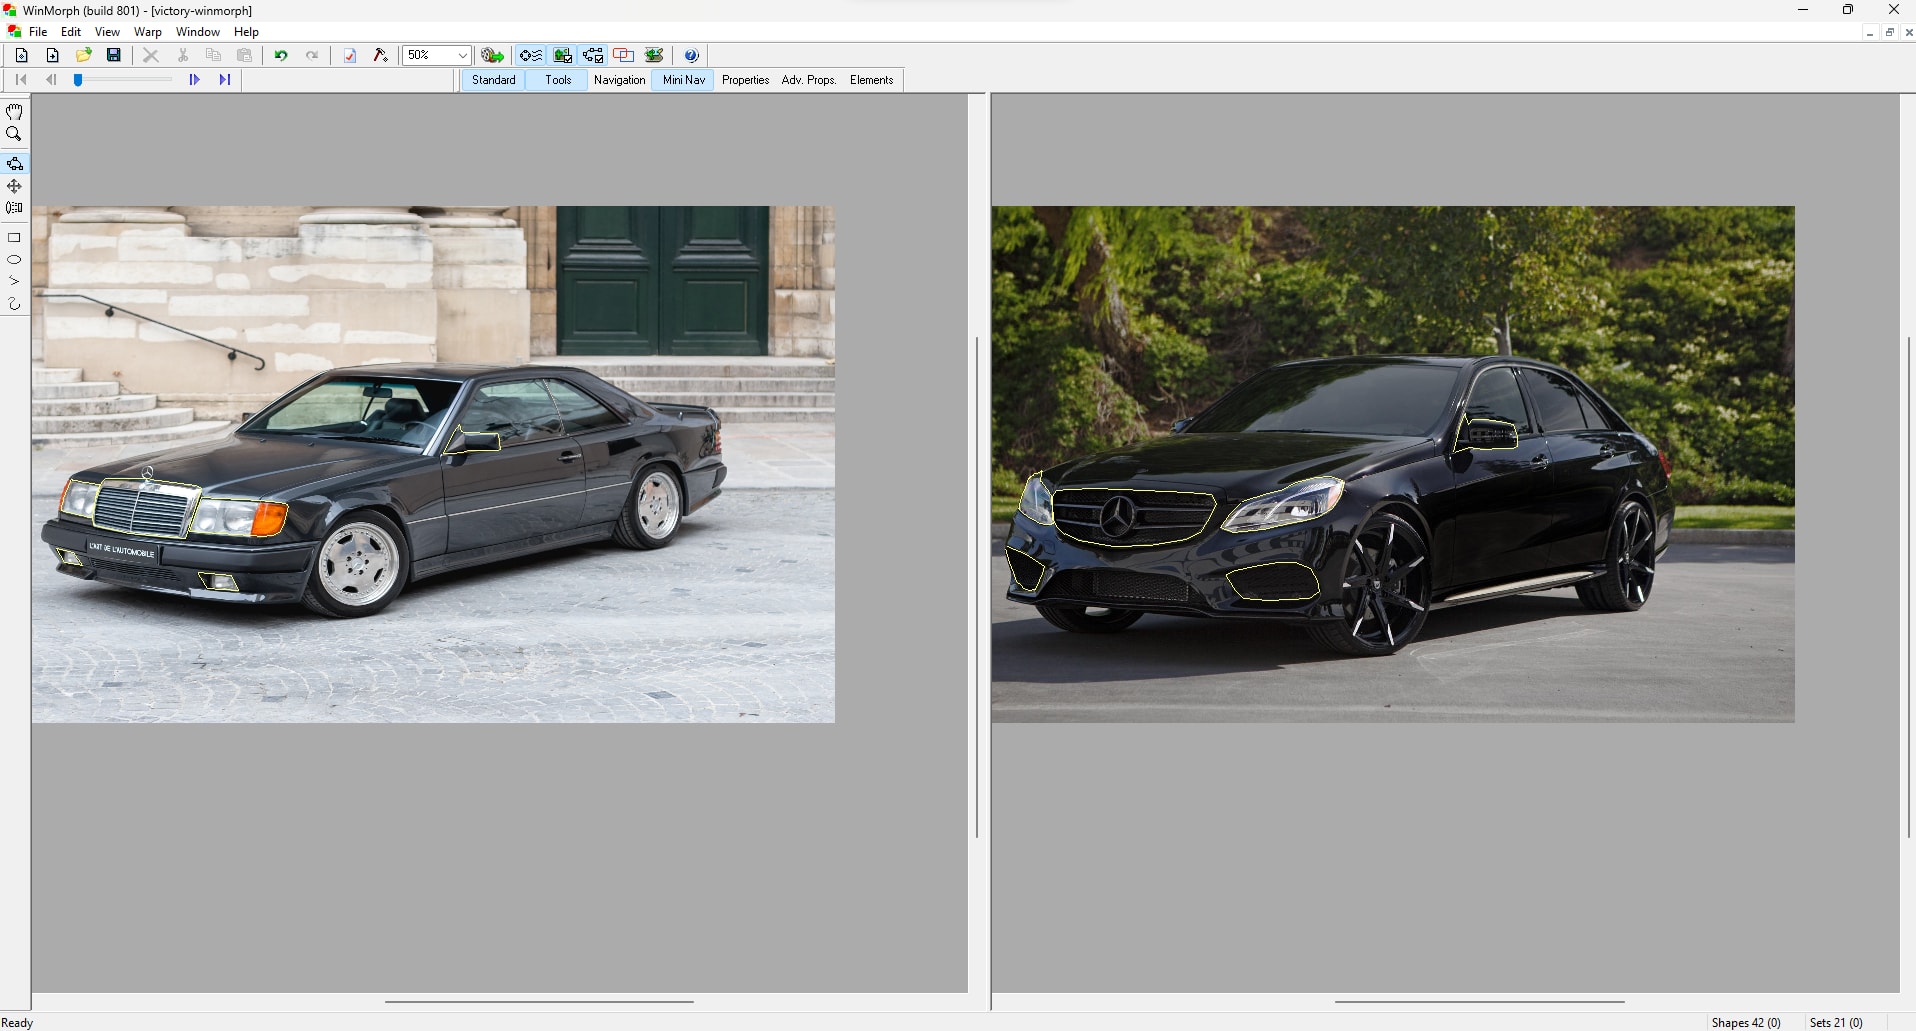
Step 4: Adding Your Morph Points
WinMorph provides various tools for selecting points within your start and end images to morph.
The following image shows the initial morph points attended to the start and end images for this demonstration.
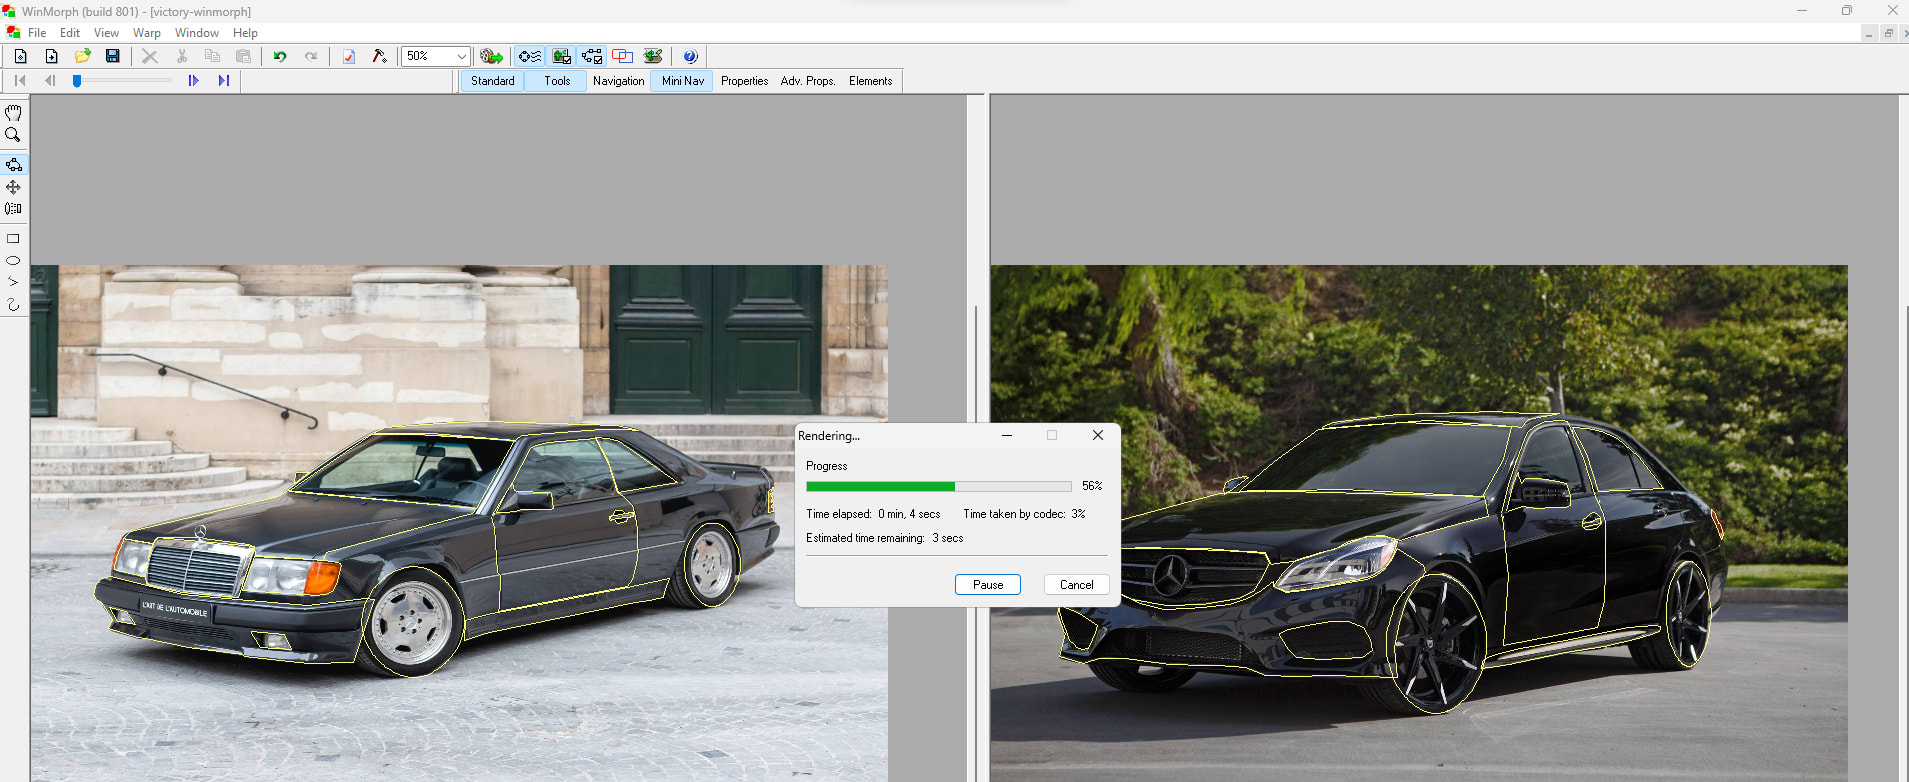
Step 5: Rendering Your First Morph
Considering that several morph points have been added to the start and end images, we can now render it to see what has been done.
Click the Render icon to render the morph project as shown in the following image;
WinMorph will save the rendered video clip to a file having the morphing project name on your computer. I recommend the VideoLAN Client (VLC) software to play the morph clip.
The following video shows the Morph clip for this demonstration.
Tutorial On Morphing
An amazing tutorial on Morphing is the one below which teaches how to morph objects using the Adobe After Effects software.
Conclusion
Through this lab, I learned about Morphing and its uses in the digital industry today. To have a hands-on feel of what Morphing can do, I practiced with the WinMorph software and used it to morph two generations of Mercedes E-Class vehicles into one.
Further Reading
Image morphing: a survey by George Wolberg.
Image Morphing Using Deformation Techniques by SEUNG-YONG LEE , KYUNG-YONG CHWA , JAMES HAHN , SUNG YONG SHIN
Warping and Morphing of Graphical Objects by J Gomes.