Image filter design involves the creation of algorithms or processes to manipulate images to enhance certain features, remove noise, or extract specific information. These filters can be designed for various purposes such as image enhancement, noise reduction, edge detection, and feature extraction.
Introduction
Filters are used in image processing to modify the brightness and contrast of an image by adjusting the color pixels. We also use filters to add layers and tones to an existing image to make it more interactive. Examples of image processing software to design filters include GIMP, Photoshop, FilterForge, and CorelDraw.
Within this lab blog post, you will learn what image filters are, their uses, and how to create your filters using Photoshop and FilterForge software.
Uses Of Image Filters
Image filters are used across various digital industries to enhance visual data. Some of the areas where image filters are being used are;
Movie banners and covers.
Machine and robot vision for setting patterns for robots to follow.
Video processing to adjust the image lightning.
How Do Image Filters Work?
There are various aspects of image filters that you need to understand to grasp how they operate. Outlined below is an explanation of some of a few of these aspects in clear terms;
Pixel Manipulation
Manipulating the color values of each pixel in an image is necessary when creating a filter. A filter applied to an image changes the original pixels to increase or decrease the brightness of the pixels or change their colors. In Image manipulation, changing the Red, Green, and Blue pixel values uses the multiplication technique.
Convolution
Convolution involves gradually swapping pixels by using the closest pixel to calculate its values. A convolution algorithm will determine the value of a central pixel by adding the weighted values of its neighbors. Adobe Photoshop, MATLAB, GIMP, and OpenCV are examples of image processing software that use convolution.
Depth Perception & Binocular Vision
Depth perception explains how the brain can view objects in three dimensions. Through depth perception, we can sense the distance of an object. Binocular vision is one of the techniques through which the brain achieves depth perception.
Lecture Lab Practice
Before you proceed to the steps of using Photoshop and FilterForge to create image filters, here are the preview images of the steps;
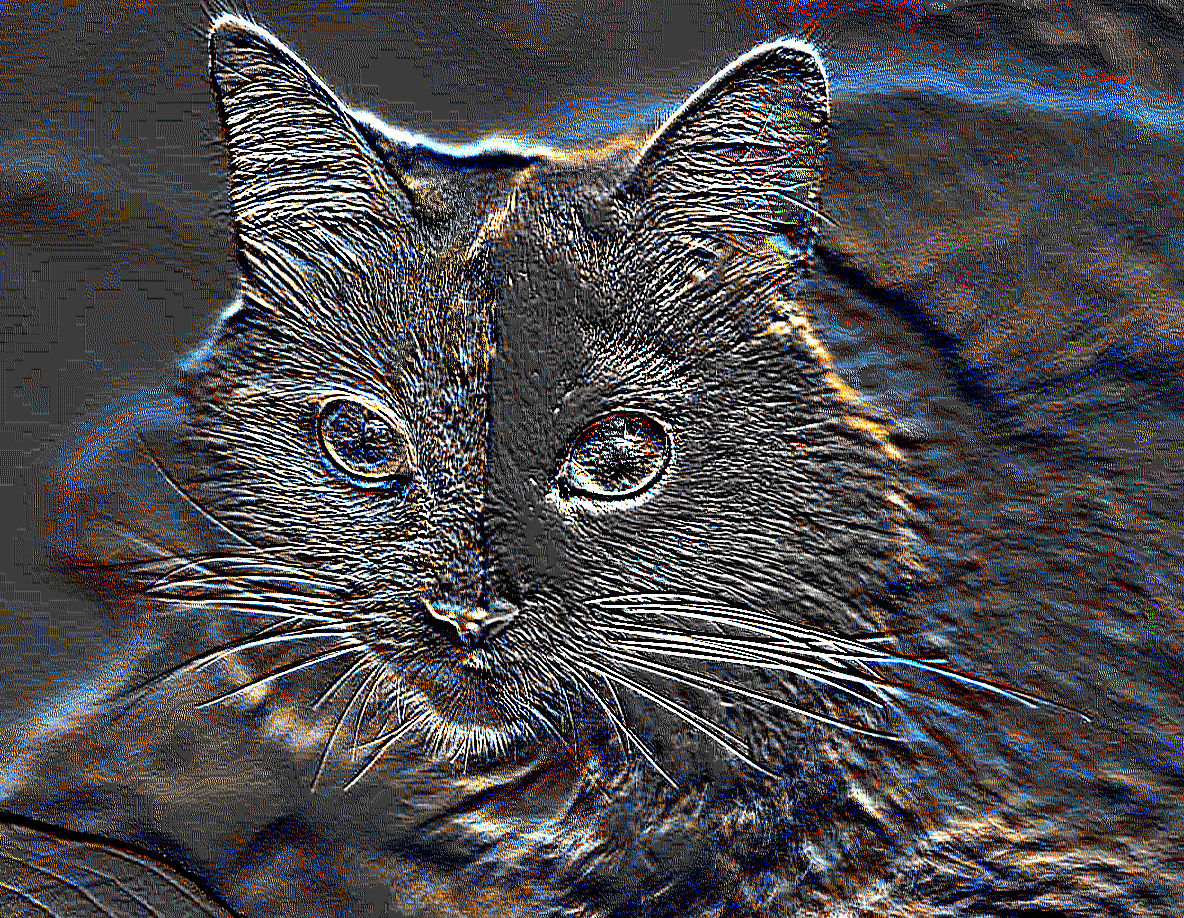
The following image shows the final result of a filter created using Photoshop applied to a cat image.
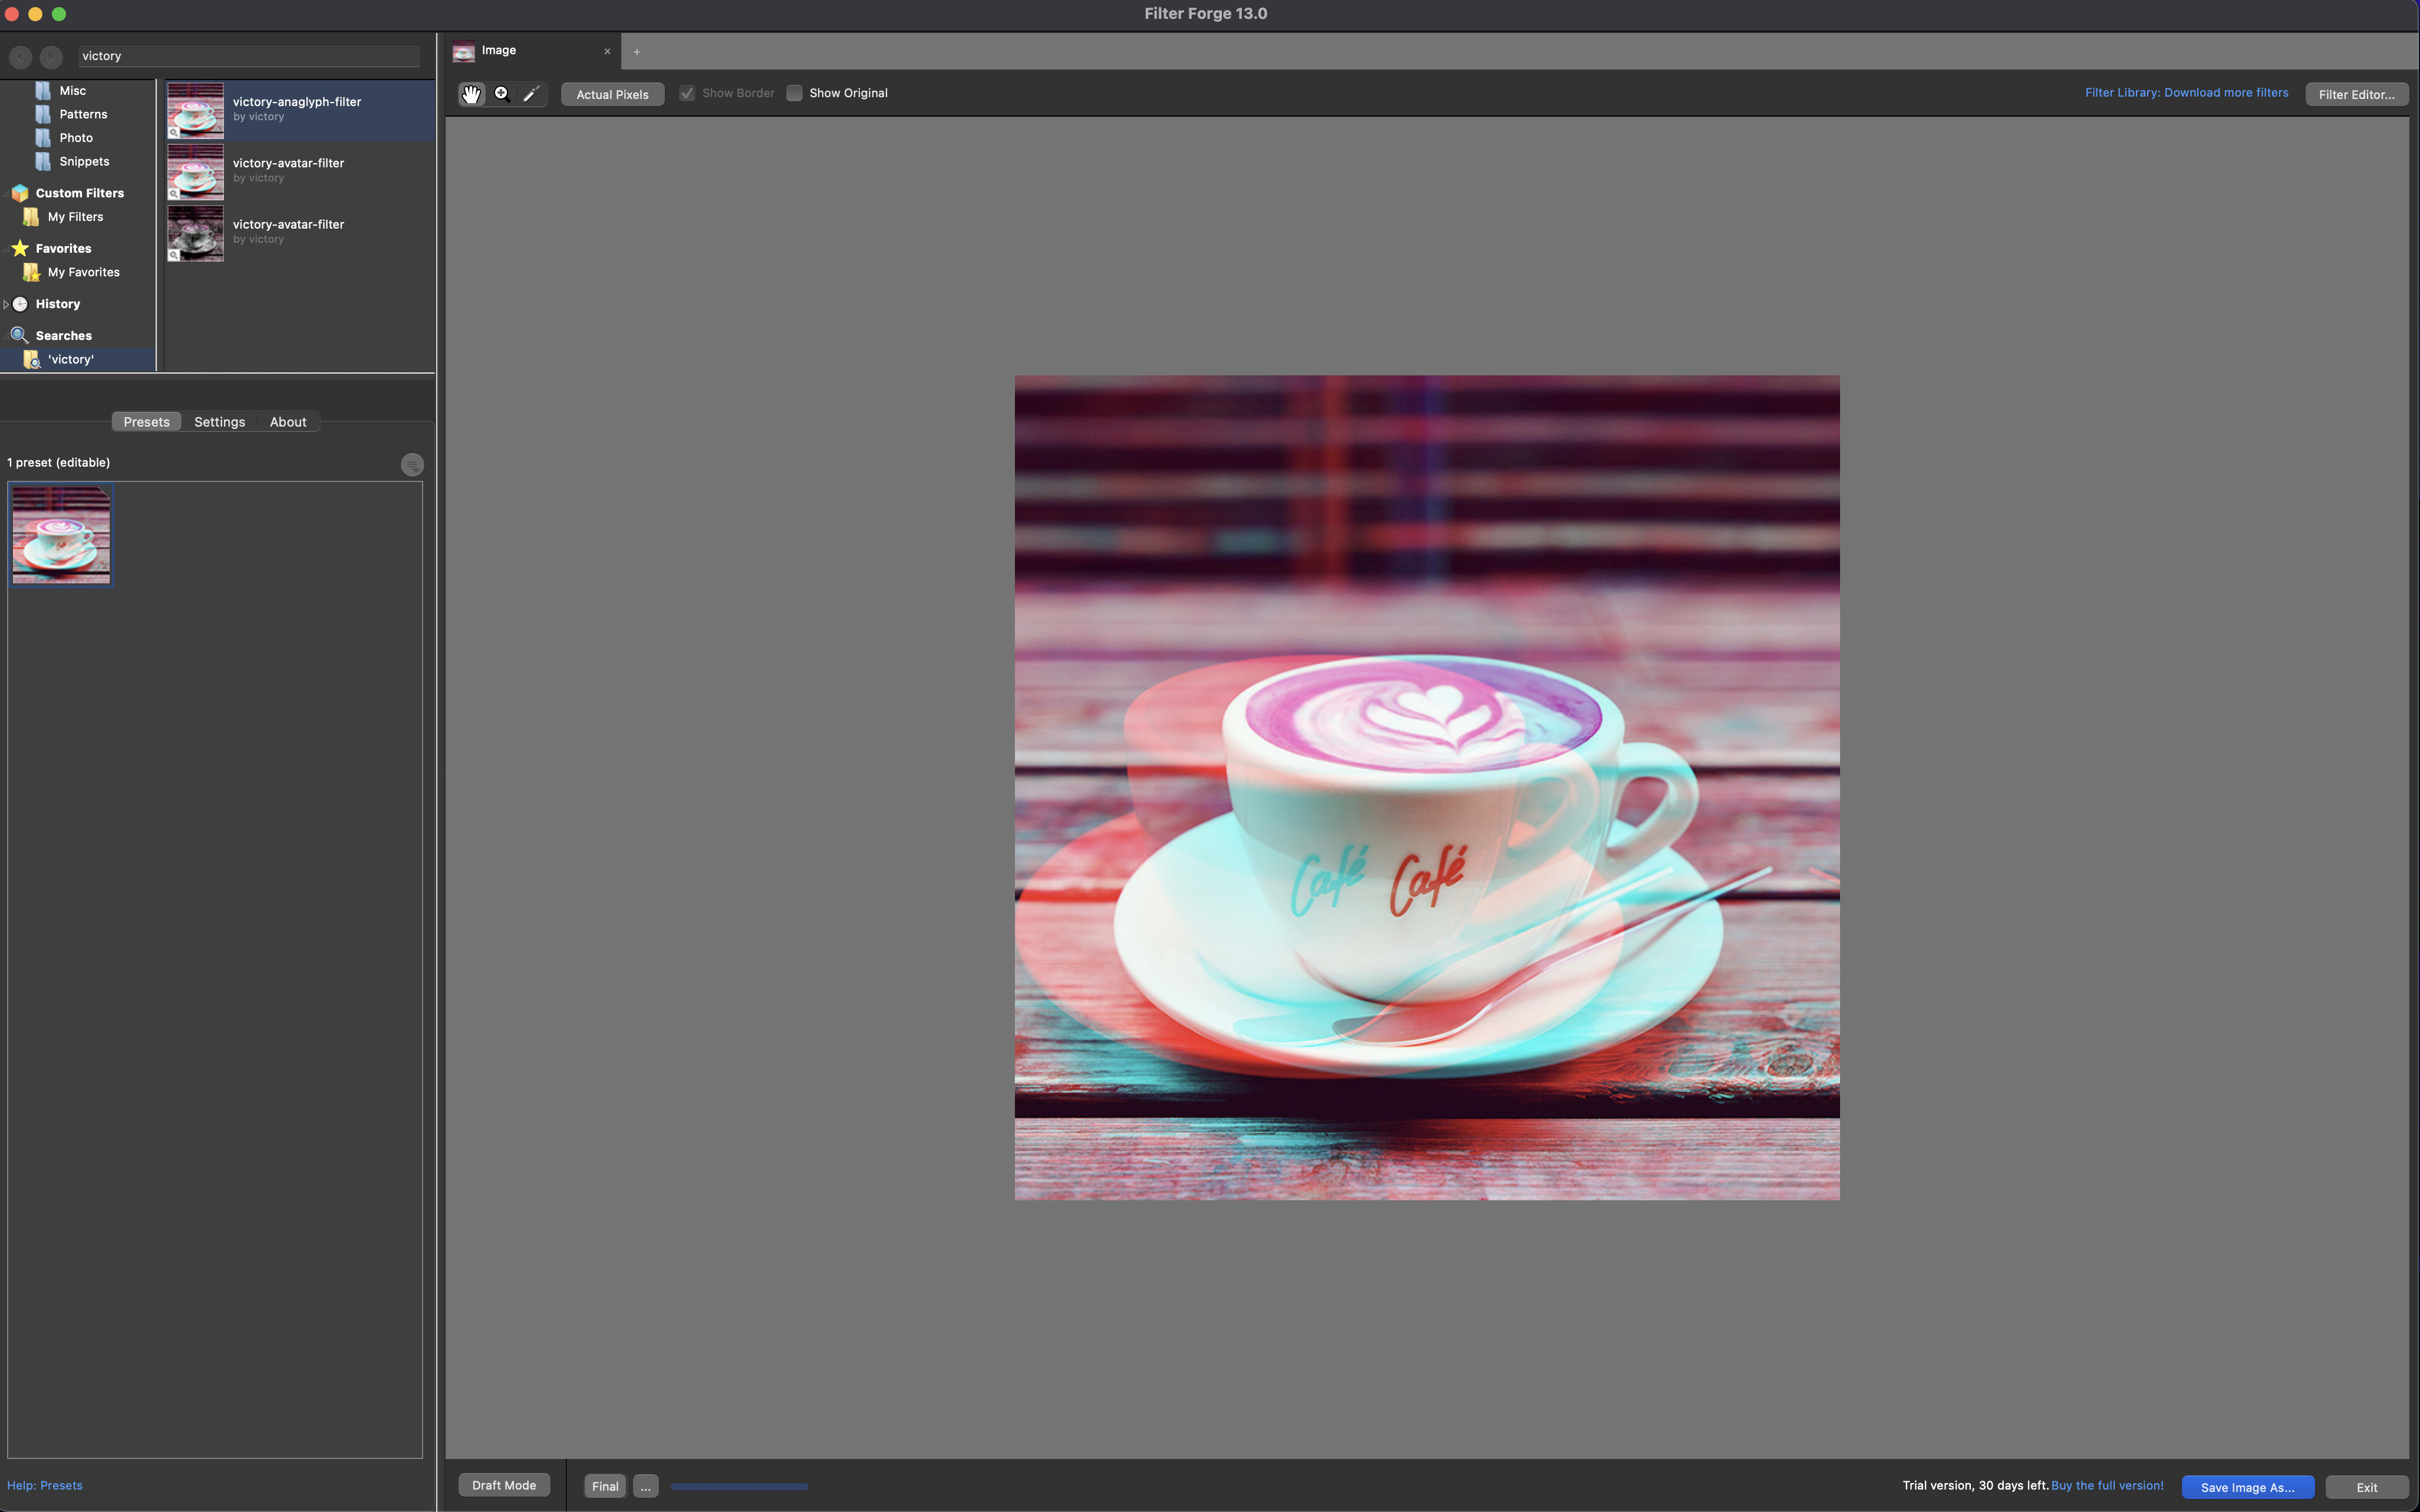
The following image shows the final result of a filter created using FilterForge being applied to a mug to add an anaglyph layer;
Let's proceed to learn how to design image filters using Photoshop and FilterForge!
Designing Image Filters With Photoshop
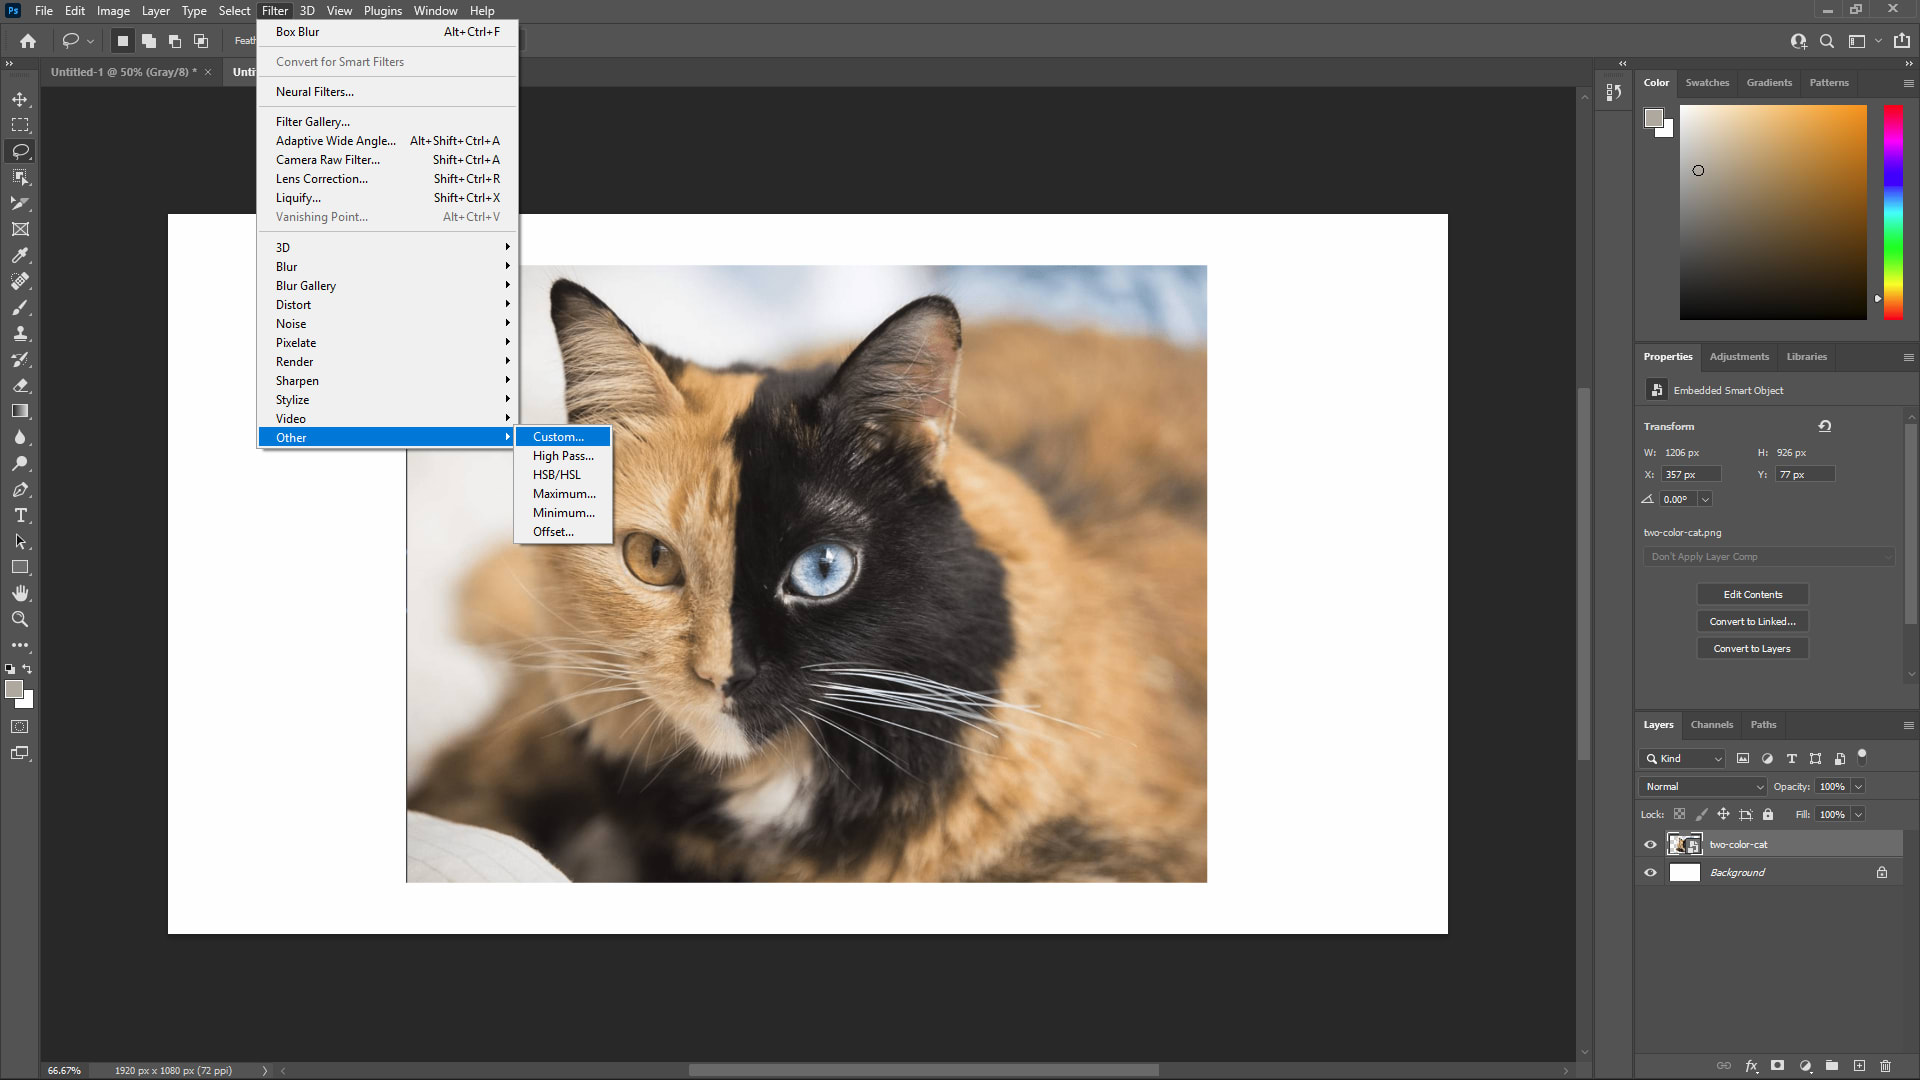
For the Photoshop filter design demonstration, I will be working with the following cat image which has two distinct fur colors;

Click the Filter > Other > Custom option of Photoshop to launch
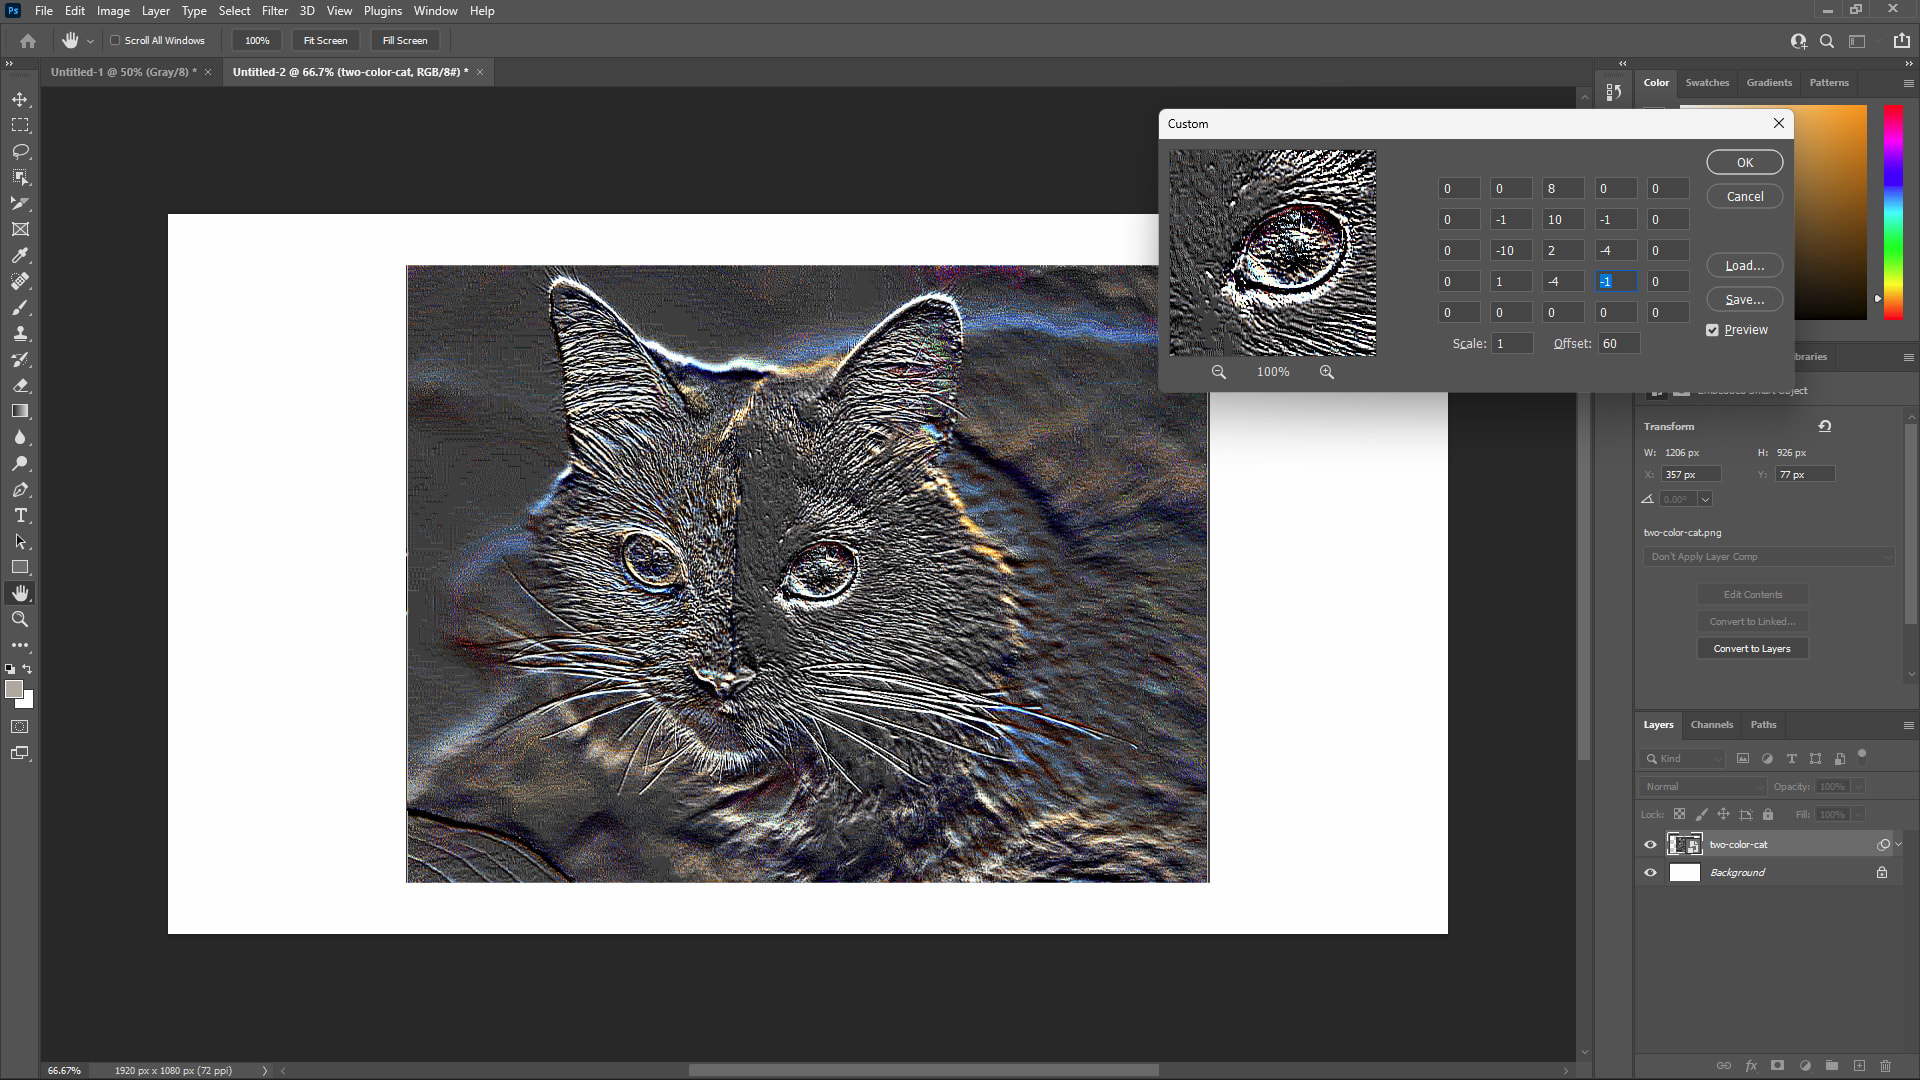
As I modify each color value in the custom window, I can observe that the appearance of the cat also changes drastically as the image colors are altered by the filter as shown in the example below;
Designing Image Filters With FilterForge
FilterForge is an amazing and feature-rich software designed for creating visual effects on images. FilterForge offers a dedicated Filter workspace window with a drag-and-drop workspace having various filters as components that you can drag and apply to your target image.
The following demonstration with FilterForge will prove how much easier it is to create your image filters. You will import the following cartoon image of the avatar bending the four elements to FilterForge and add various filters to customize the avatar image;
Step 1 — Launch The Filter Workspace Of FilterForge
Although FilterForge may be a difficult-to-navigate software for beginners, opening the Filter Workspace is the first step when designing your filter.
Click the Filter > New Filter options to launch the Filter workspace.
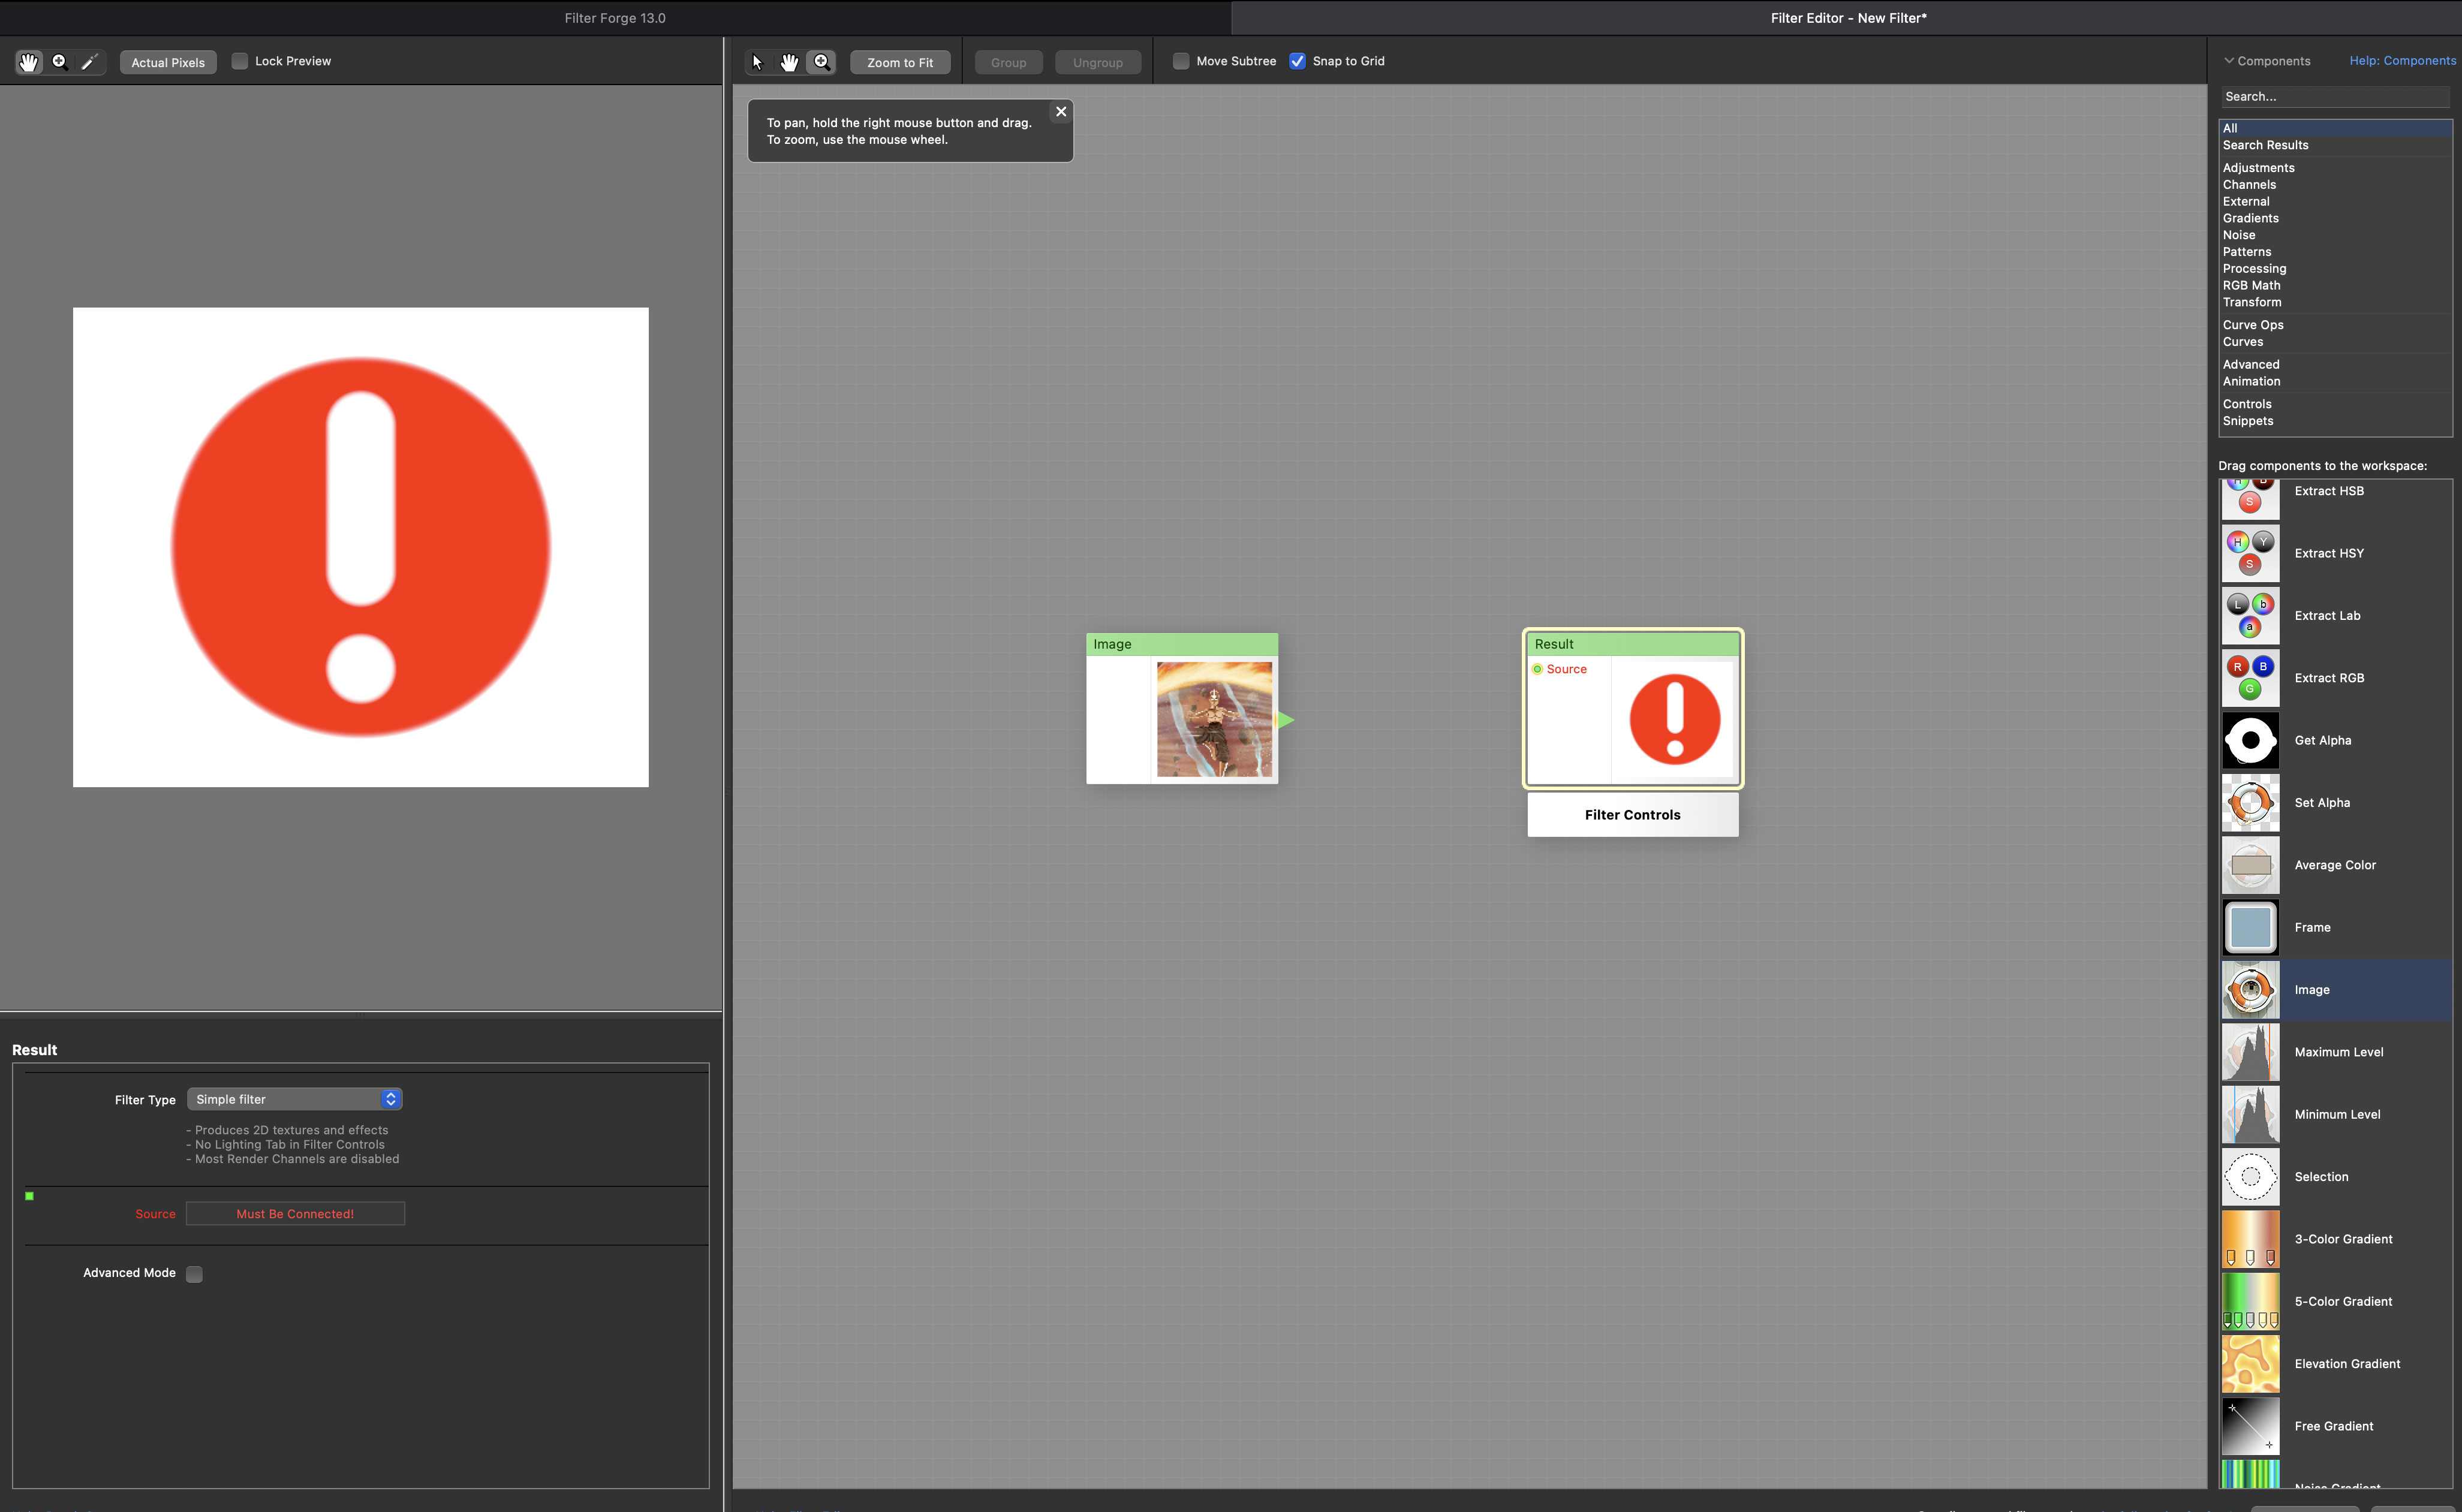
As shown in the following image, the filter workspace will be launched with an empty filter showing the result block in the workspace and preview.
In the next step, you will learn how to add your image to the Filter Workspace window.
Step 2 — Adding Your Filter Image
The Image component of FilterForge enables you to add your target image to the Filter workspace.
Click the Image component and drag it into your workspace. For this demo, we will use the avatar image shown earlier in this demonstration.
Next, click the Source > Open Image option in the Filter workspace to select the image you want to create the filters for. ( If you use the Windows installation of FilterForge, the options might be different )

After selecting an image, connect the image component to the Result component. FilterForge will immediately display a preview of your image on the right side as shown in the following image;
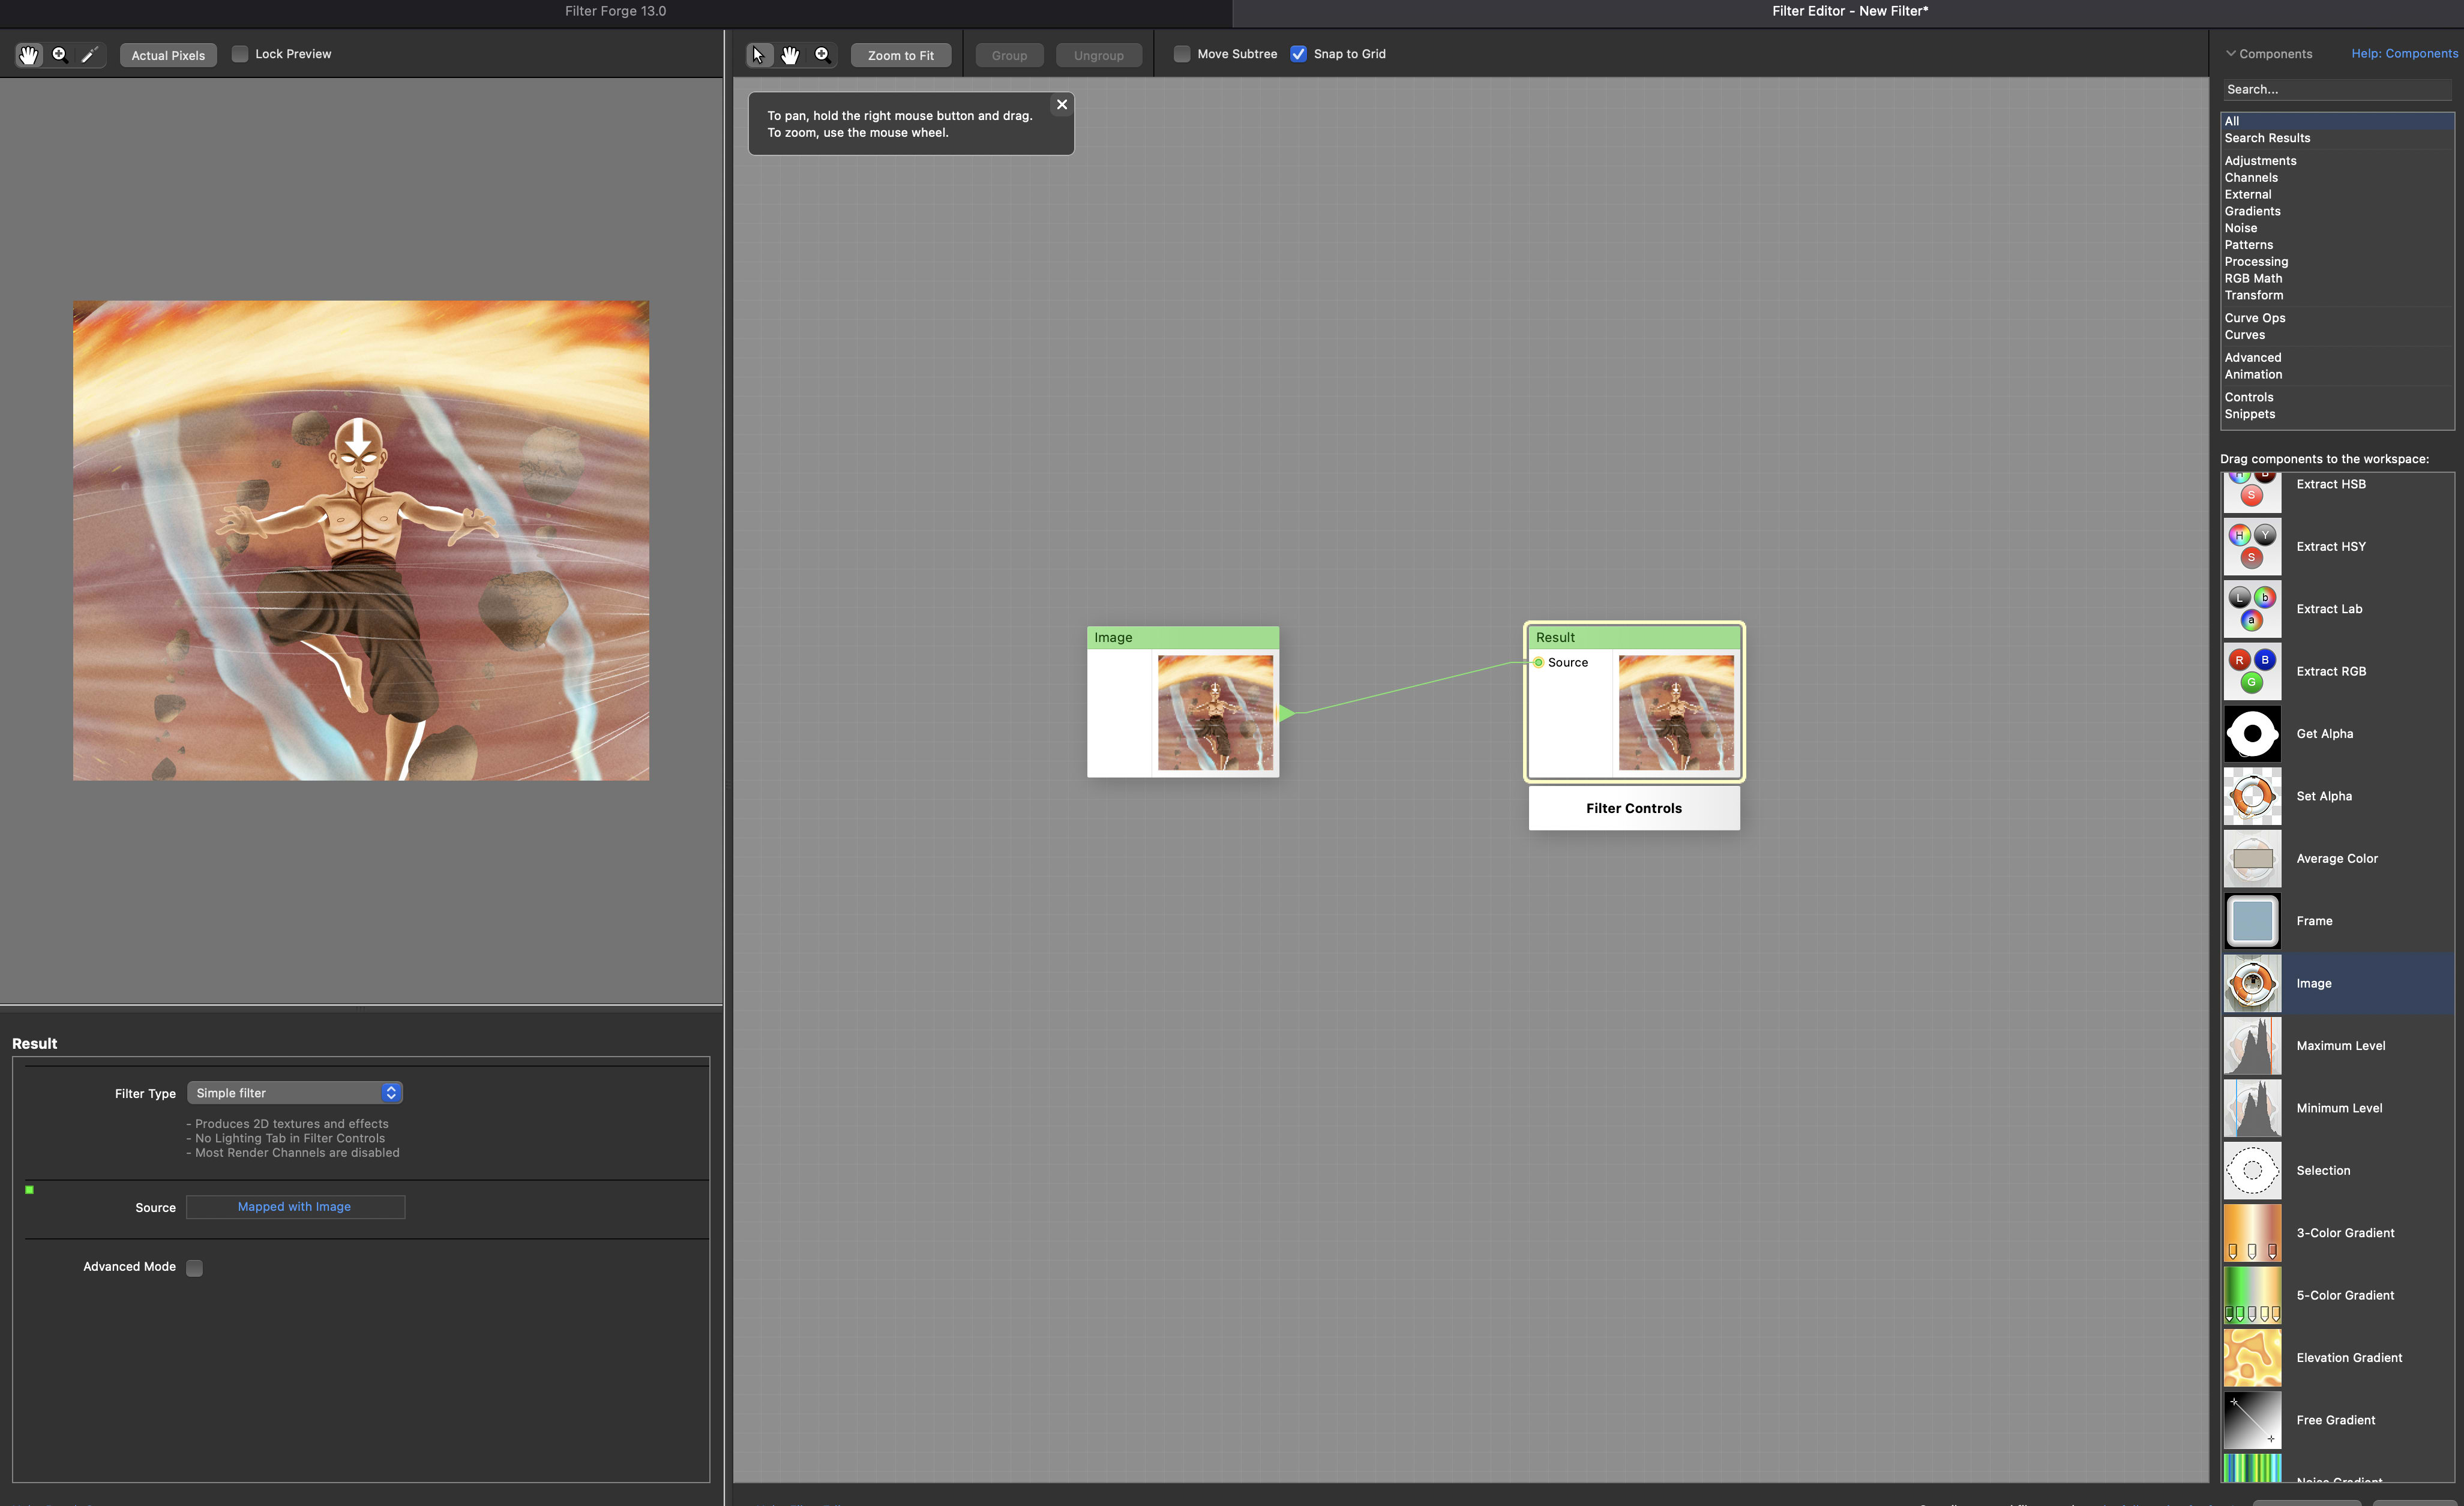
Congratulations!
At this point, you have set up a filter at its most basic level. Over the next steps, you will apply multiple components to customize and tinker with this filter.
Step 3 — Adding Filter Components To The Image
One of the interesting and powerful filters from FilterForge is the Extract RGB component. It allows you to extract specific Red, Green, and Blue color channels from your image and redirect them to change how the image appears.
Tweaking The RGB Properties
Click the Extract RGB component and drag it into the filter workspace to tweak the image. Link your image Extract RGB component source as shown in the following image;
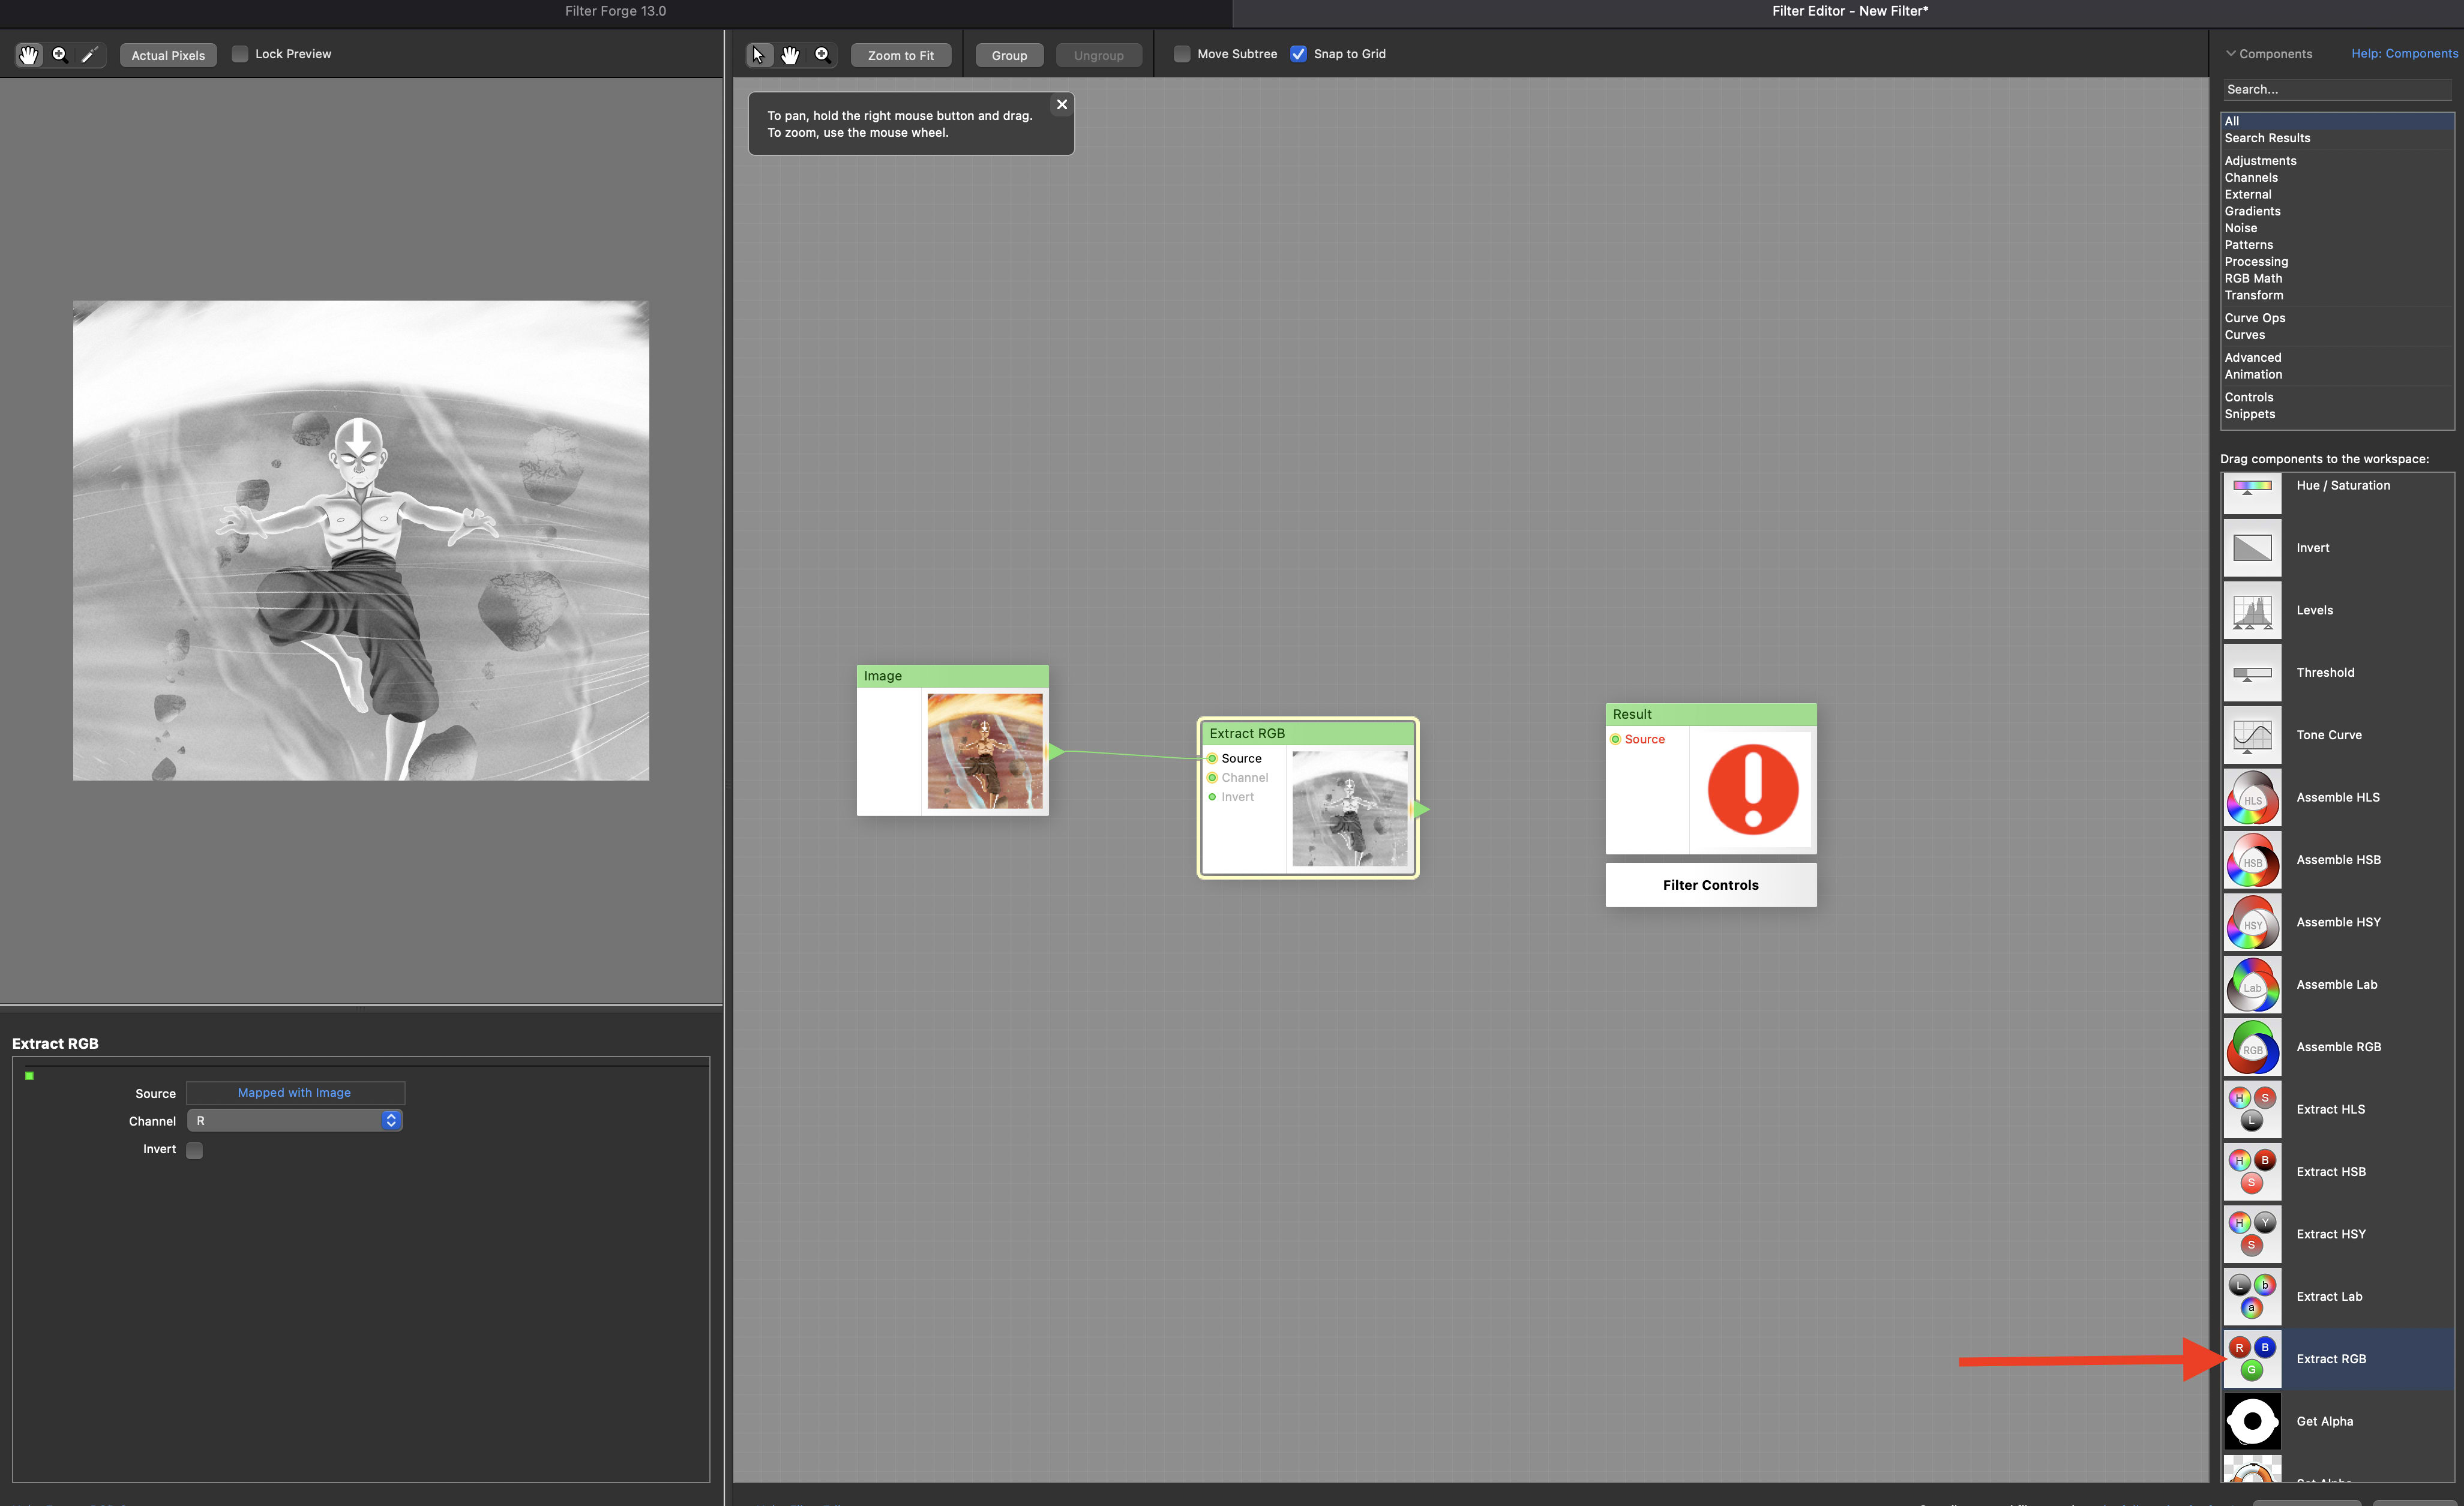
The image above shows the Extract RGB component being used to extract only the Red channel of the filter image. You need two more Extract RGB components to extract the two other Green and Blue channels.
Add two more Extract RGB components and change their channels from "R" to "G" and "B" respectively as shown in the following image.
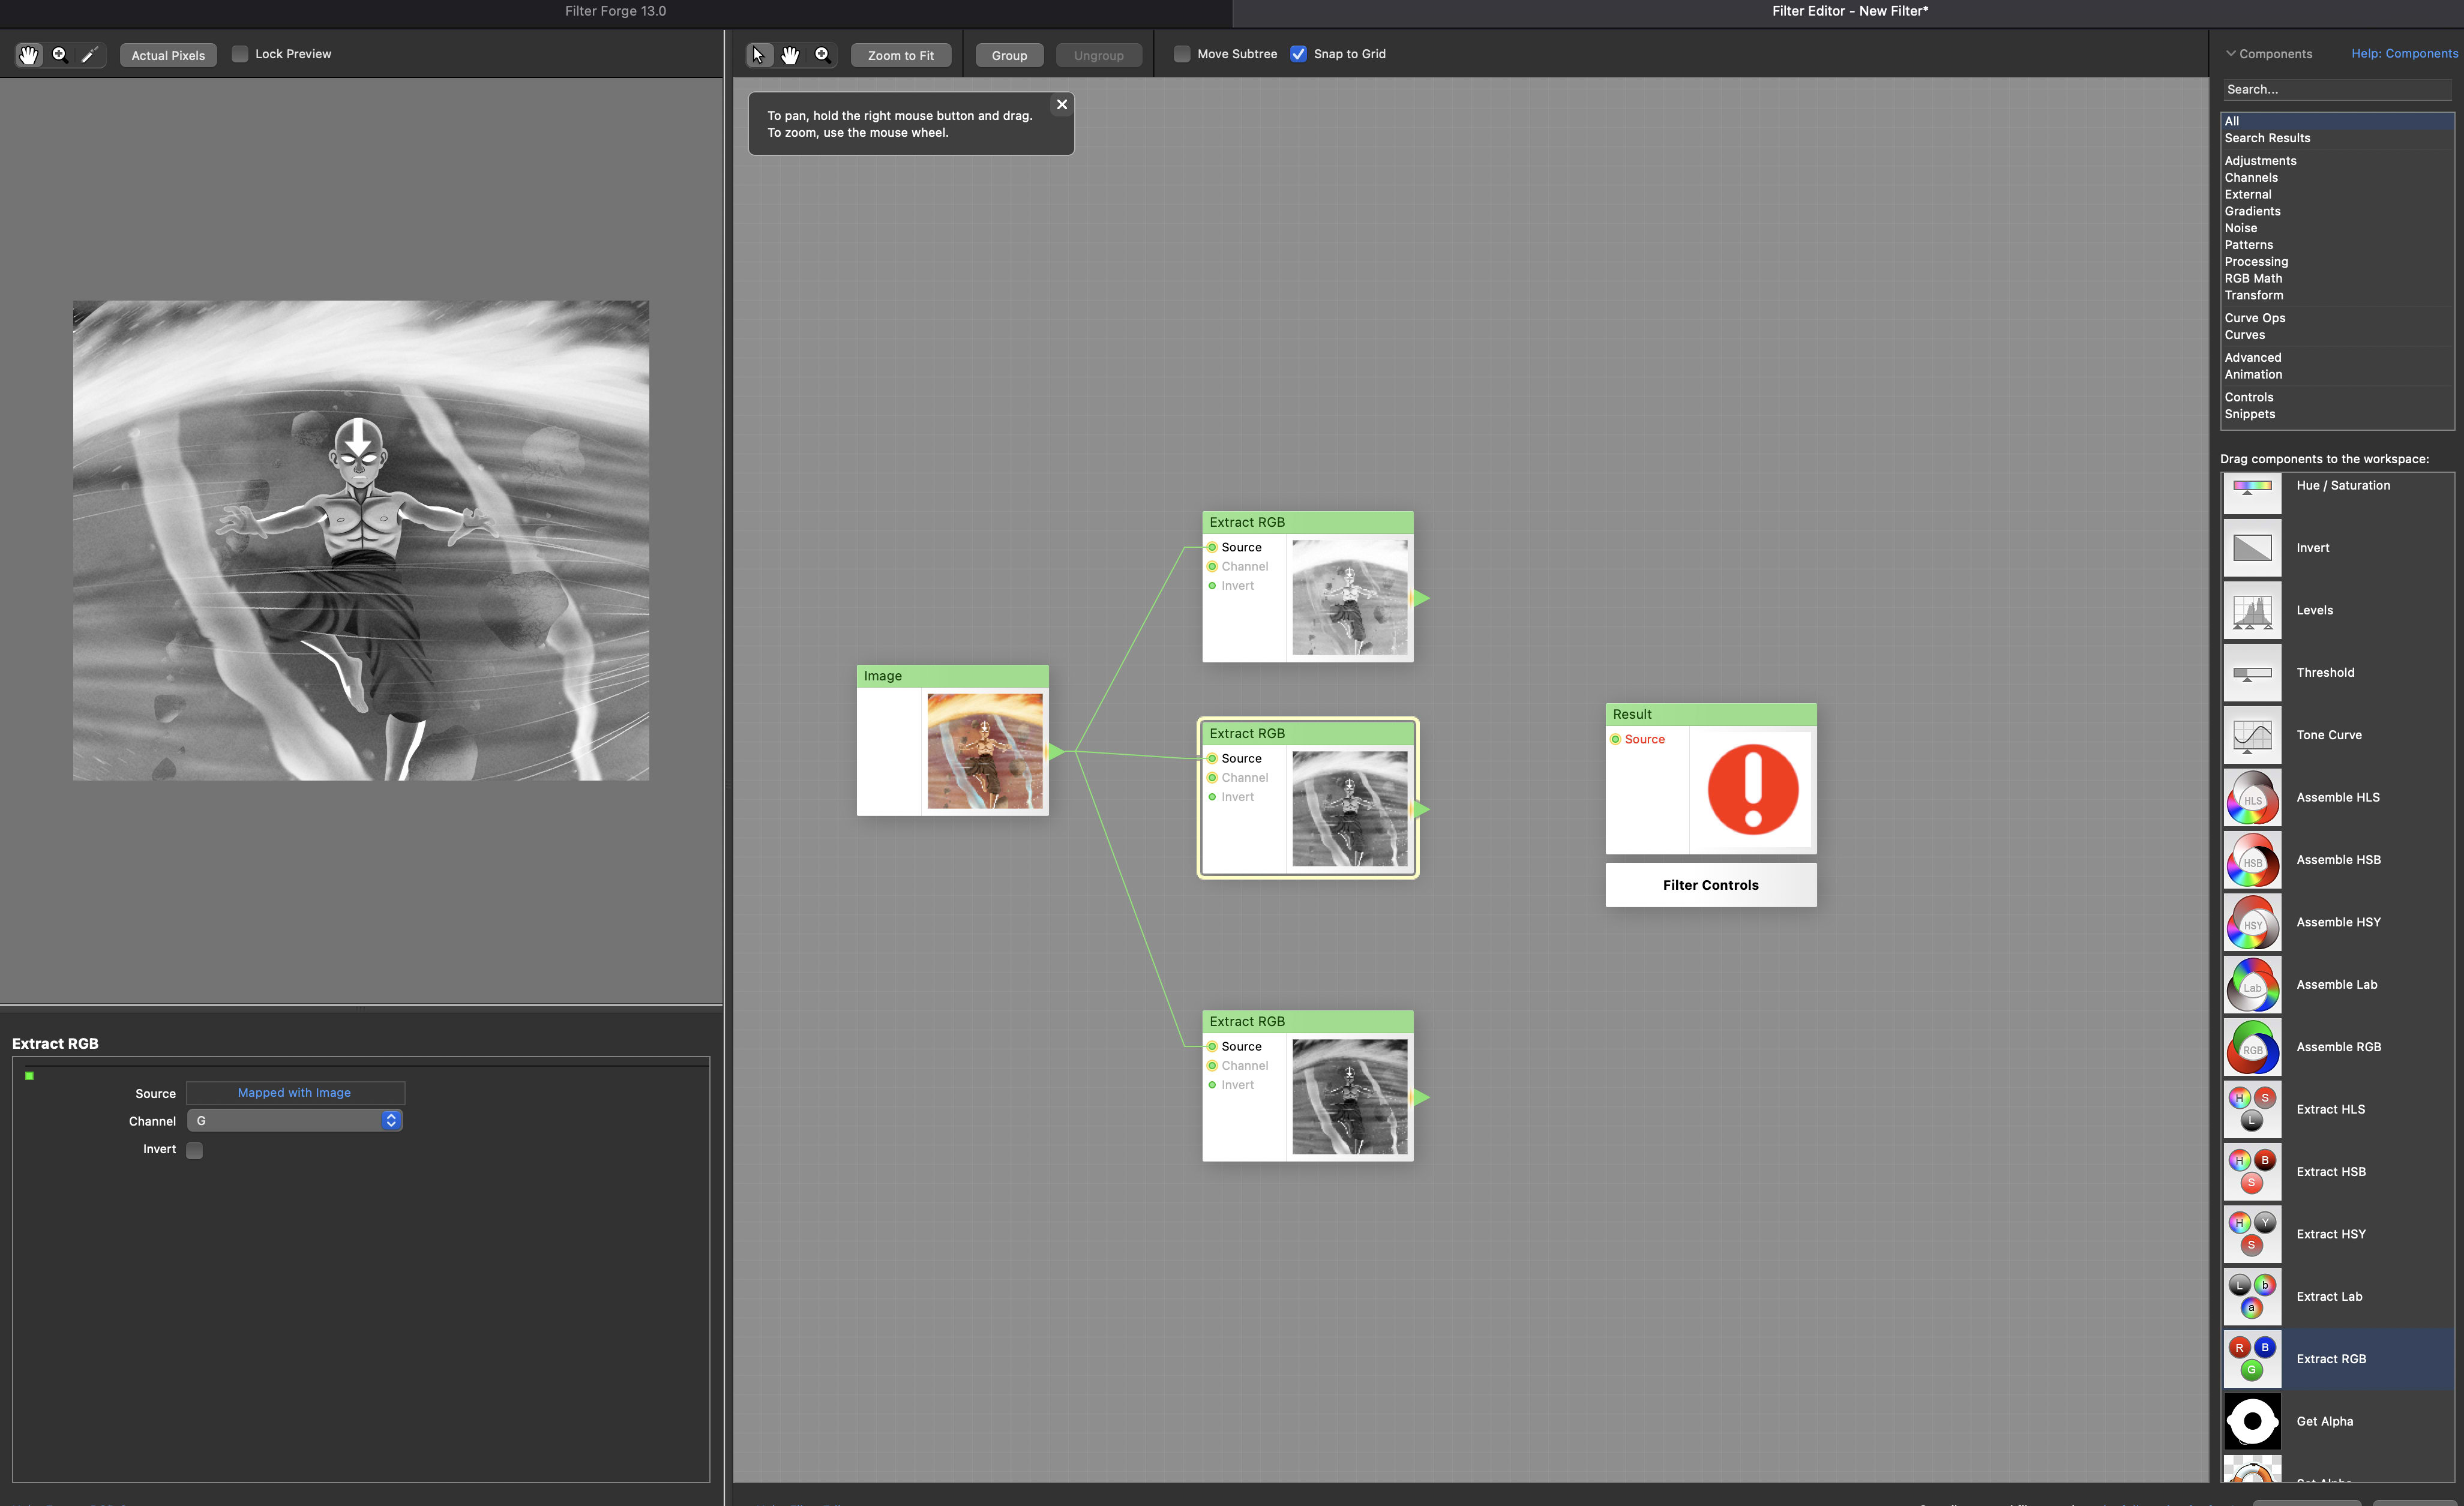
The image above now shows three Extract RGB components being used to extract the Red, Green, and Blue properties from the target image. If you zoom into the extract components, you will observe that they have different preview shades showing their different channels.
The next step is to assemble the RGB extracts and exchange them to create a different image as a filter. This is the job of the Assemble RGB component.
Click the Assemble RGB component from the sidebar and drag it into the Filter workspace. The Assemble RGB component has three RGB points for mapping the RGB extracts from an image into their correct positions.
To spice things up, map the B extract to the G point, the B extract to the G point, and the R extract to the B point. By swapping these values, we are increasing or decreasing the emission intensity of the RGB lights in the image.
Map the output of the Assemble RGB component to the Result component to output the tweaked image as shown in the following image;
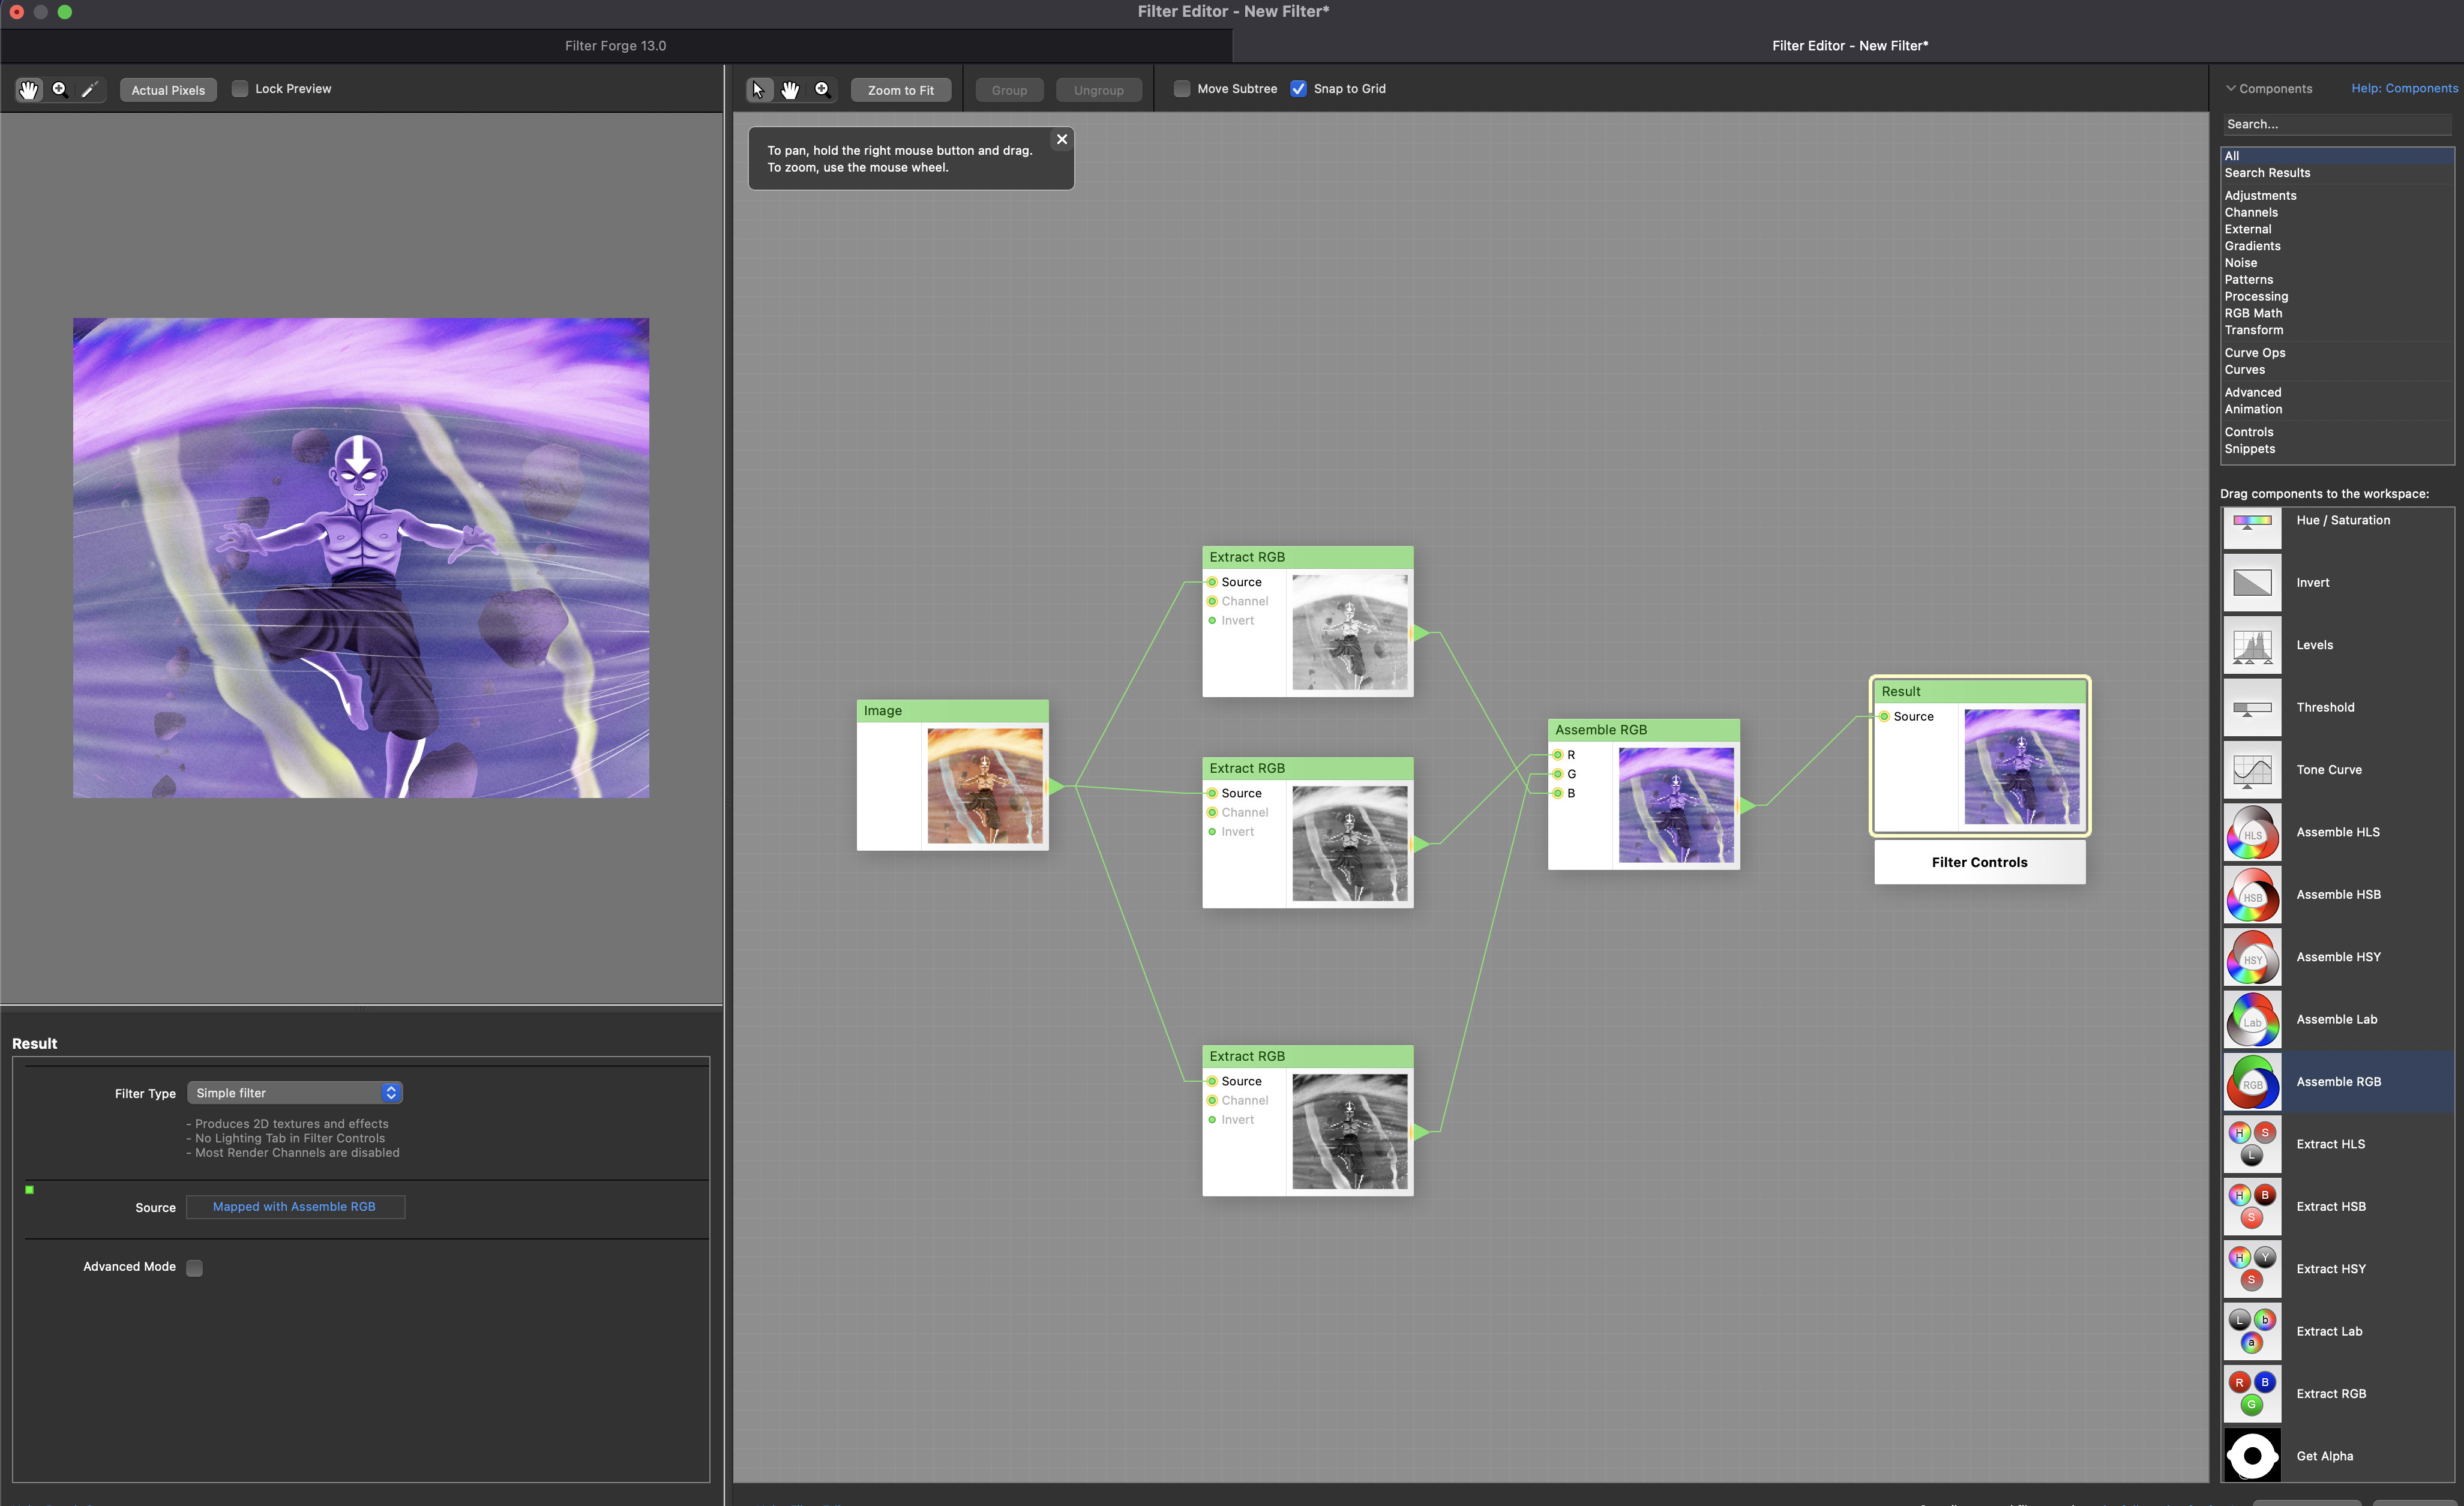
At this point, you have created your first filter with the avatar image by tweaking the RGB lights of the image with the Extract and Assemble components. Let's do something more fun!
Using The Offset Filter To Create An Anaglyph
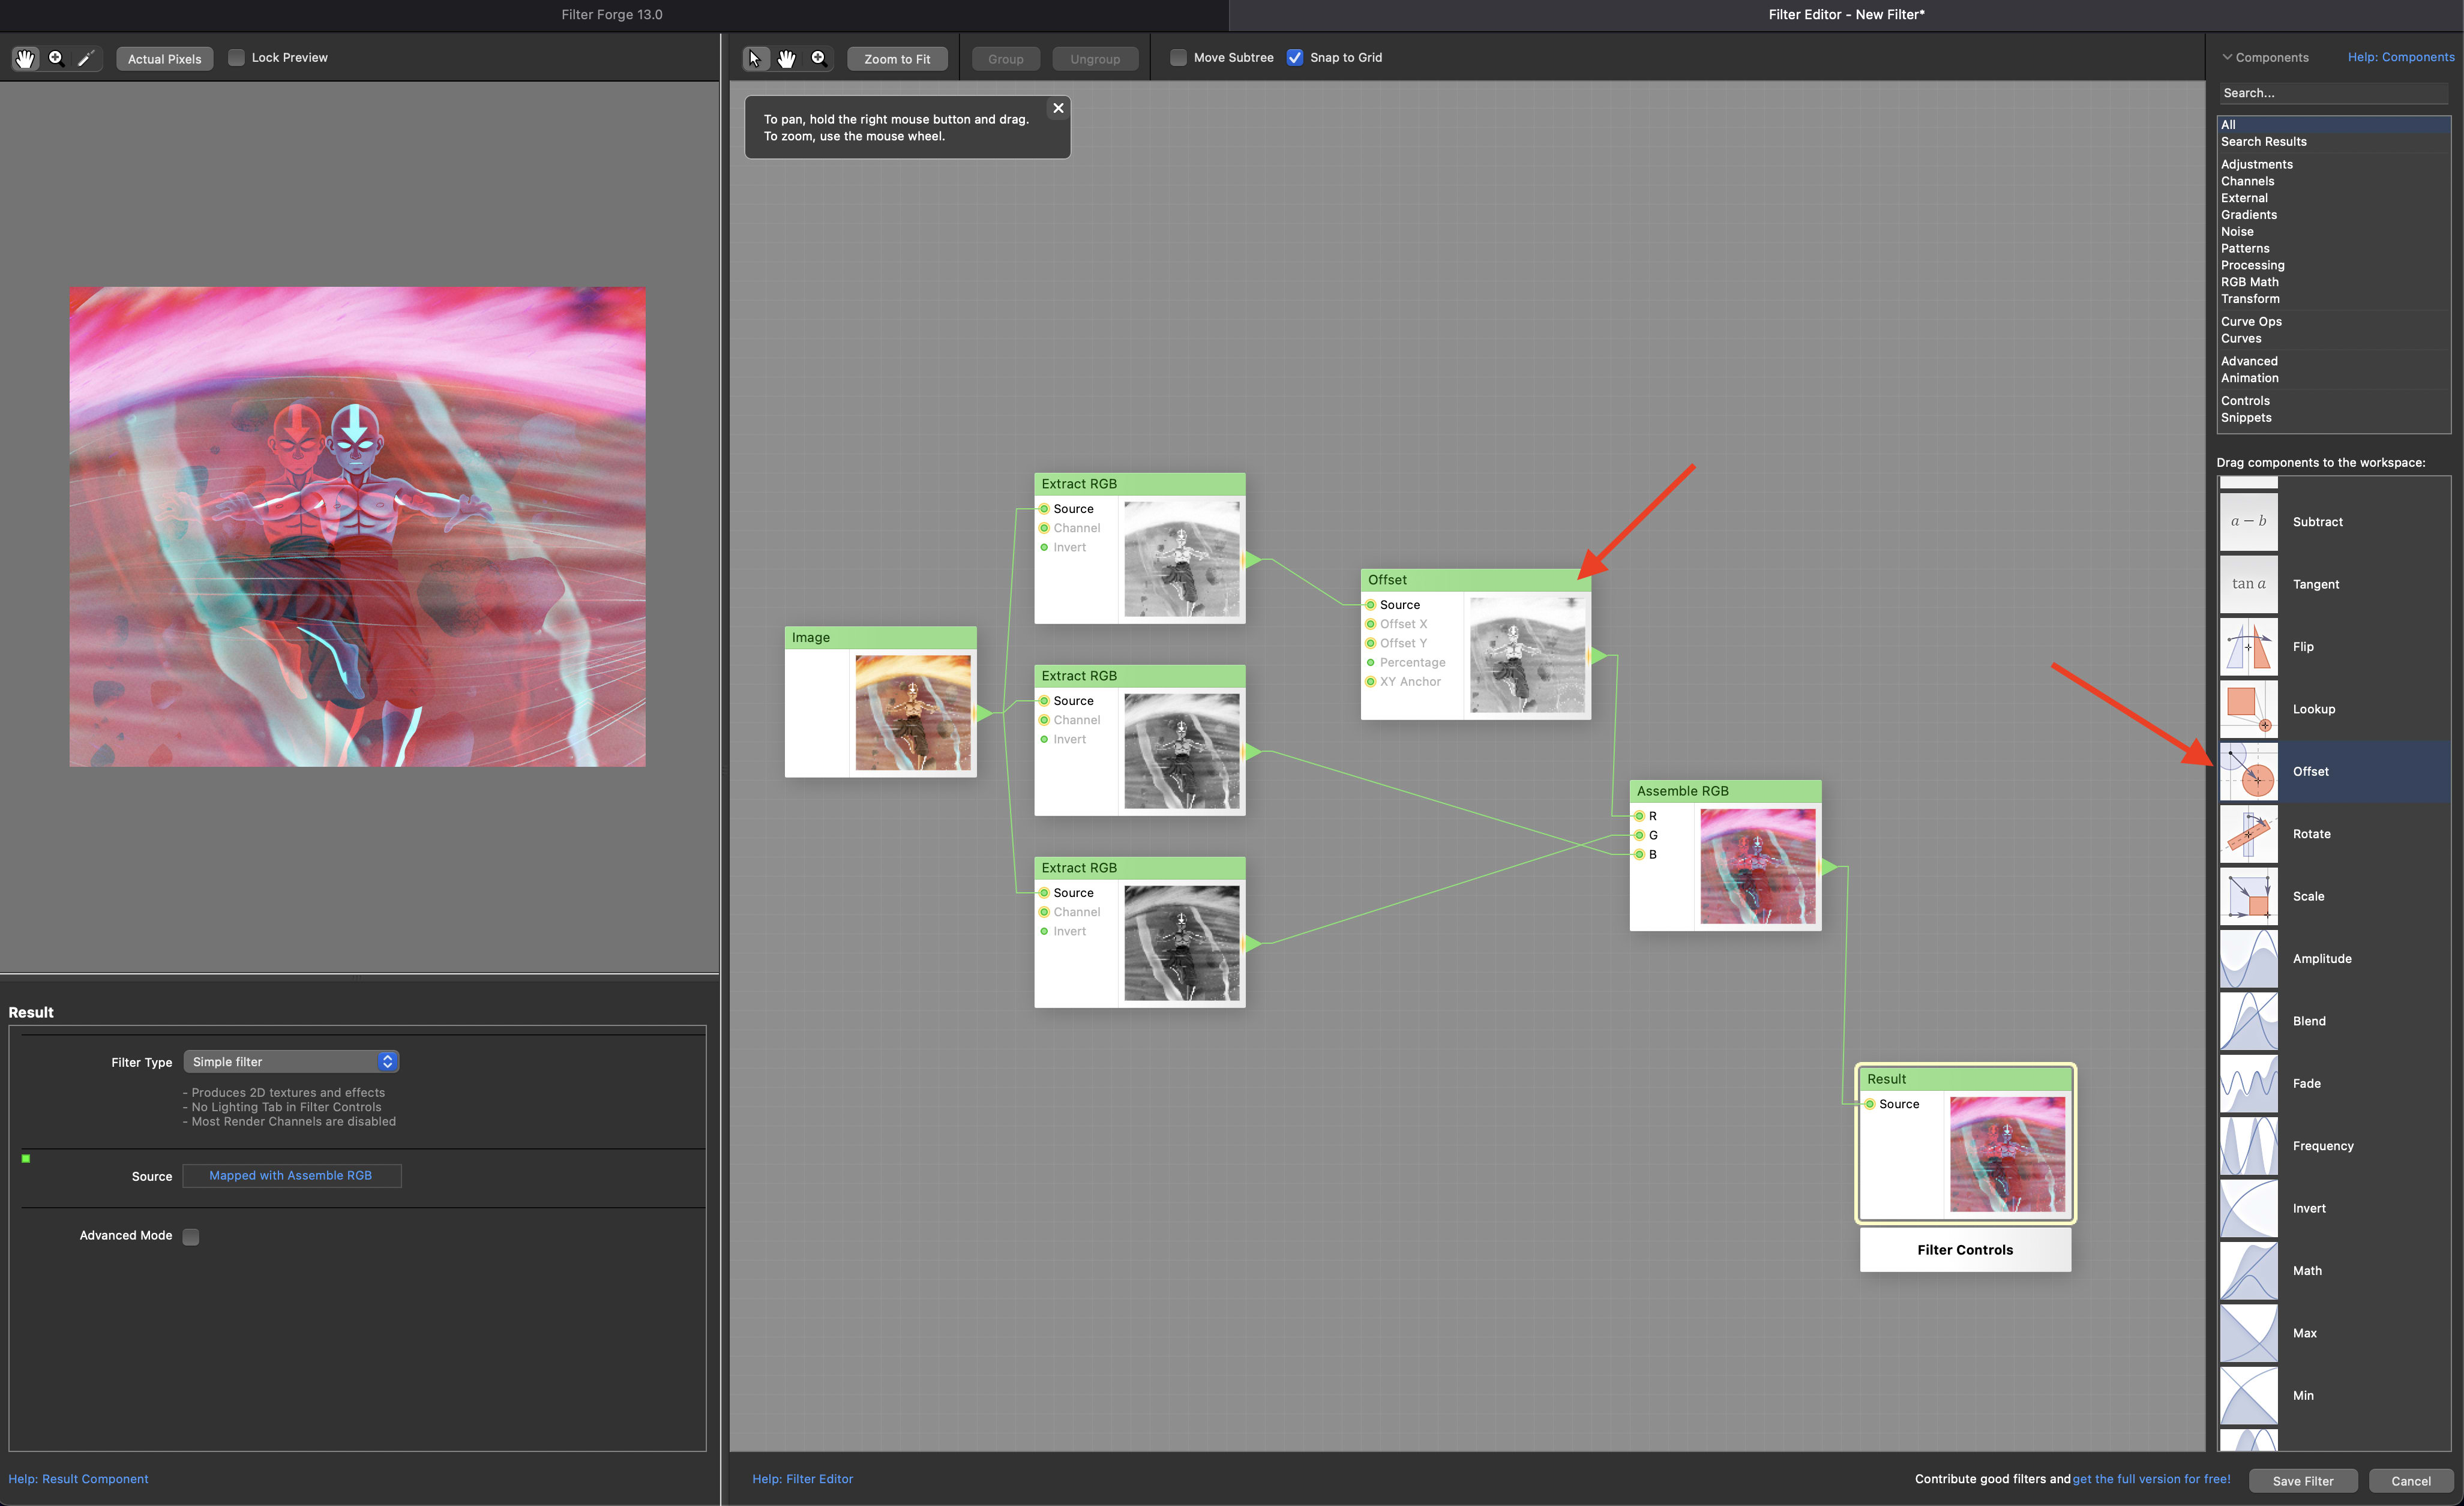
One way to create an anaglyph through FilterForge is to offset one of the RGB lights of the filter image. Aside from creating Anaglyphs, the offset component is also useful for shifting the position of elements over their X or Y axis.
Click and drag the Offset component from the right menu into the Filter Workspace.
Link the R Extract RGB component to the Offset component Source and link the Offset output to the R point of the Assemble RGB component source.
The following image shows the RED light of the avatar filter being offset sideways to create an anaglyph.
With the created filter, you can save and exit the Filter Editor. After saving, you can now apply the filter to other sample images in the FilterForge as shown in the tea cup example below;
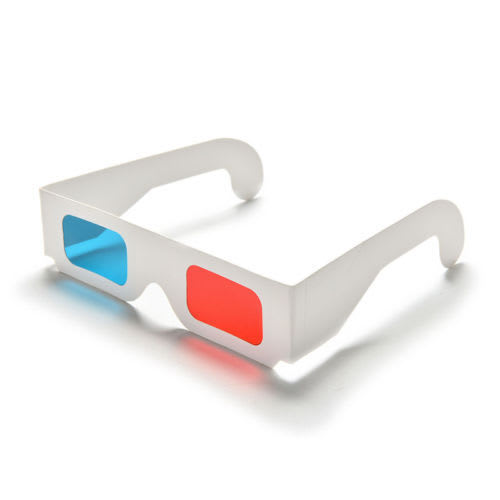
NOTE: You can see the full anaglyph effect of filter if you look at it through a 3D glass like the ones below;
Tutorial On Image Filter Design
An amazing tutorial on image filter design using Photoshop is the one below from Texturelabs which shows how to create an engraving effect on images;
Conclusion
Within this lab, I learned in-depth from Carl about image filters and their real-world uses in the digital industry. Using the class lab section, I gained hands-on experience using the FilterForge software to create my filter using the Extract, Assemble, Offset, and Noise components.