Image synthesis involves the creation of images using computational techniques, ranging from traditional computer graphics methods to advanced deep learning models like Generative Adversarial Networks (GANs) and Variational Autoencoders (VAEs). It encompasses tasks such as generating photorealistic images, style transfer, super-resolution, and image-to-image translation. Image synthesis finds applications in diverse fields including entertainment, design, virtual reality, and medical imaging, driving innovation and advancements in artificial intelligence and computer graphics.
Introduction
Image synthesis involves the creation of digital images using complex computer algorithms. Image synthesis is also known as computer-generated imagery (CGI) and the process involves scene description, modeling, rendering, texturing, and post-processing for output.
Teragen is one of the most advanced software for image synthesis due to its numerous features. The Terragen software utilizes fractals and the Perlin noise for generating terrains. Perlin noise generates a grid of gradient vectors and then interpolates between them to produce smooth, continuous variations.
Uses Of Image Synthesis
Image synthesis is used heavily in various technological industries to generate images. The following list outlines some of these uses;
In sci-fi movies to generate alien landscapes and scenes.
In architecture and urban planning for mapping and generating topographies.
In brand advertisements to generate compelling visual content.
In PC, mobile, and web-based games to generate ultra-realistic scenes rapidly as the game is being played.
In Virtual Reality (VR) and Augmented Reality (AR).
Lab Lecture Practice
Before you proceed to the steps of using Terragen to generate your image scene, here is one preview image from the demonstration having layers of cloud, greenery, lighting and water to depict the observation of an island from the water body;
Step 1: Find A Suitable Viewpoint
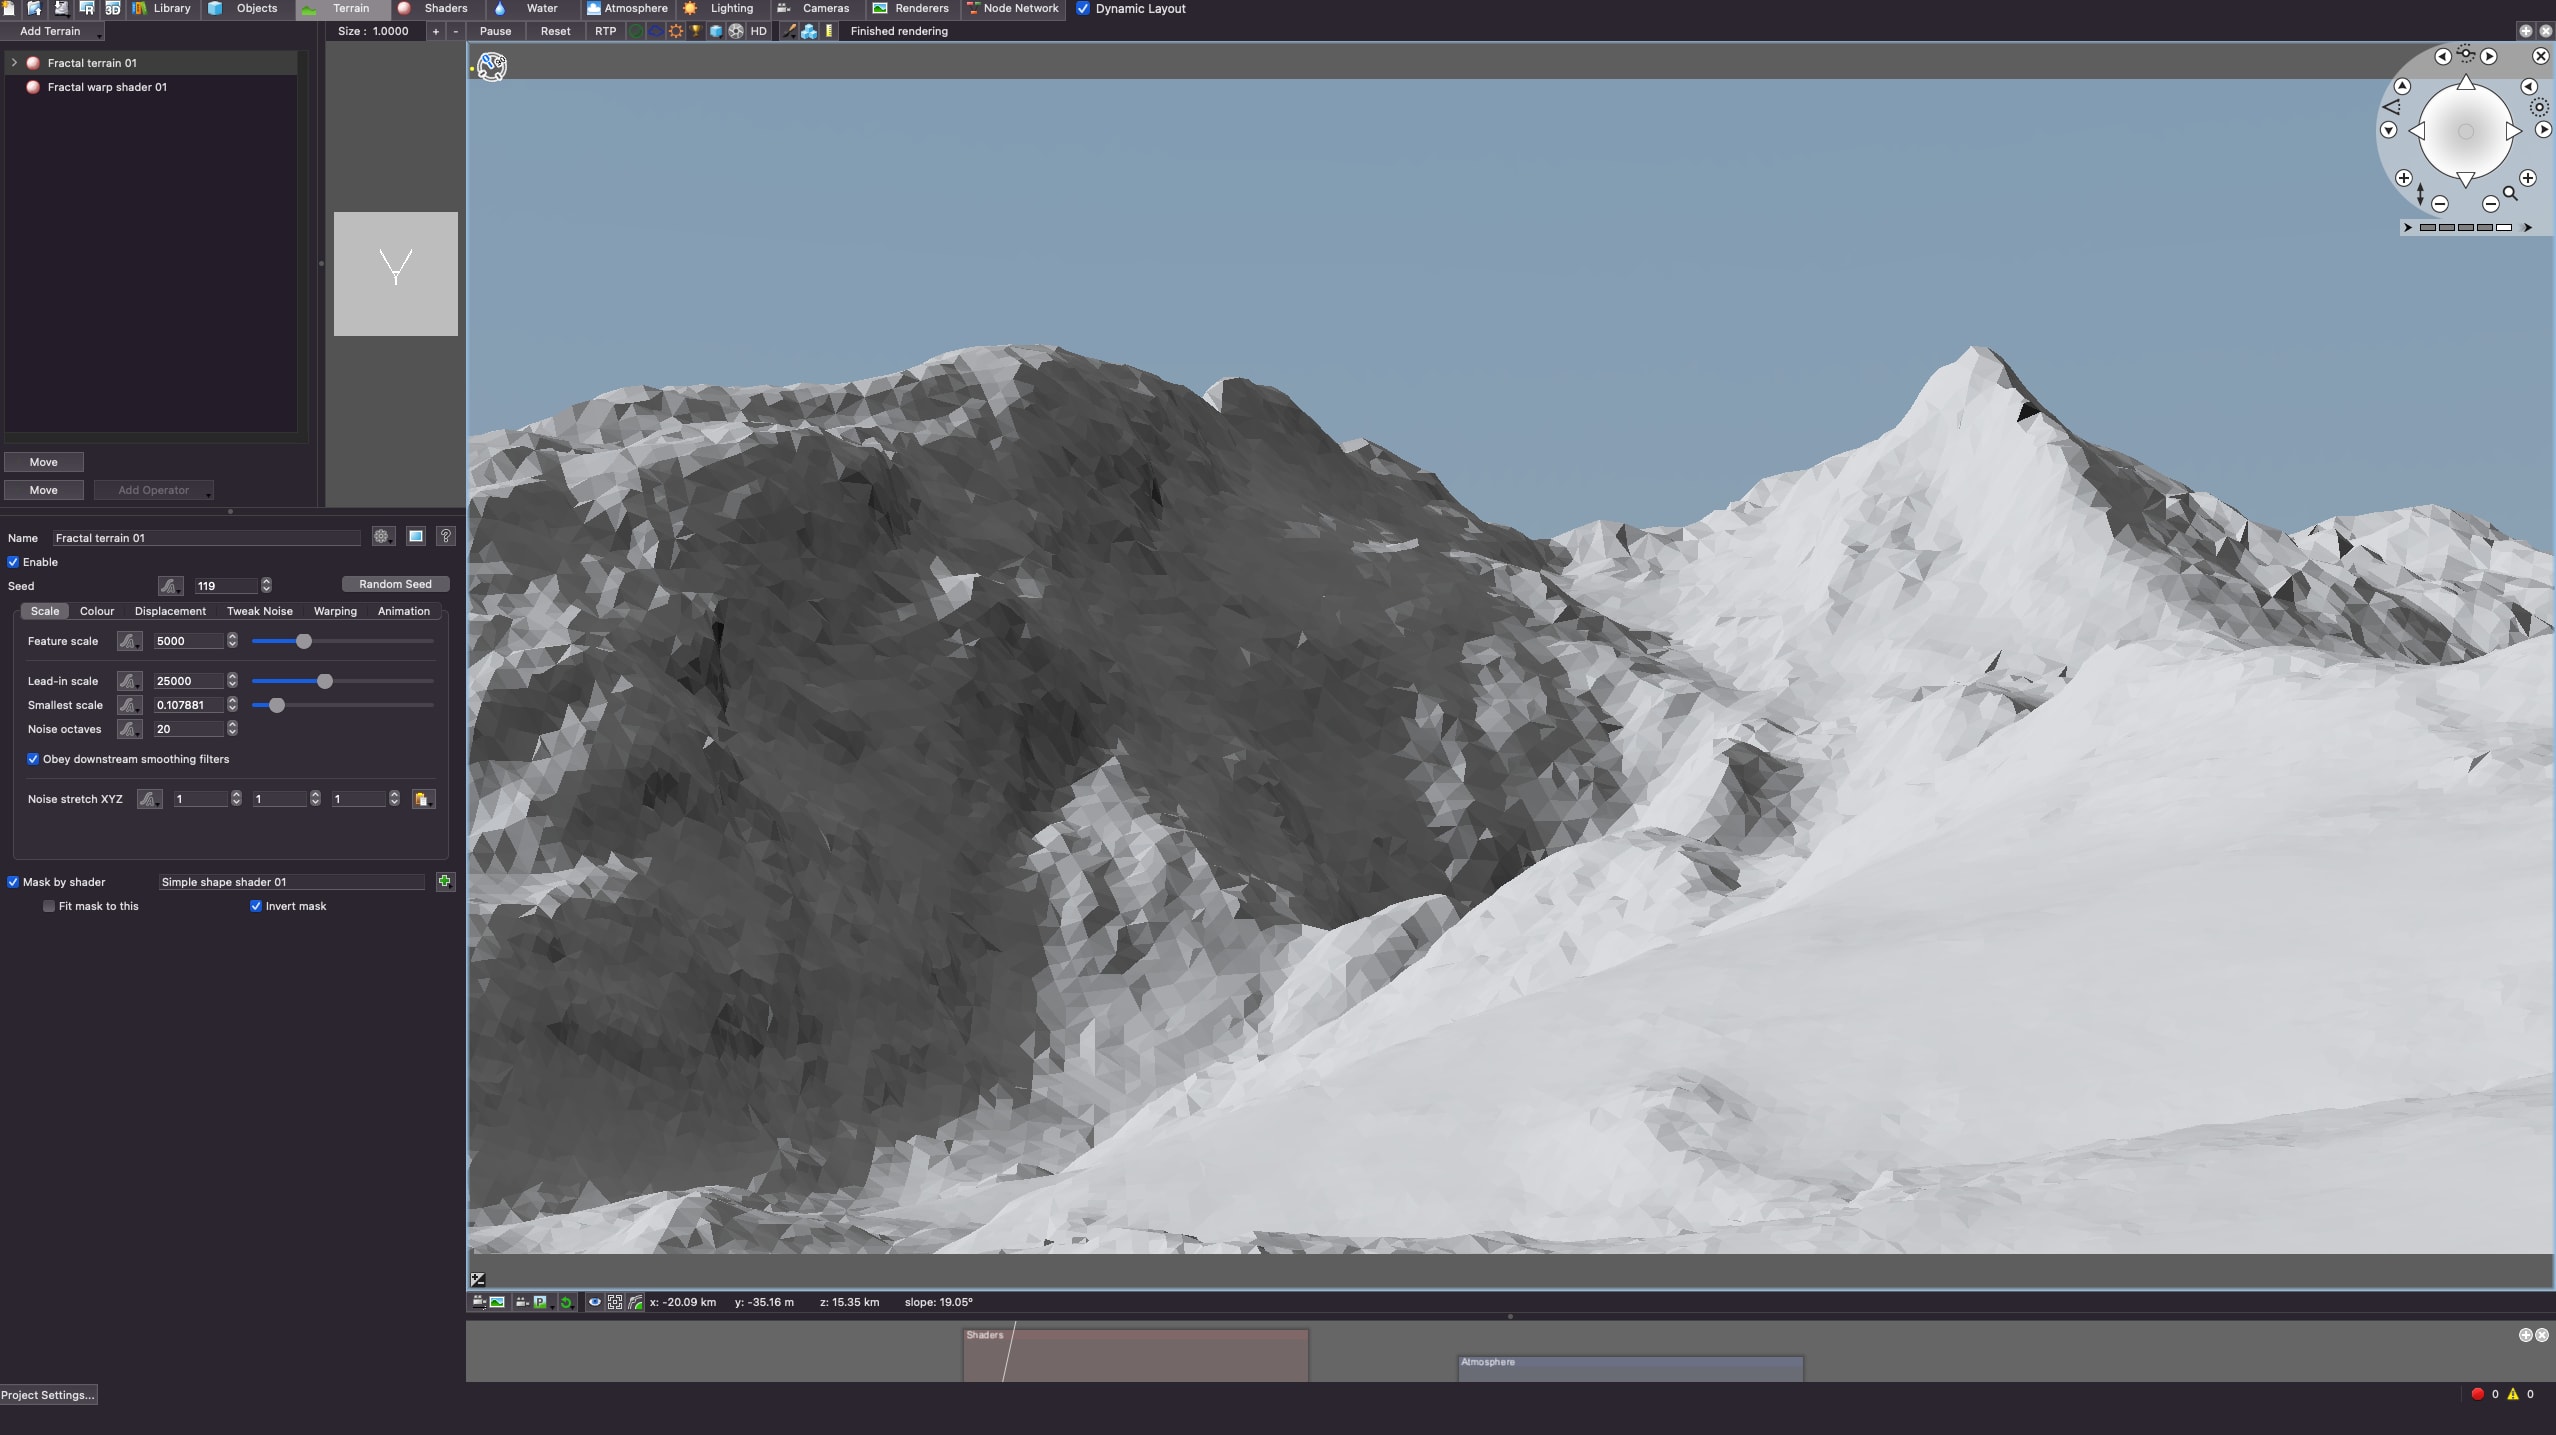
By default, Teragen launches with a bare Terrain facing the mountains. Using your mouse and keyboard, you can pan and tilt the view angles around to find a good viewpoint for your project.

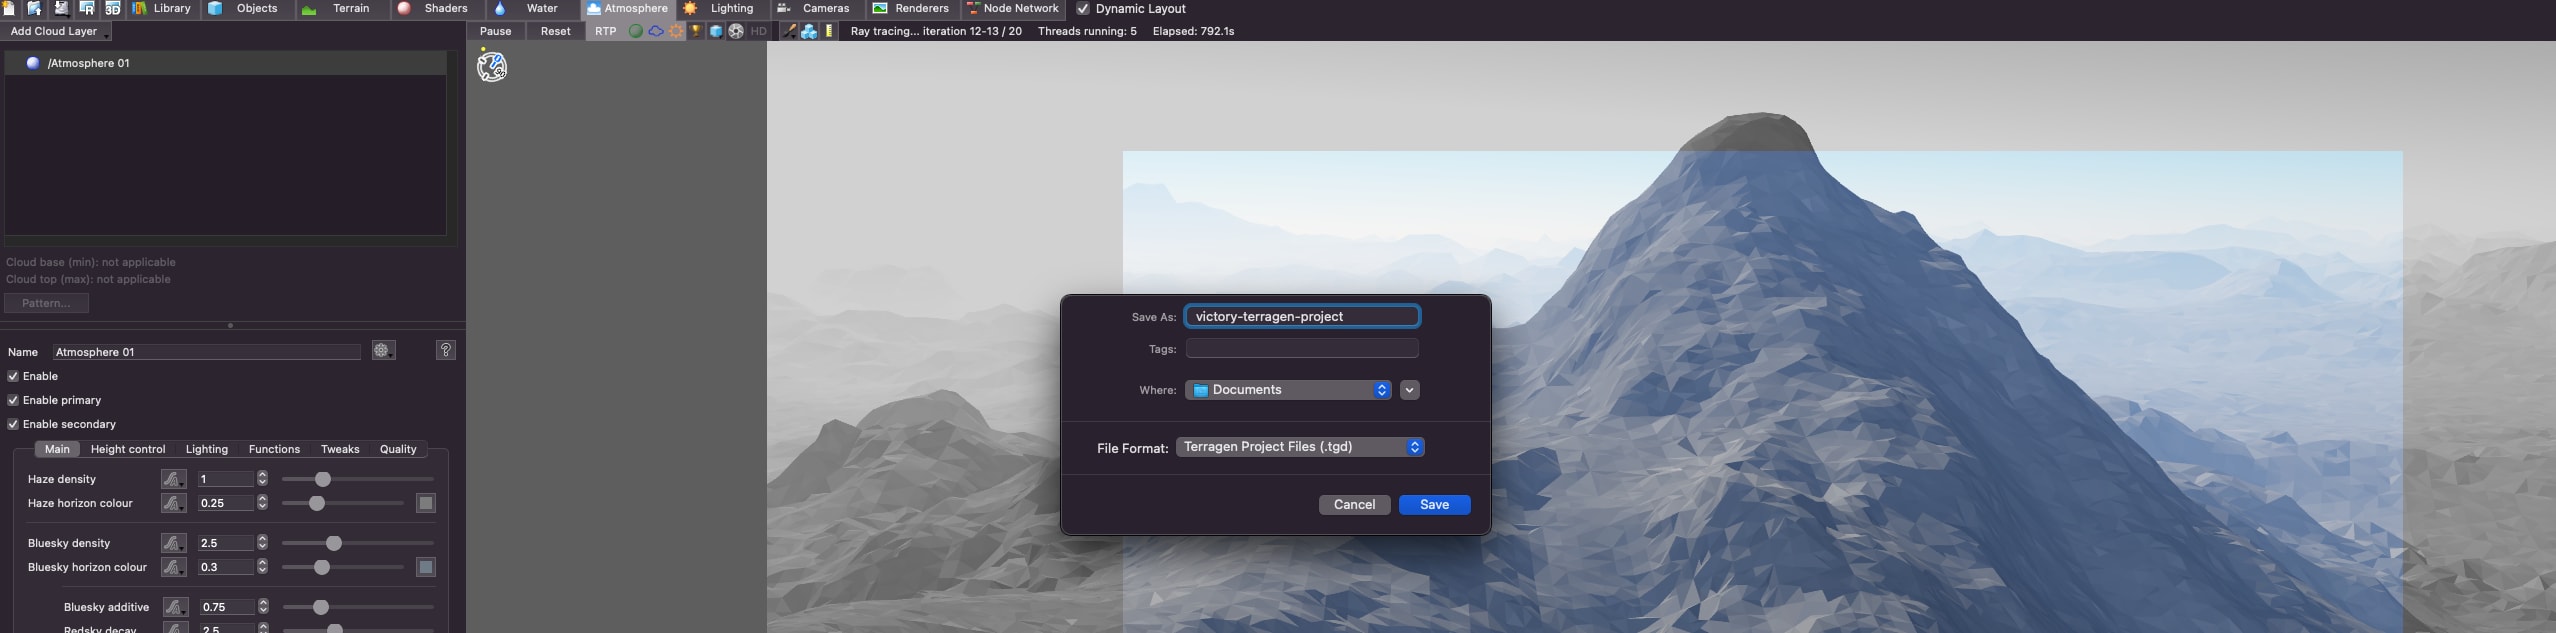
Save your Teragen project to avoid data loss and continue working later. Teragen saves your project using the *.tgd file extension.
After panning and tilting around for a few minutes, I got the following viewpoint of my terrain for this demonstration. The Terrain shows the view from two mountain peaks. It is similar to what you would see while snow-surfing down an elevation.
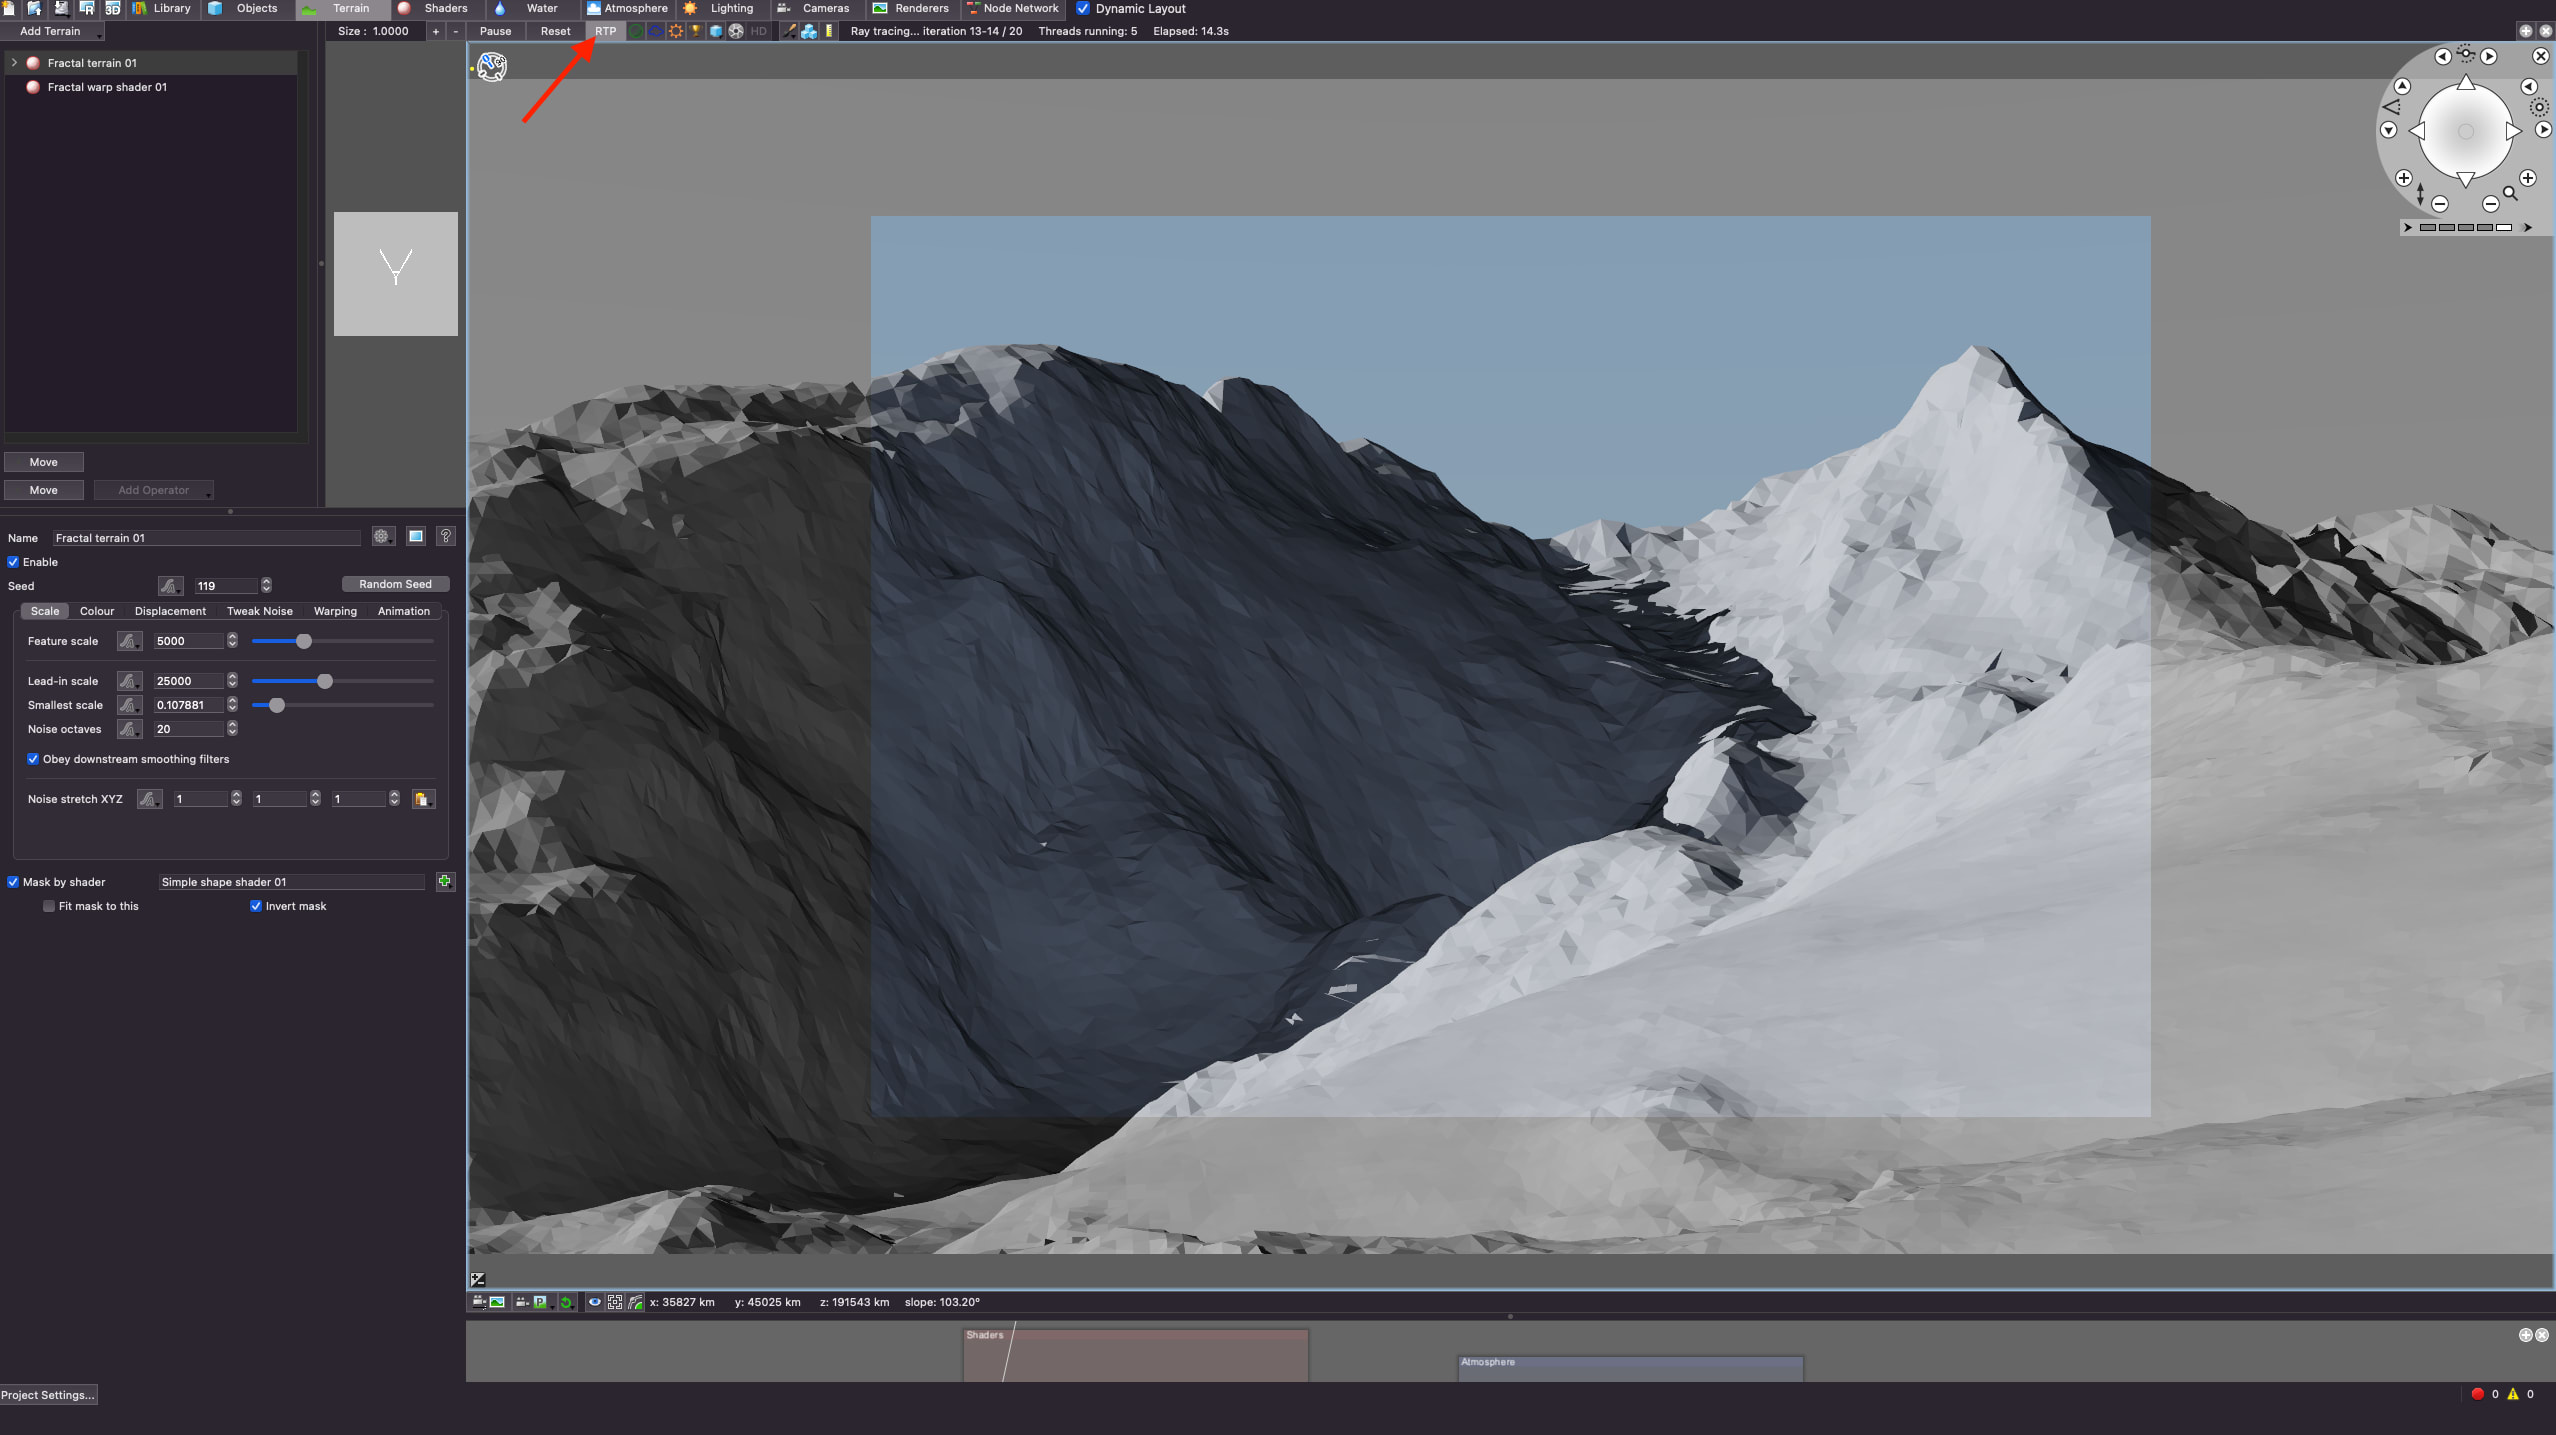
One way to enhance the look of your scenes is by enabling the Ray-Traced Preview mode. According to NVIDIA, Ray Tracing XXXXX (COMPLETE-ME)
Click the RTP button to toggle the ray-traced preview on and off.
Step 2: Add An Atmosphere Effect To The Scene
The atmosphere is crucial when generating a scene as it makes the scene look much more realistic.
Click the Atmosphere tab to add and customize the Atmosphere for your project. You can customize the haze density of the atmosphere, change the haze color, and do much more!

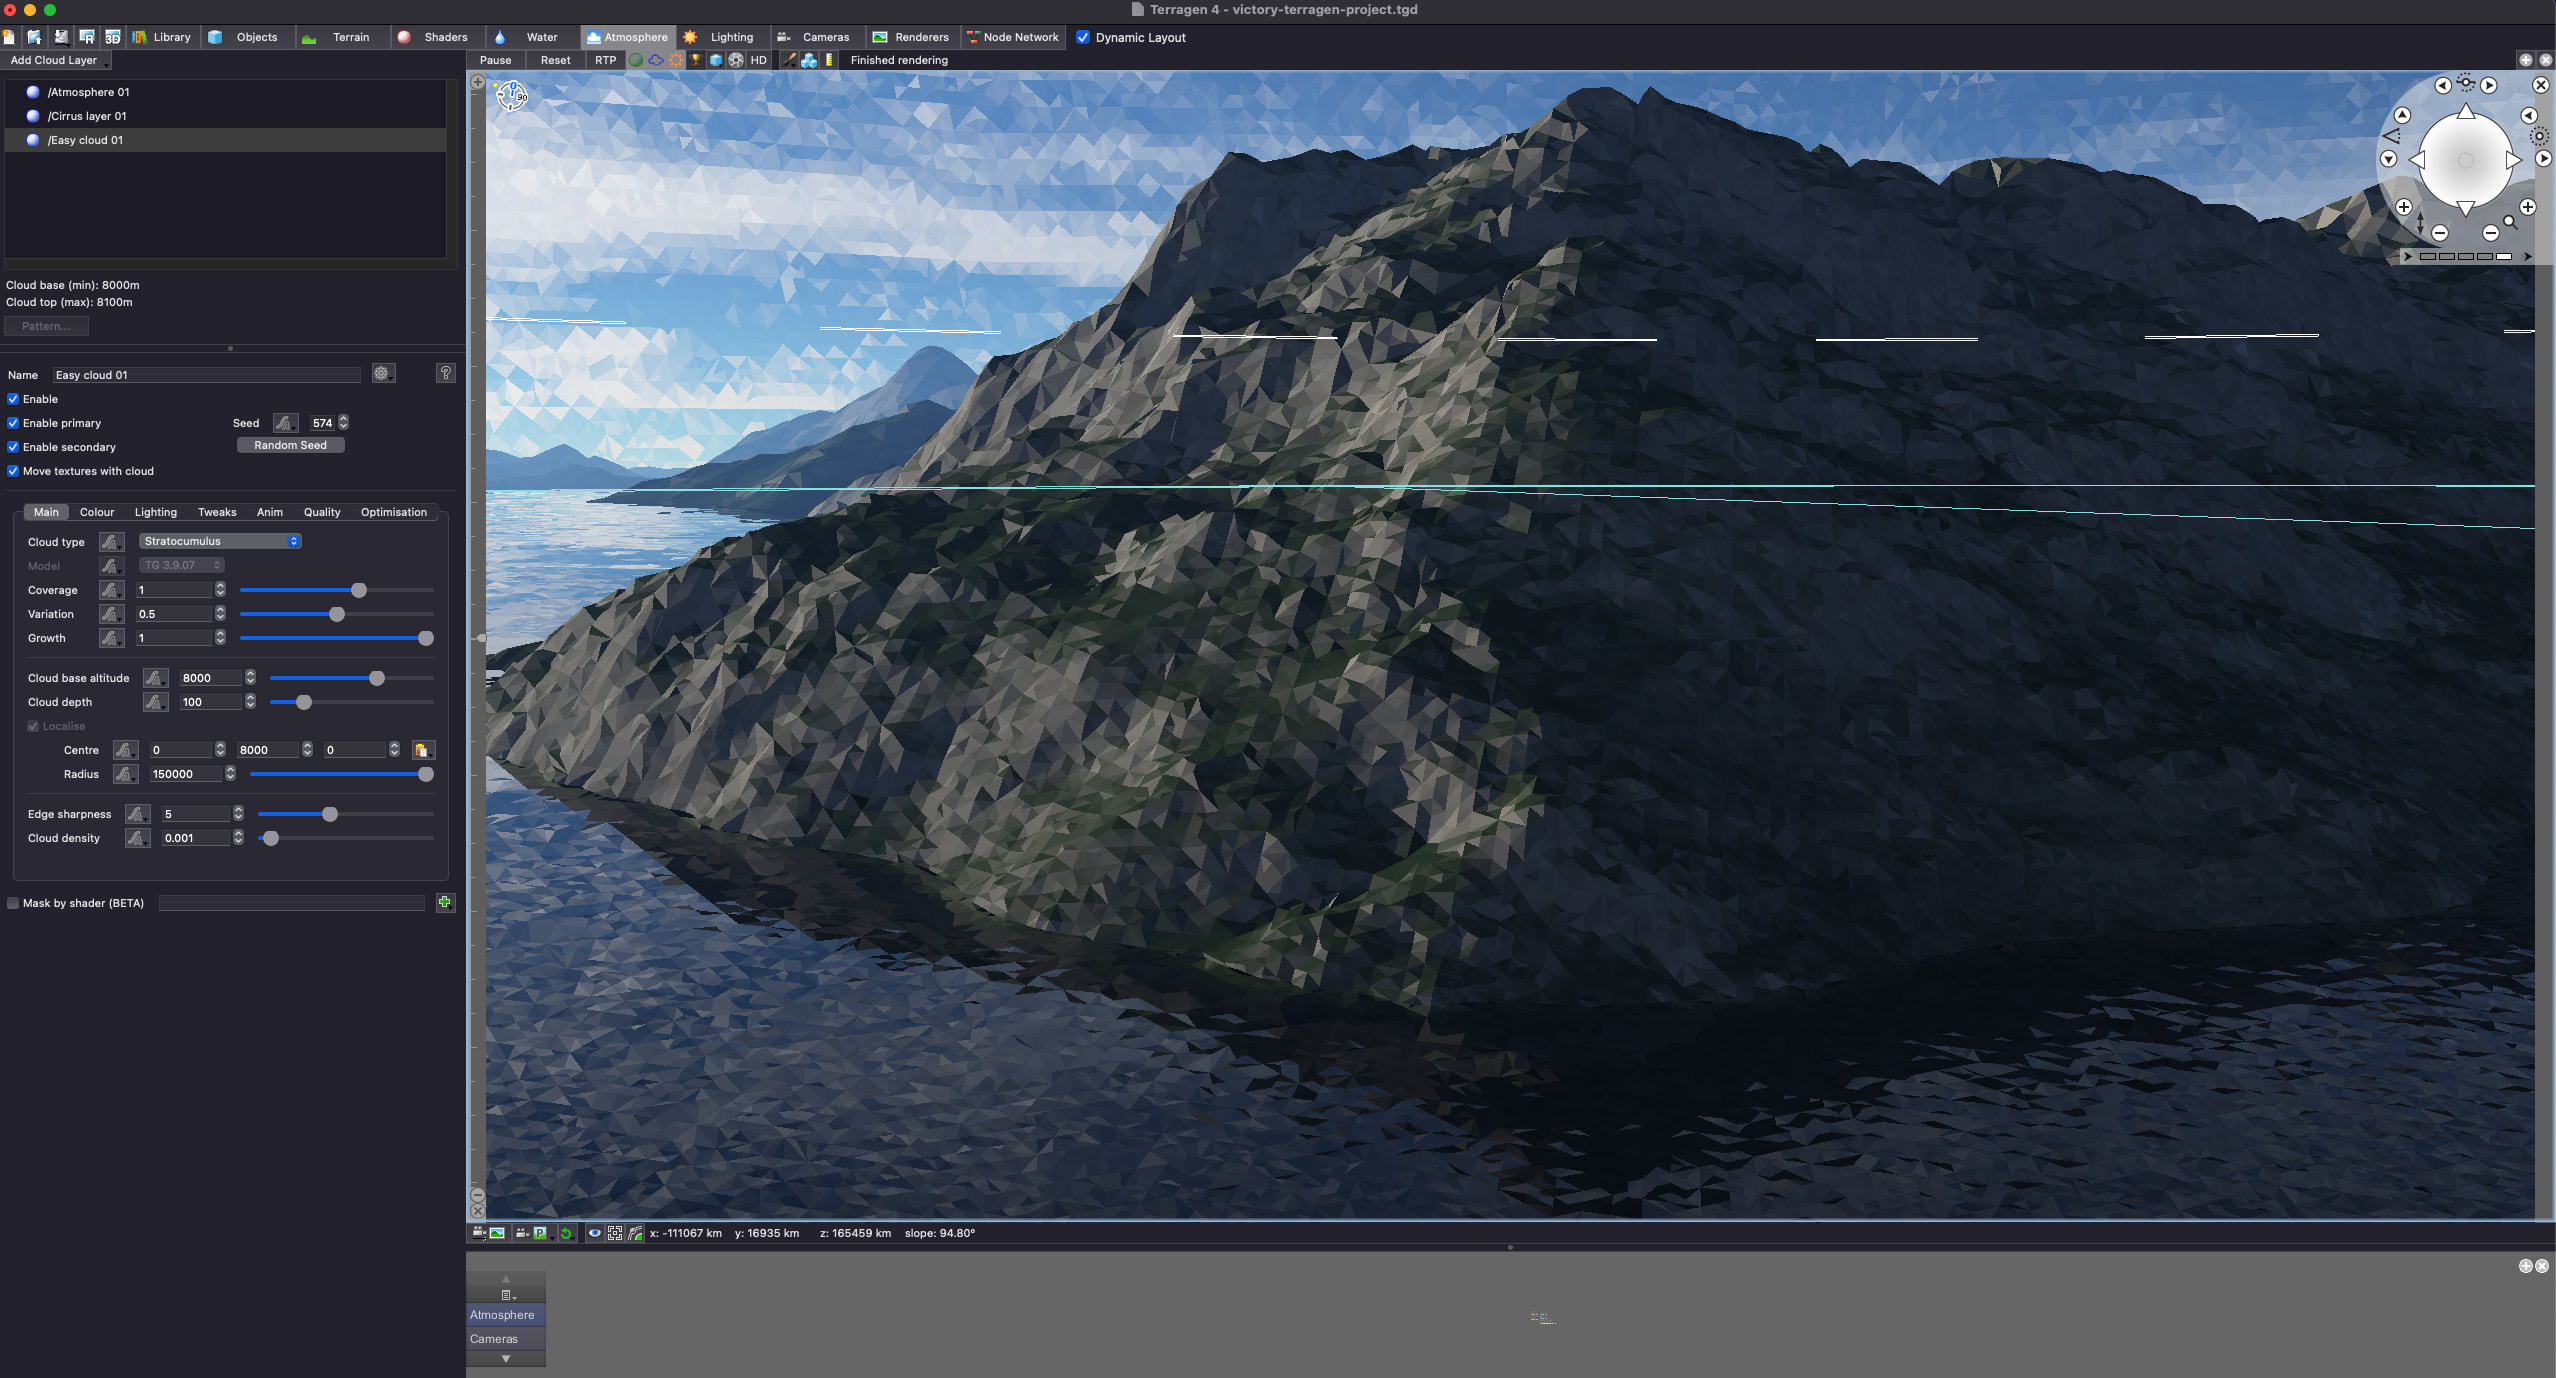
In addition to the default-generated atmosphere, you can add other items as layers. For example, you can add clouds to the scene.
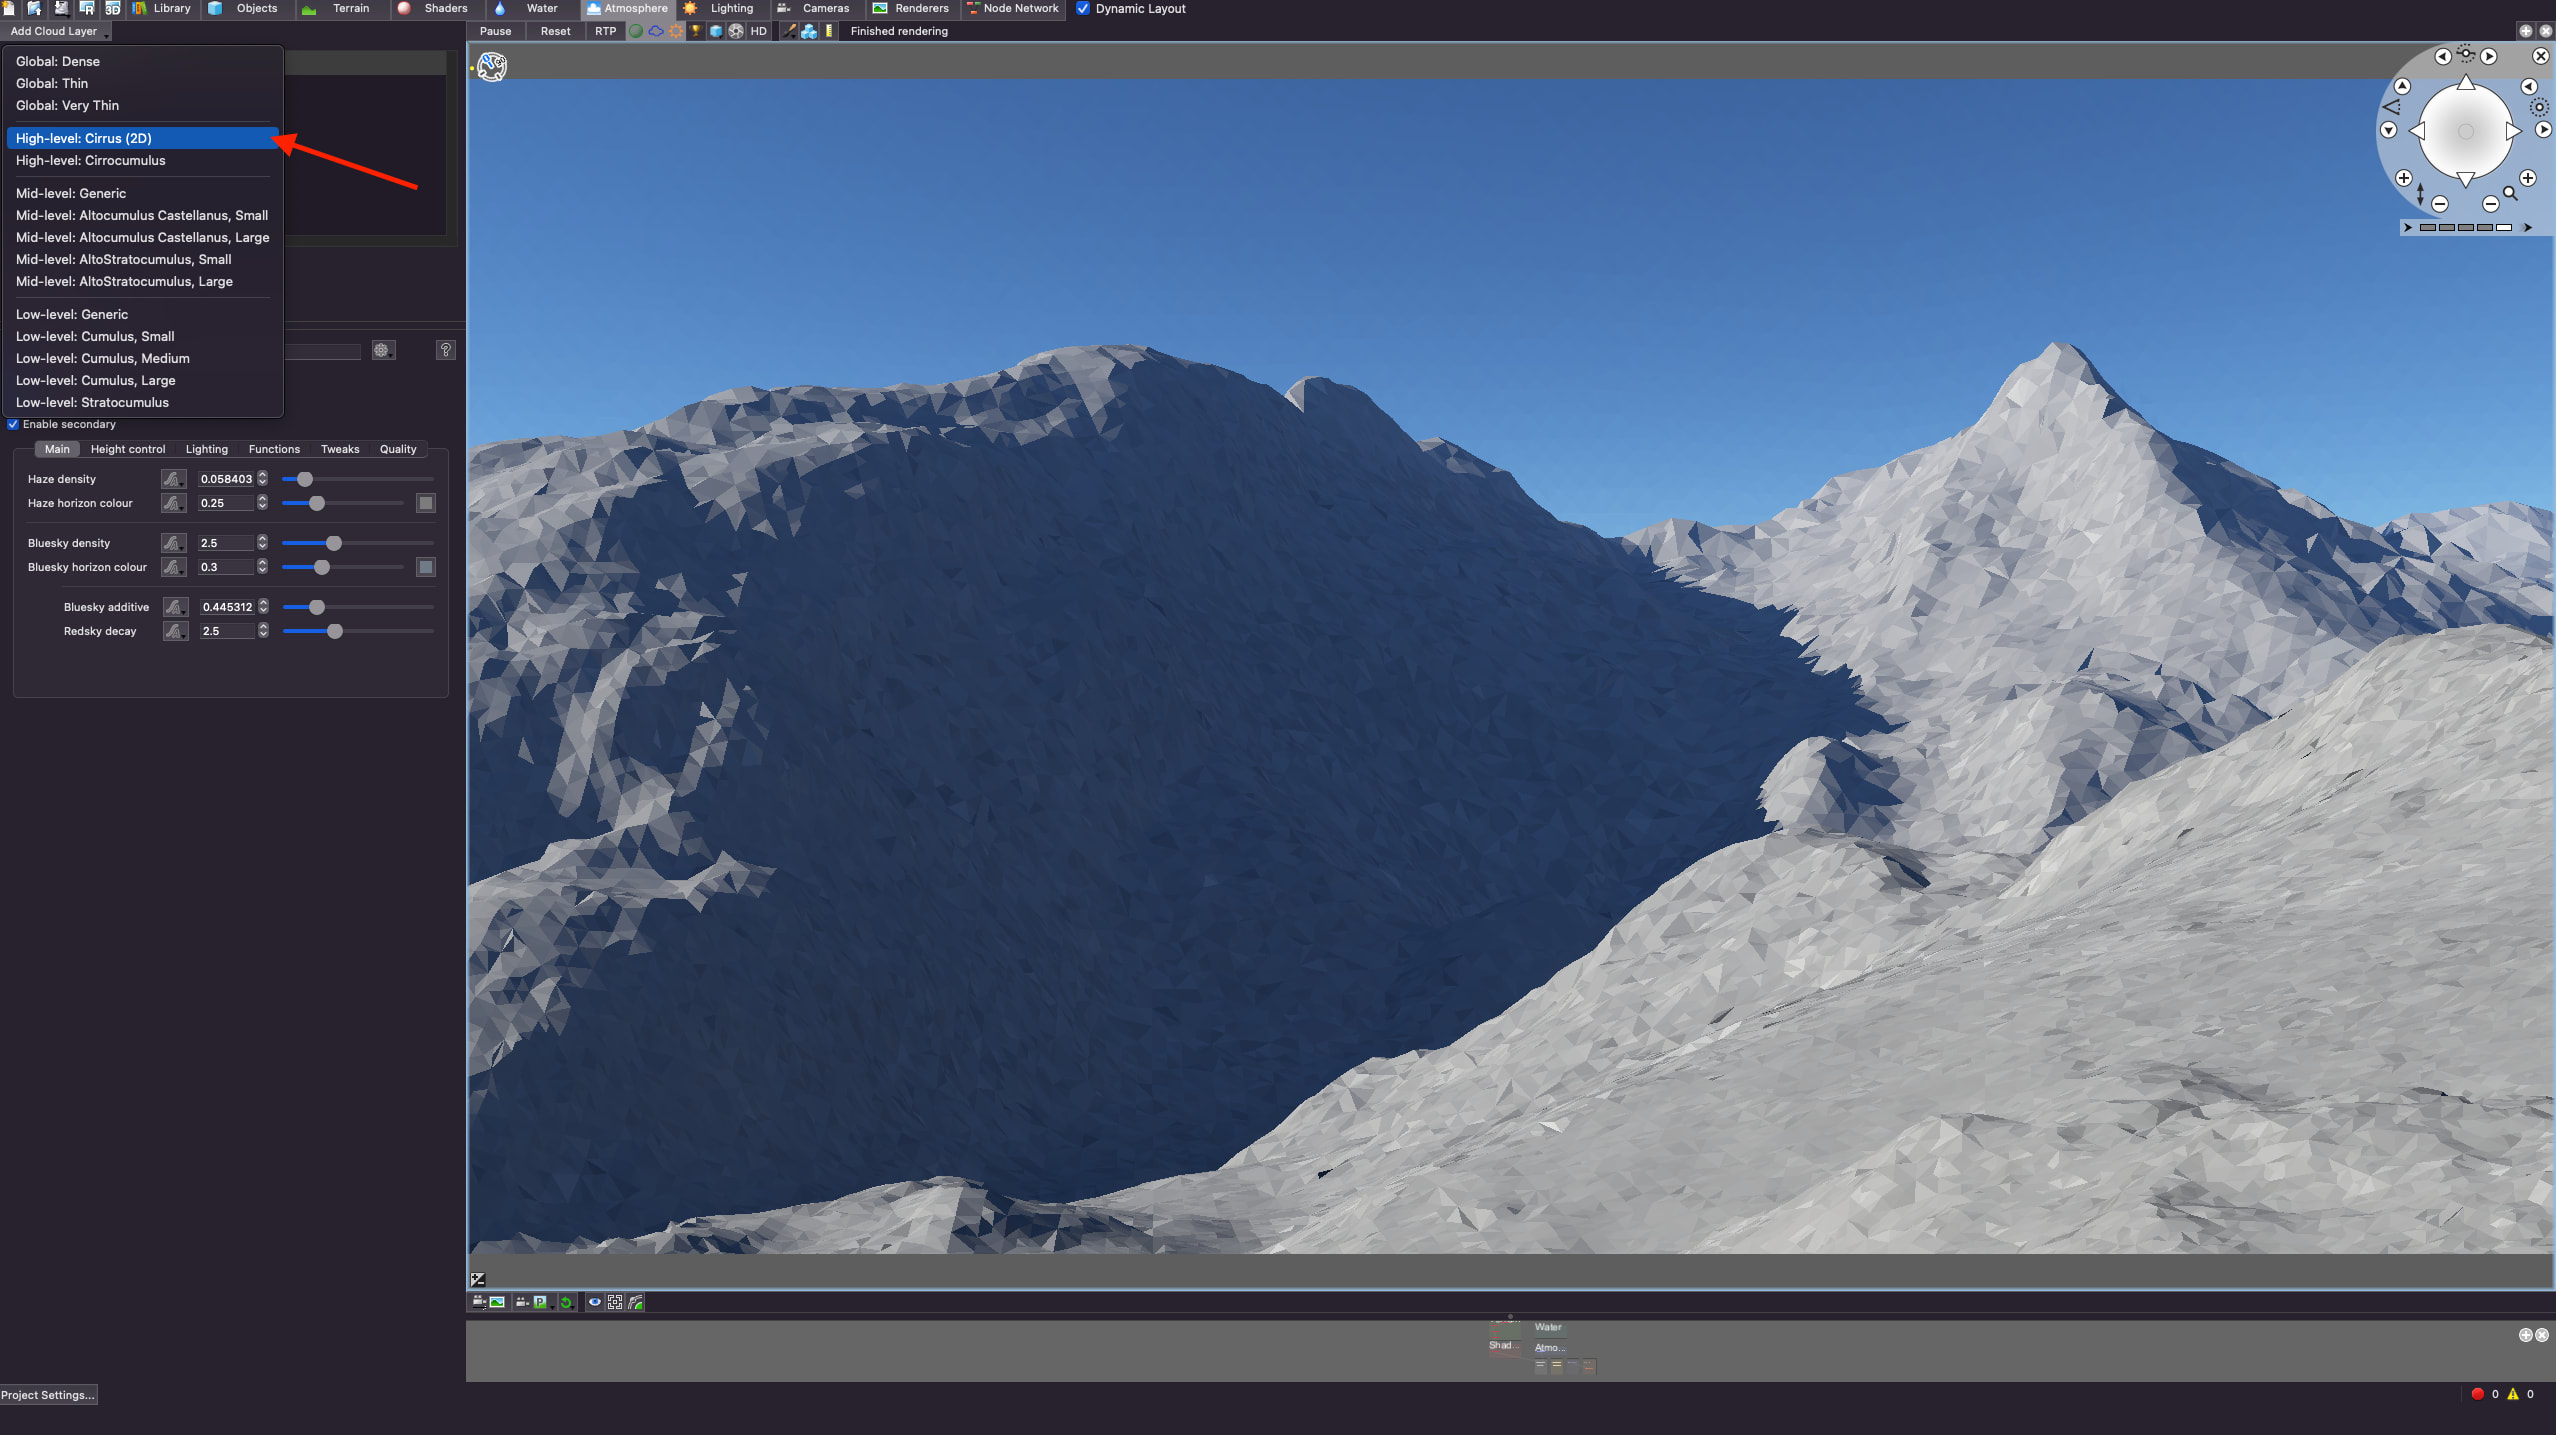
Click the Add Cloud Layer at the top-right corner. You can also have multiple cloud layers in your scene and customize their values for a more realistic look.
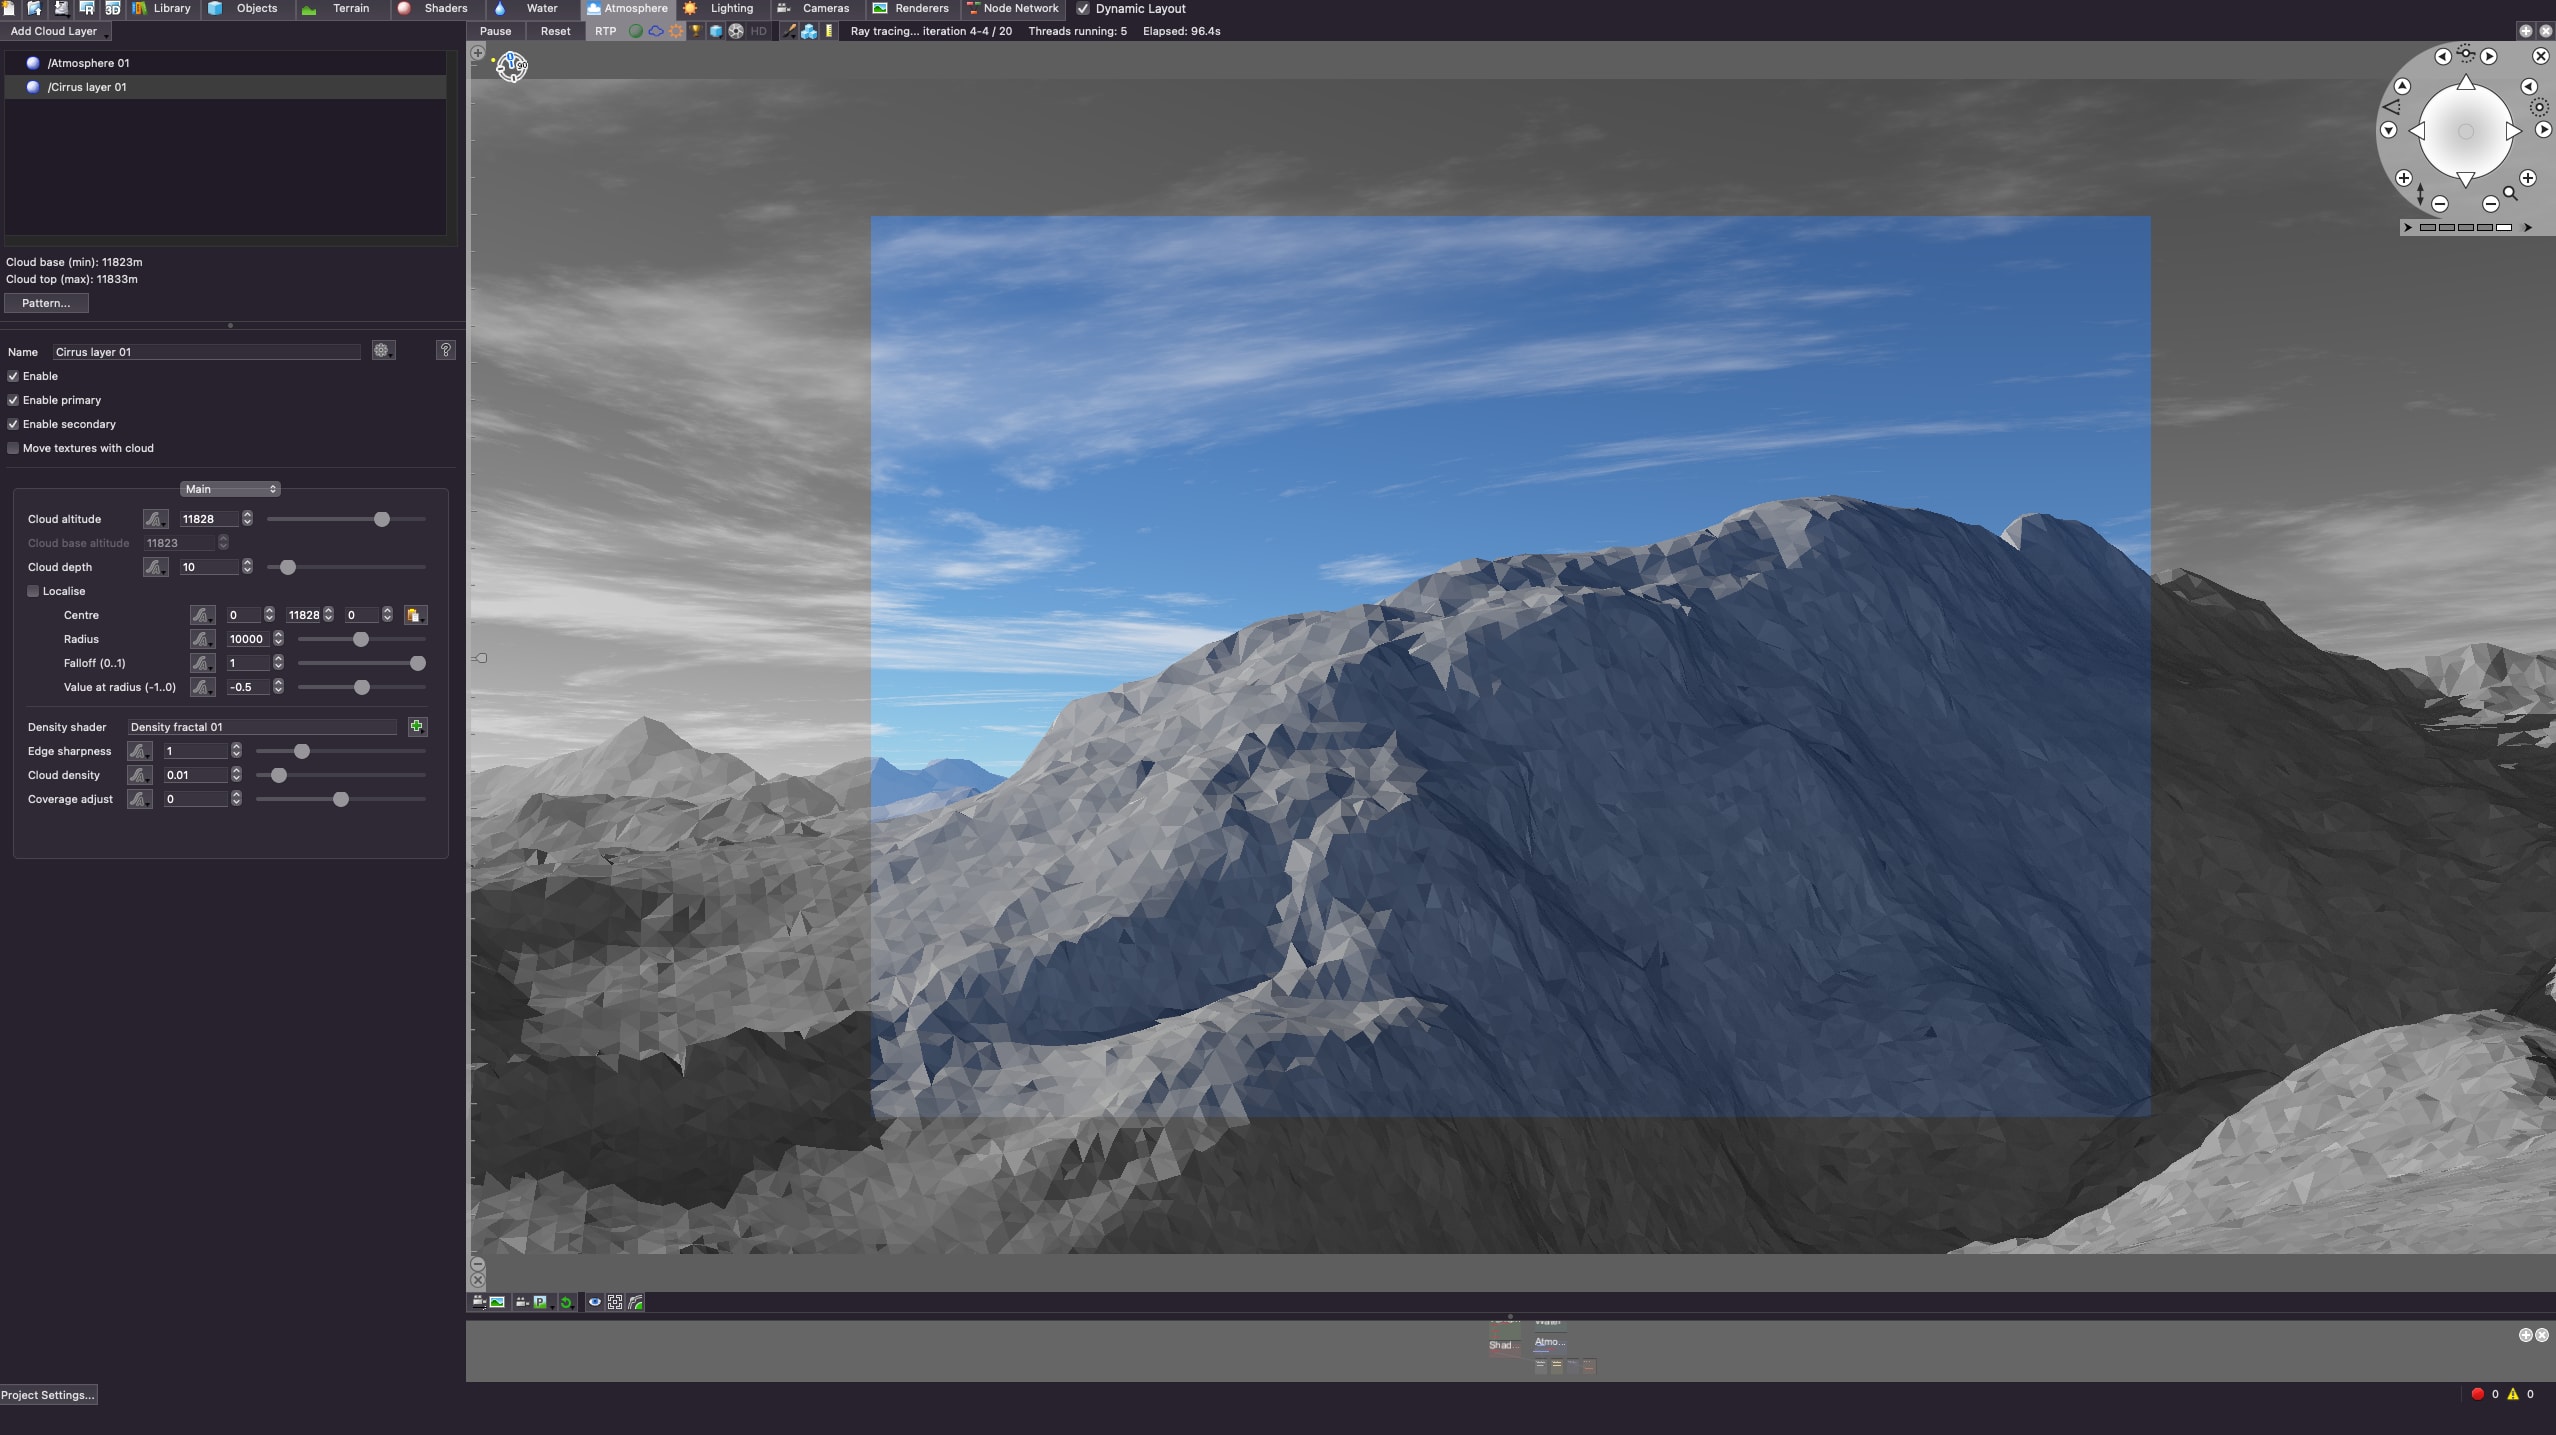
With the cloud layer added, the scene now has the following look;
Step 3: Adjust Lighting Effect
Lighting is also another crucial component of every generated scene. Through the proper use of lighting, you can create sunset, sundown, sunrise, and other realistic effects.
Your Teragen project's lighting tab provides the feature to customize the default lighting setup and add or remove new light sources. Let's rotate the sun's position in our project to change where the shadows are being cast on our Terrain.
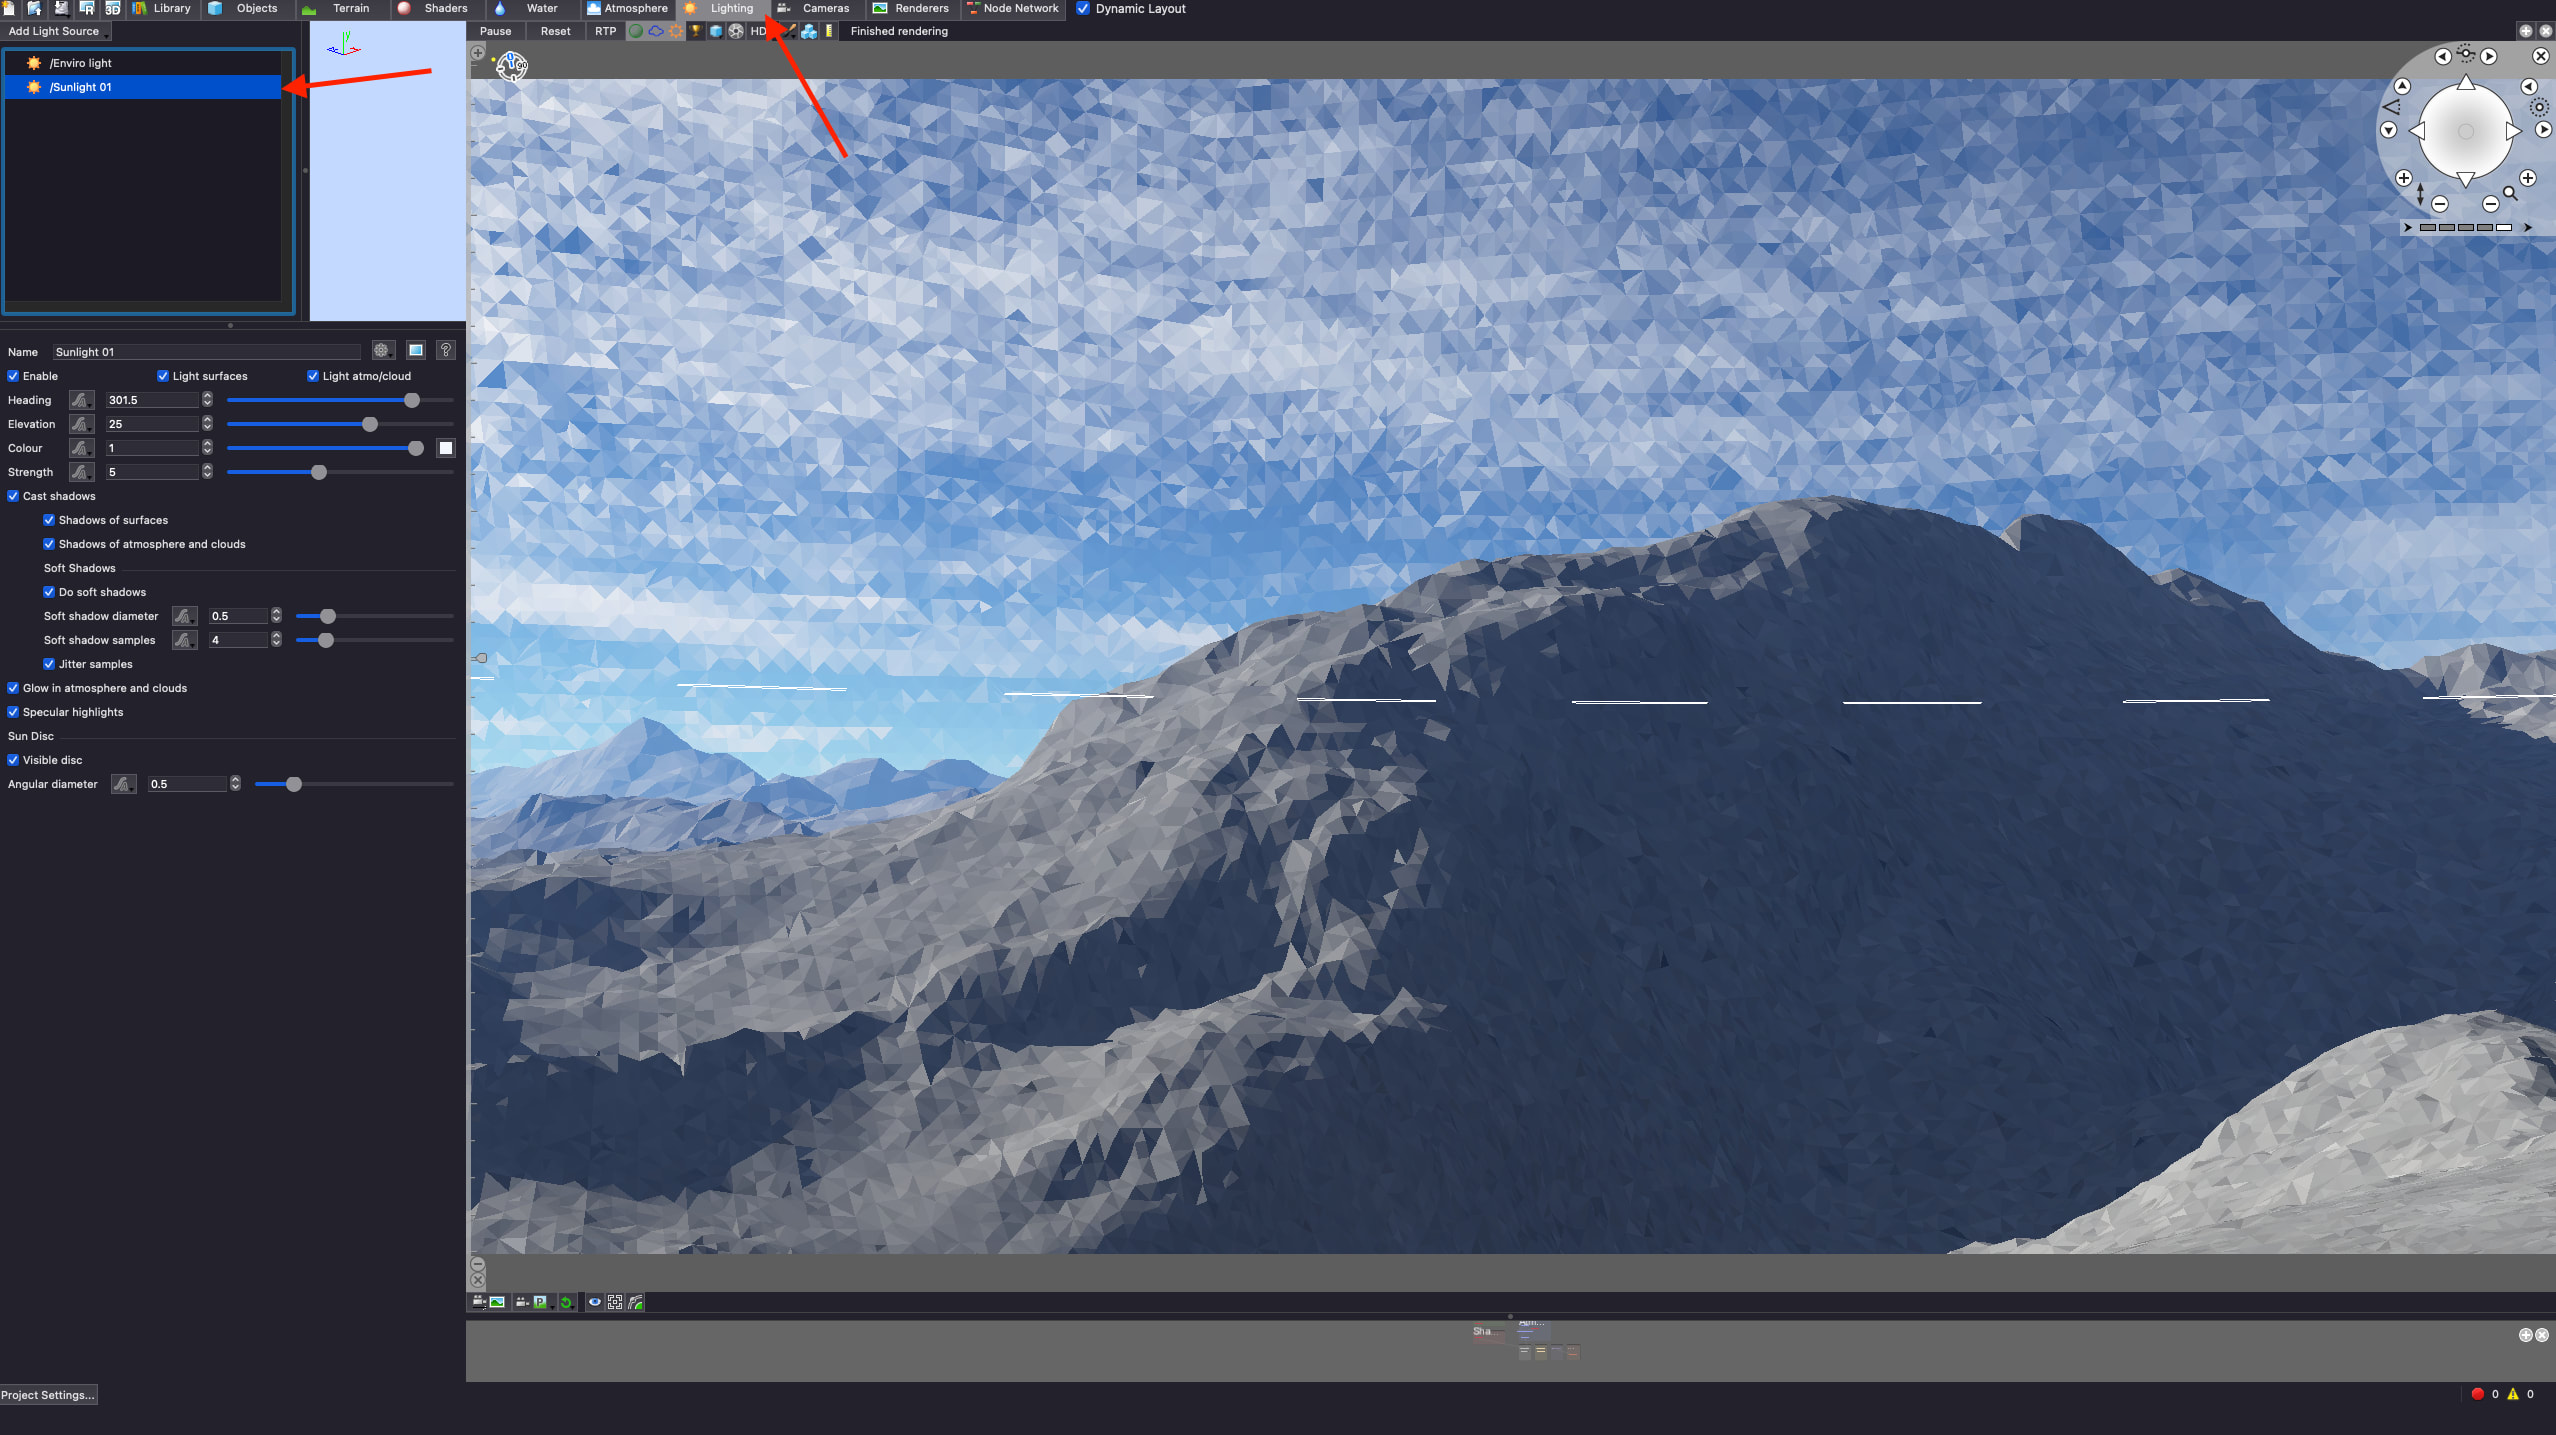
Click the Lighting tab and /Sunlight 01 light source to rotate the sun position.
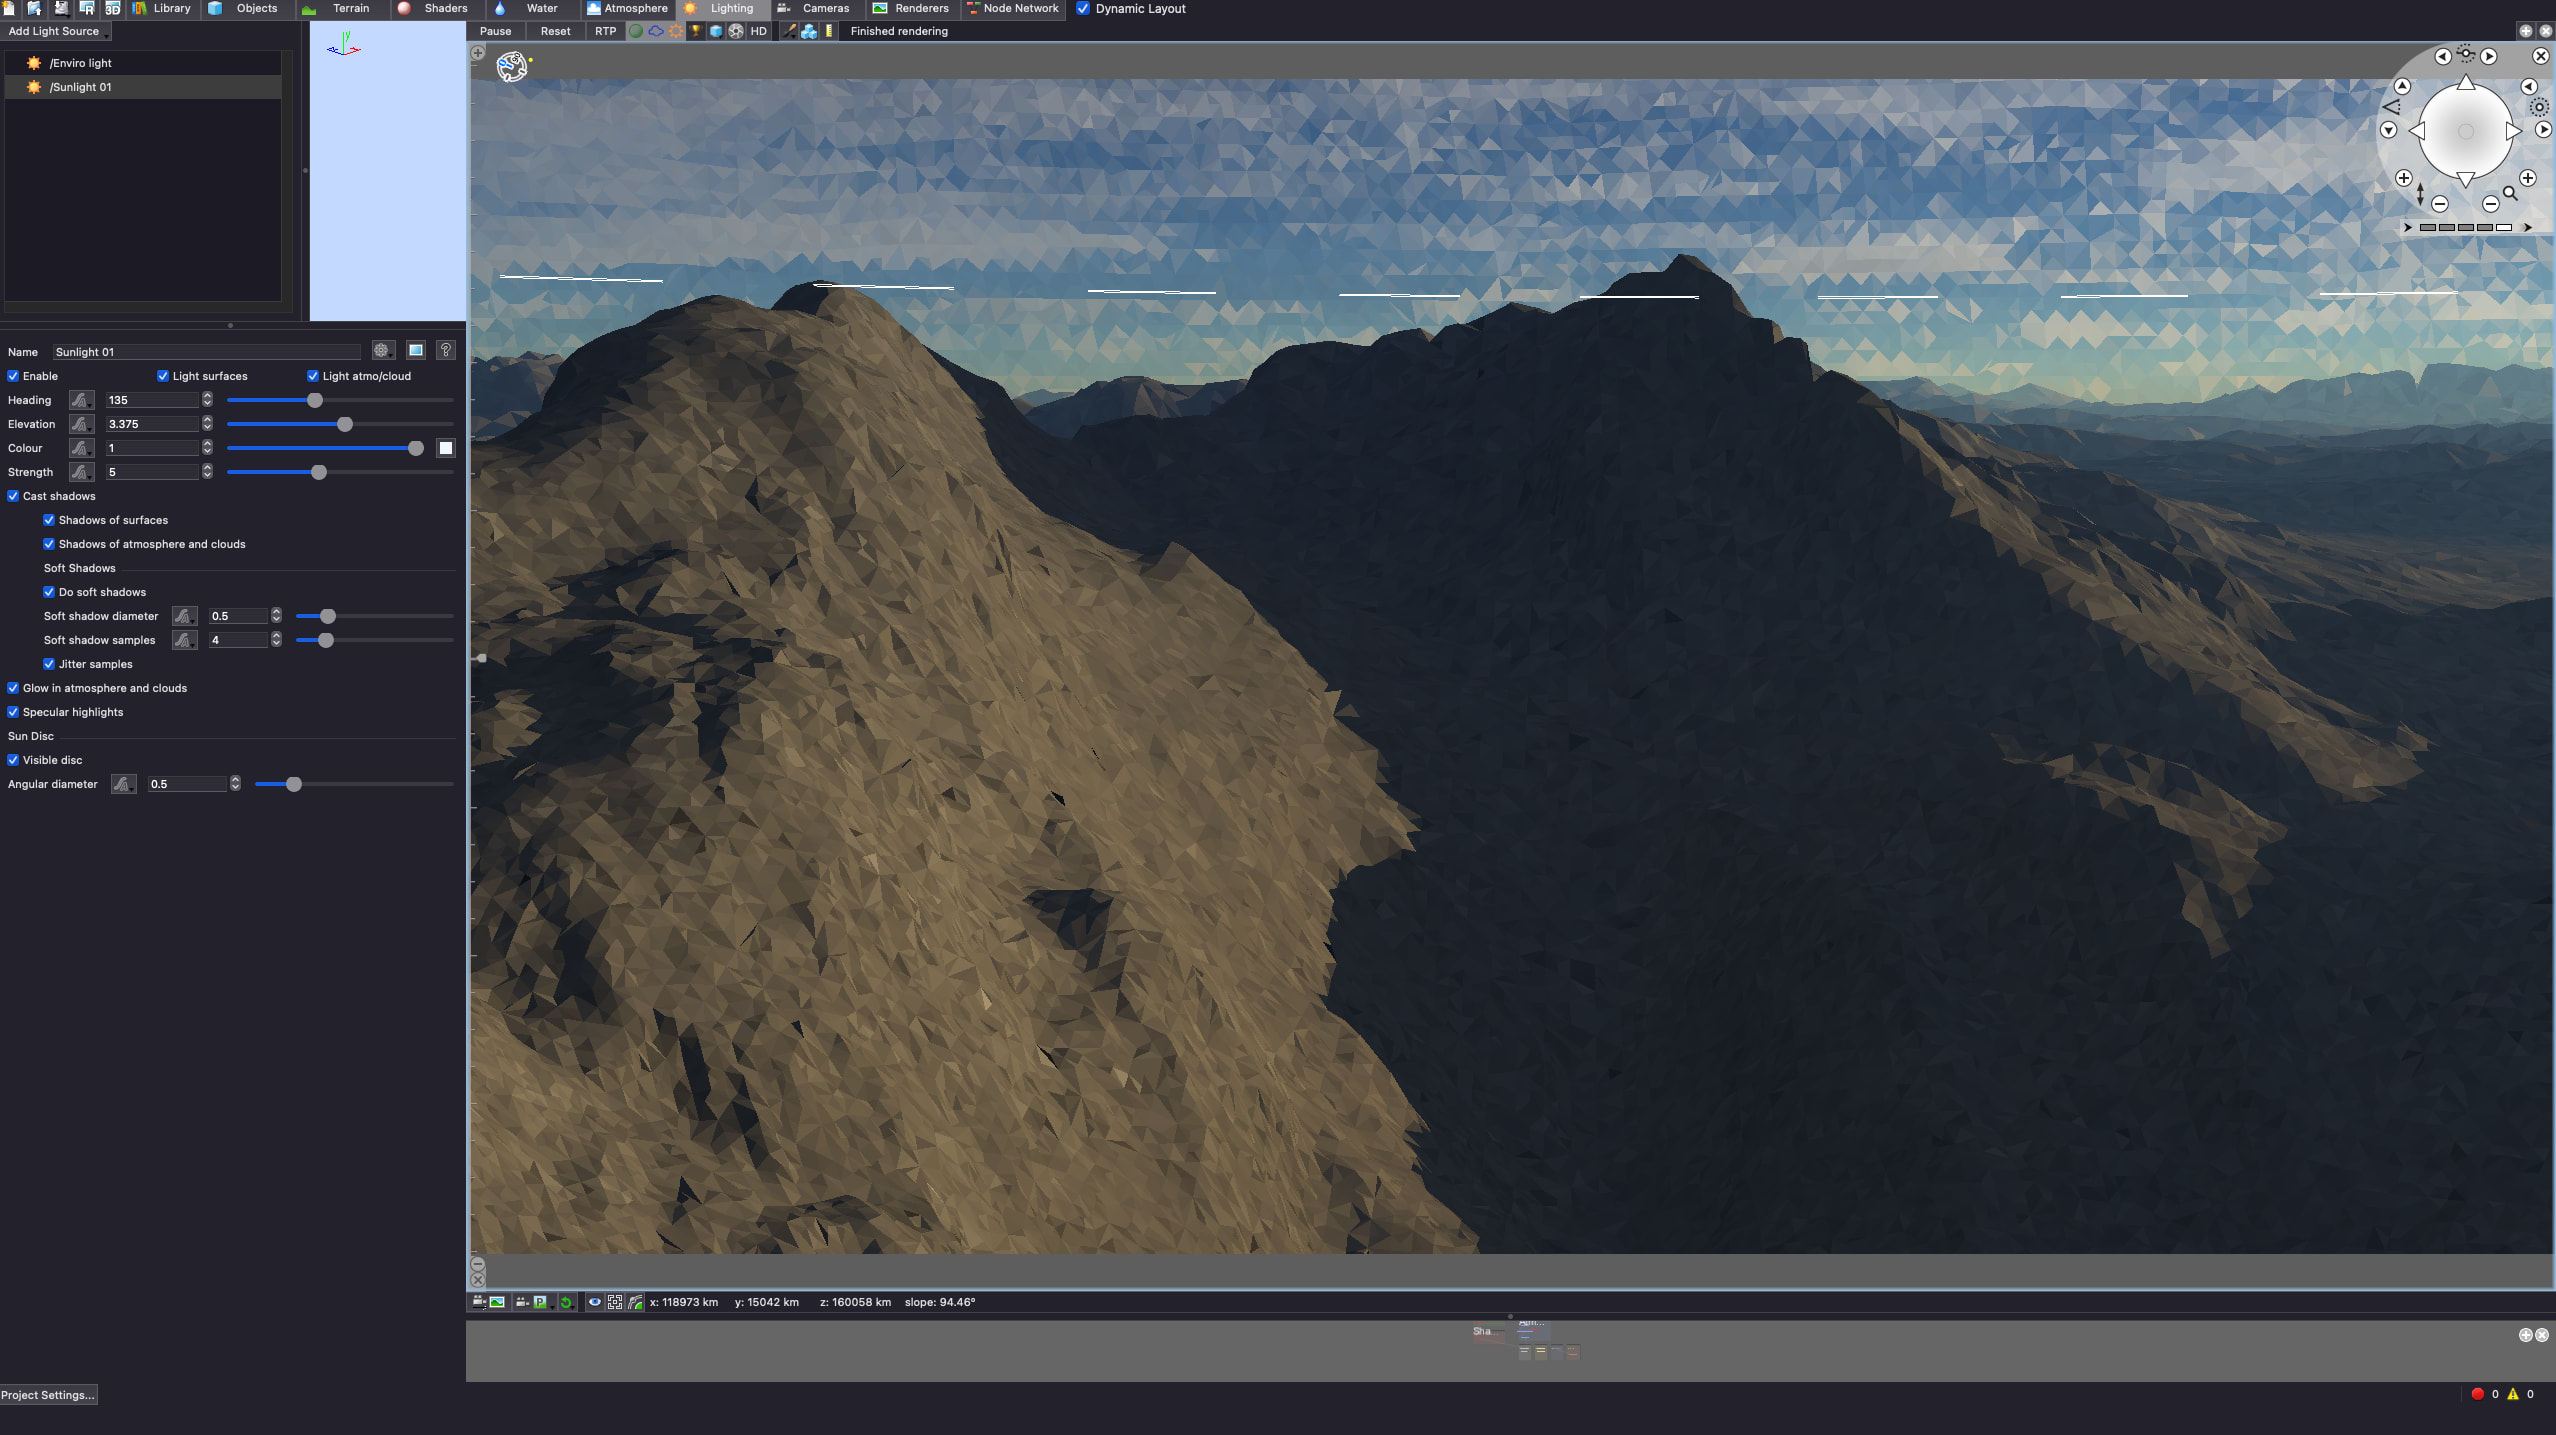
After rotating the sun by 135° and reducing the elevation to 3.375, I have the following result that shows a gradual sunrise within the mountain terrain.
Step 4: Add A Water Effect
Geographically, mountainous regions often have water bodies such as lakes, streams, and waterfalls associated with them.
Step 5: Add Shaders For Colors
To make the Terrain more realistic, we can add colors using the Shaders feature of Terragen. We add different grades of green color to represent some vegetation.
Click the Shaers tab and the Apply Color palette to pick a color for the shades. I am making use of Red at 30, Green at 52, and Blue at 38 for my color palette.

The entire Terrain changes to a green vegetation color after the new shade is applied.
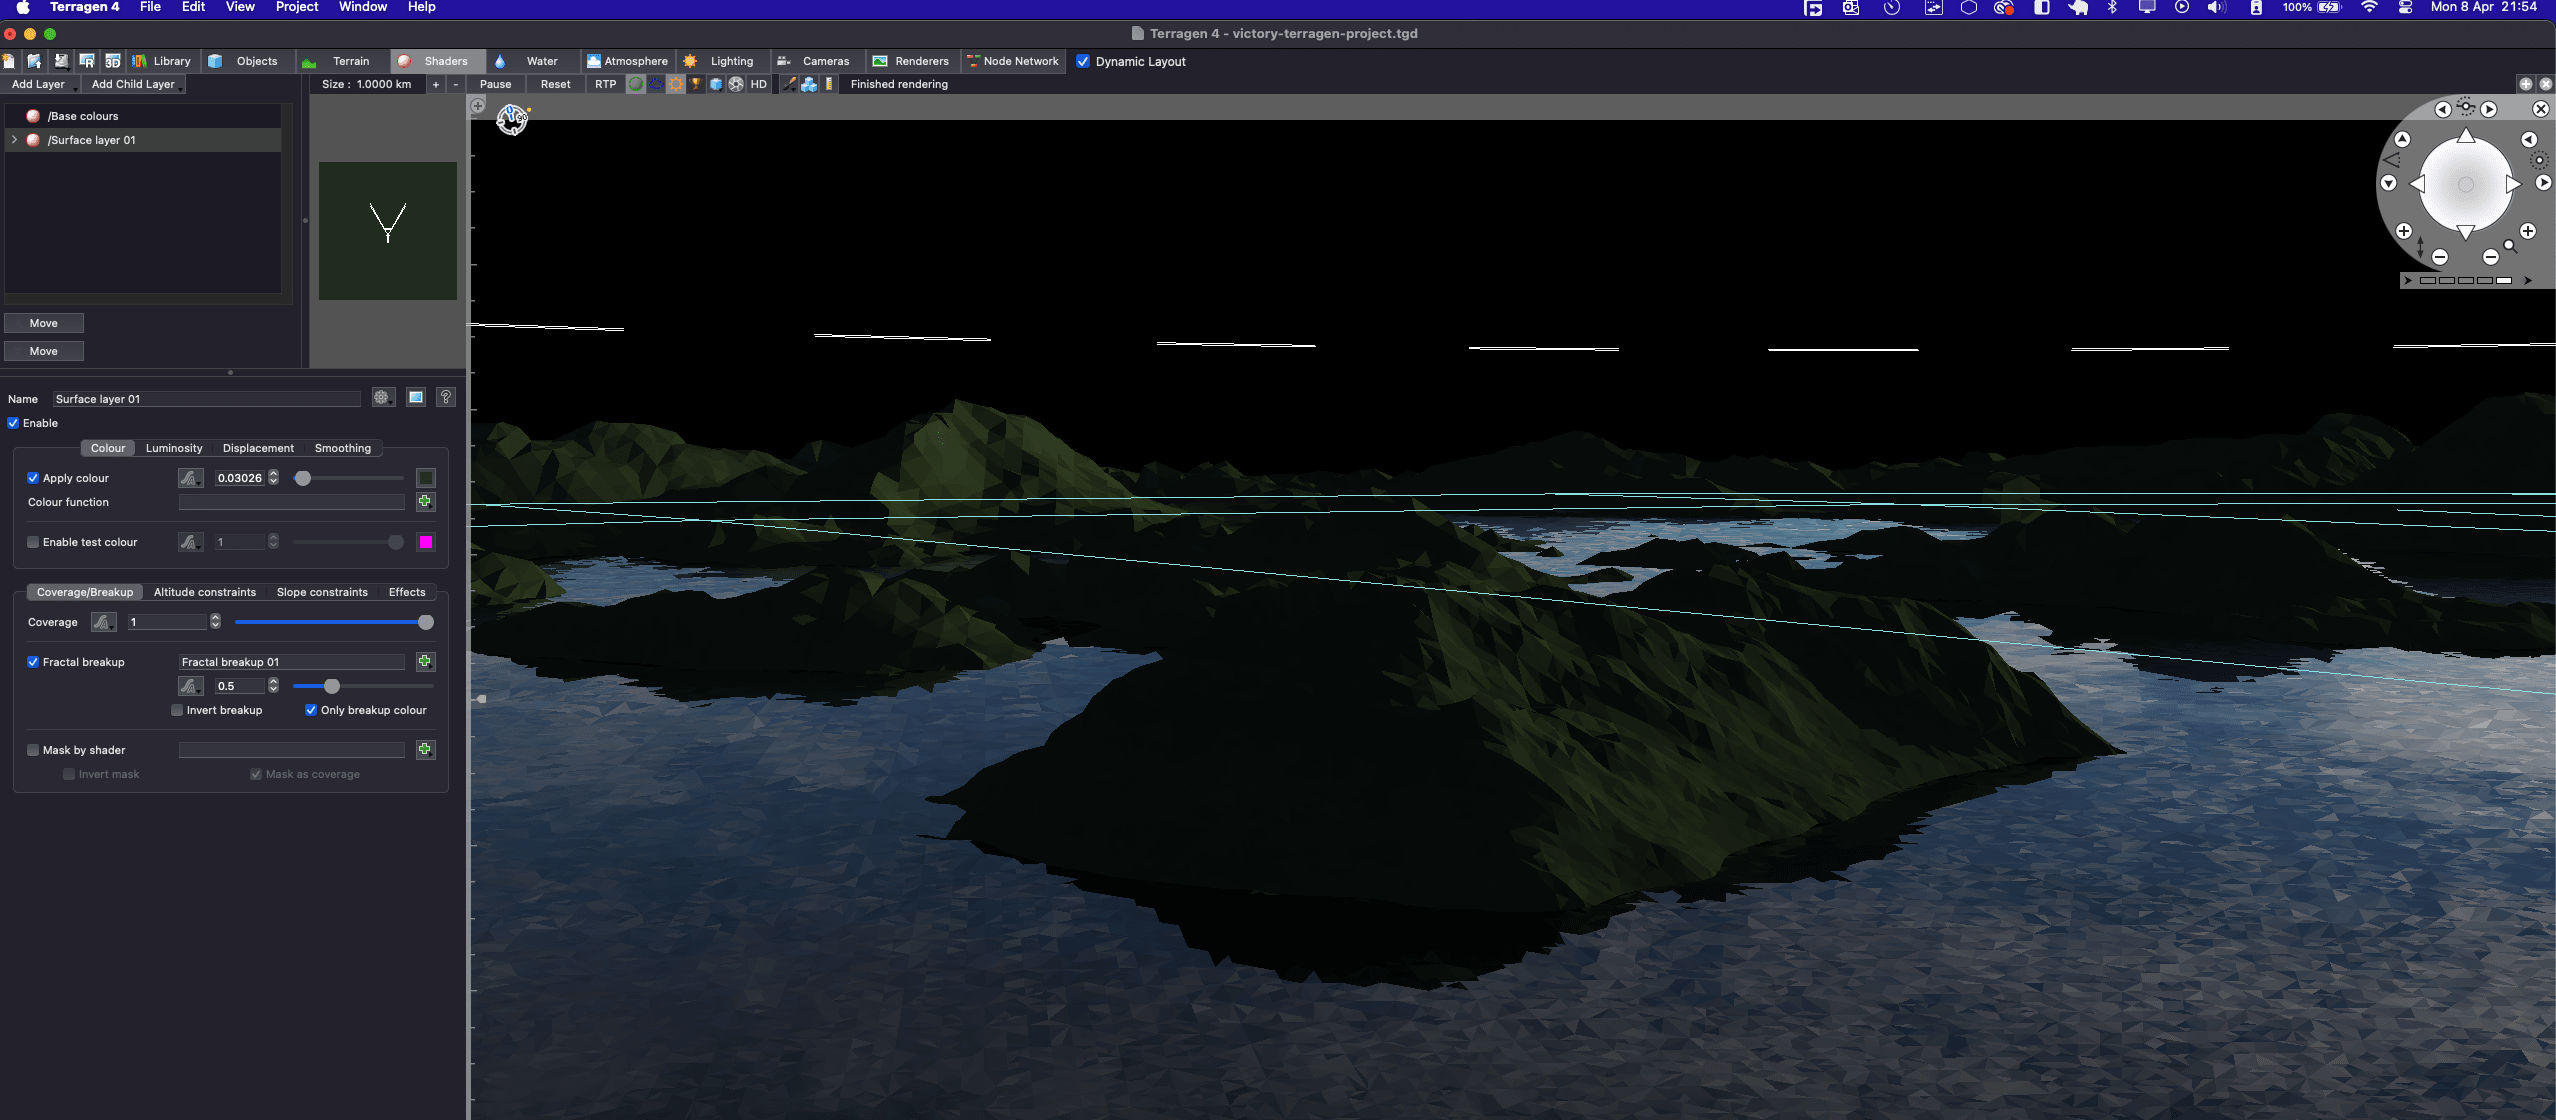
To reduce the green effect all over the Terrain, I will add a Slope Constraint to apply the vegetation shade to some places, making it more realistic.
Click the Slope Constraints tab and enable the Limit Maximum slope to only apply it to planes less than 51.
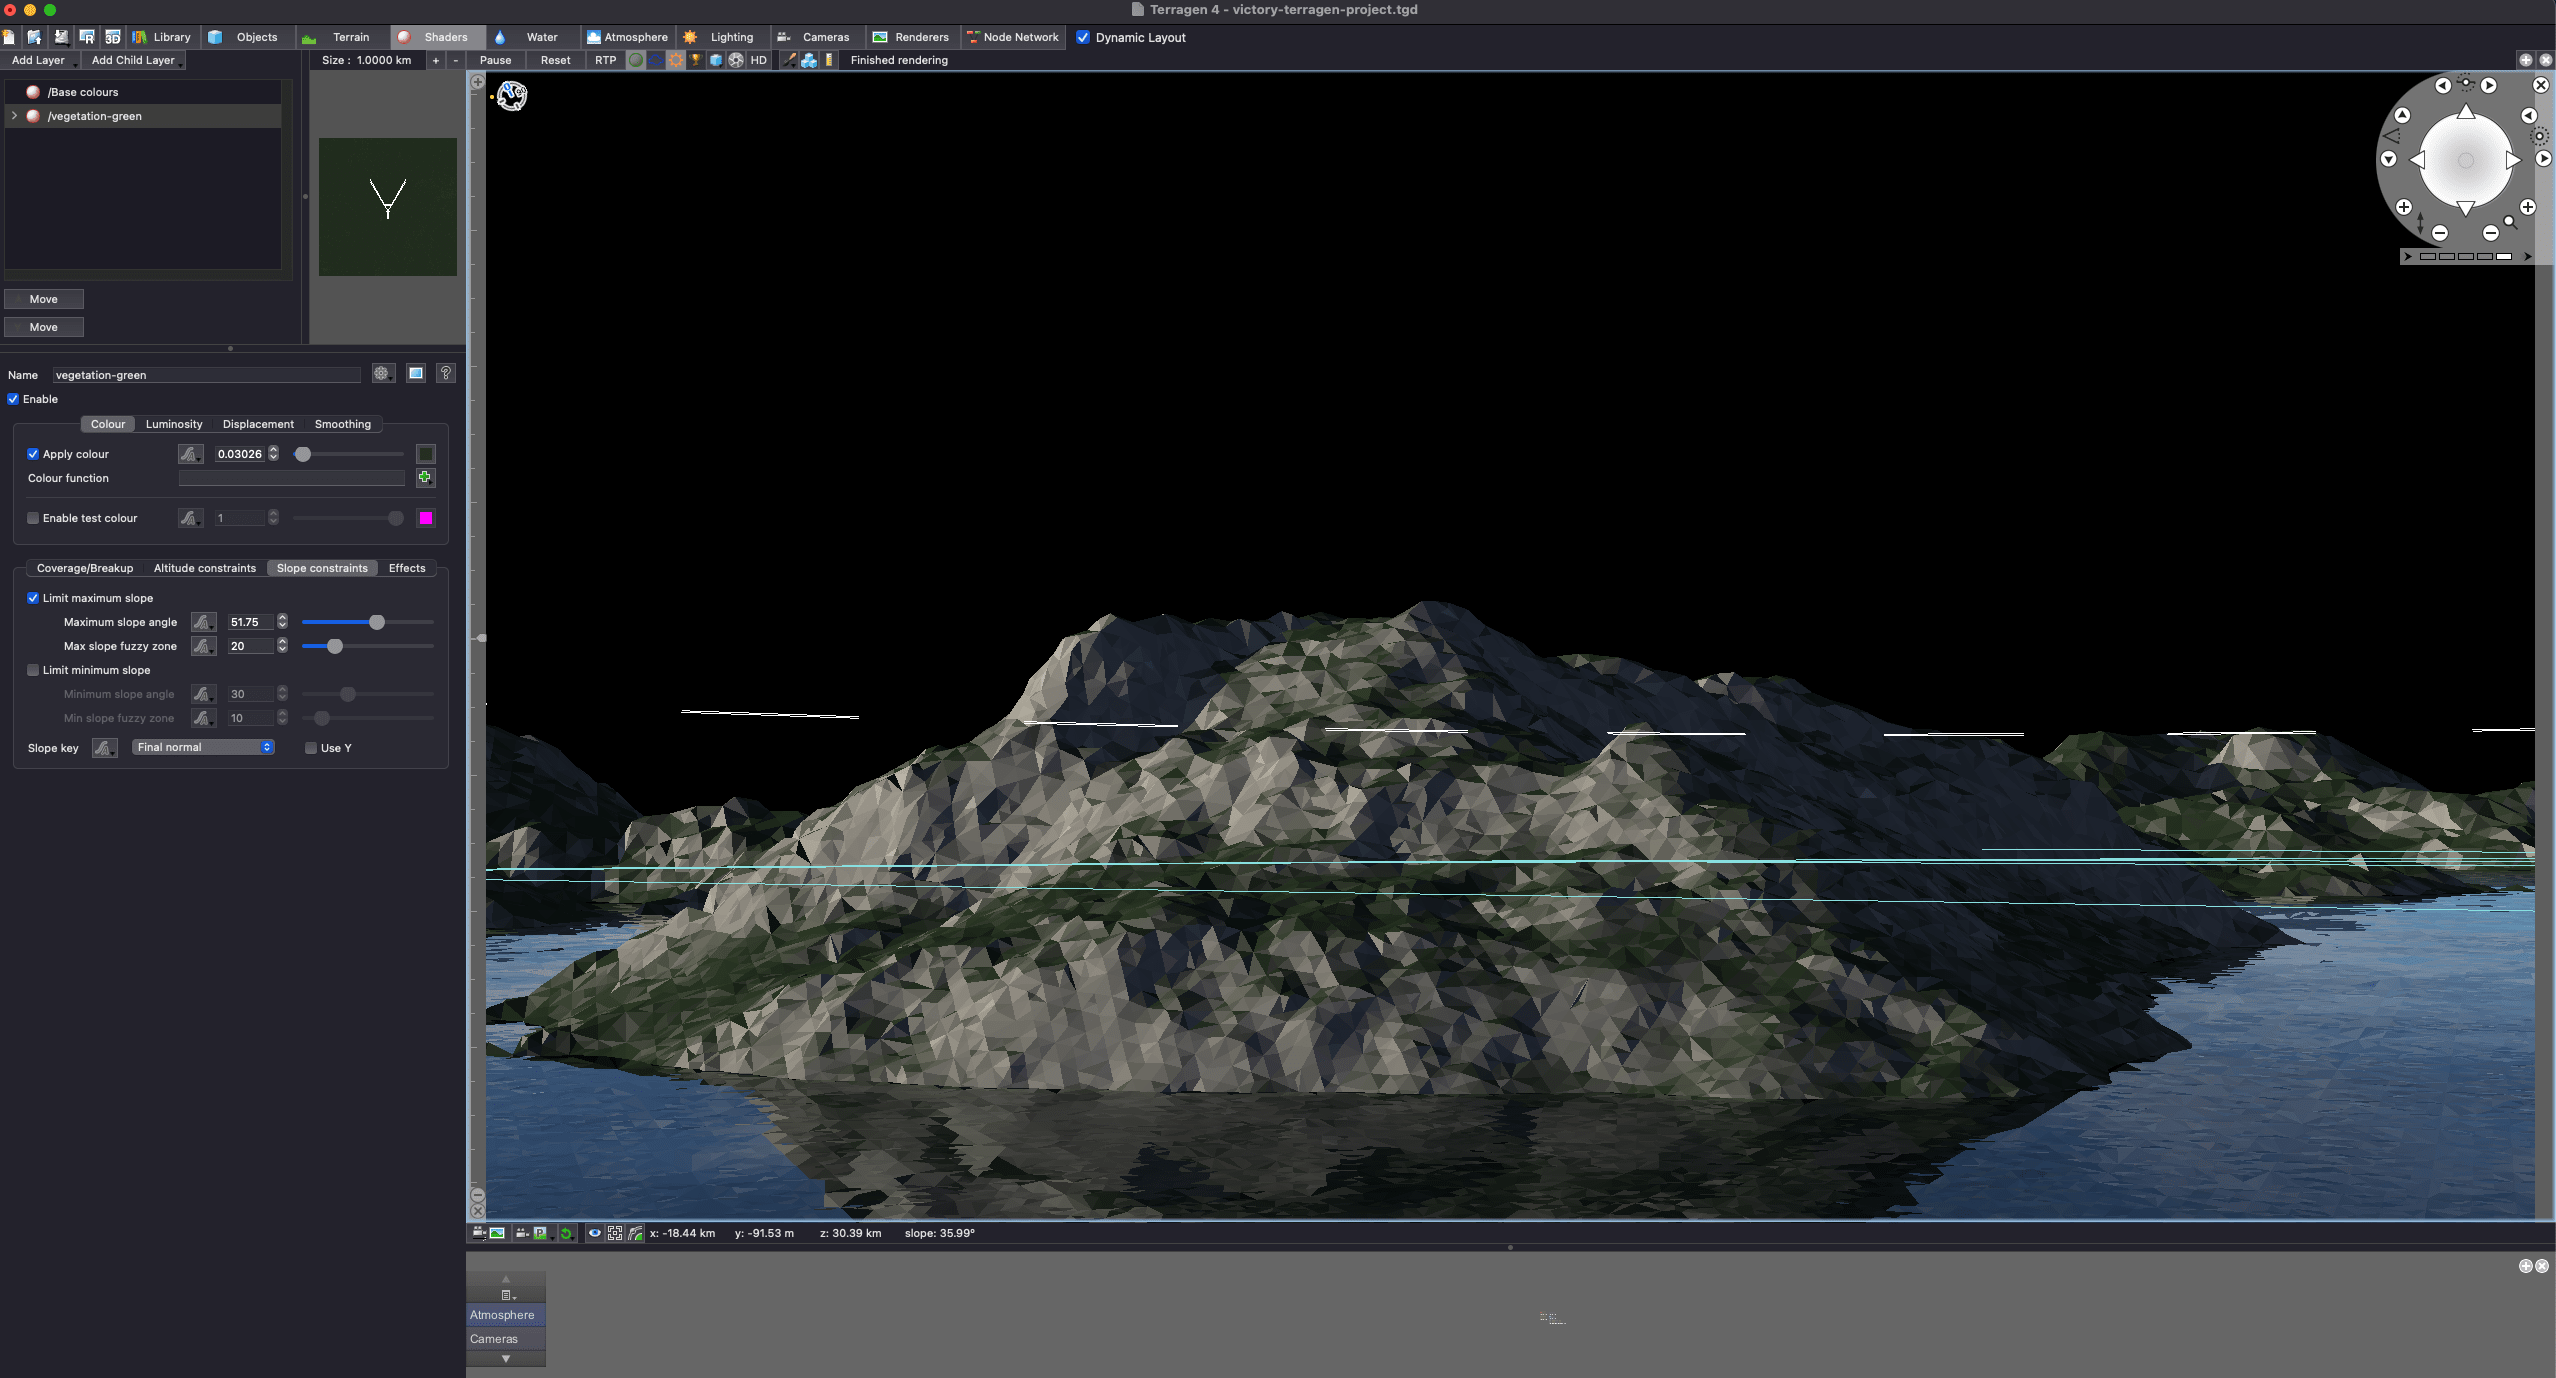
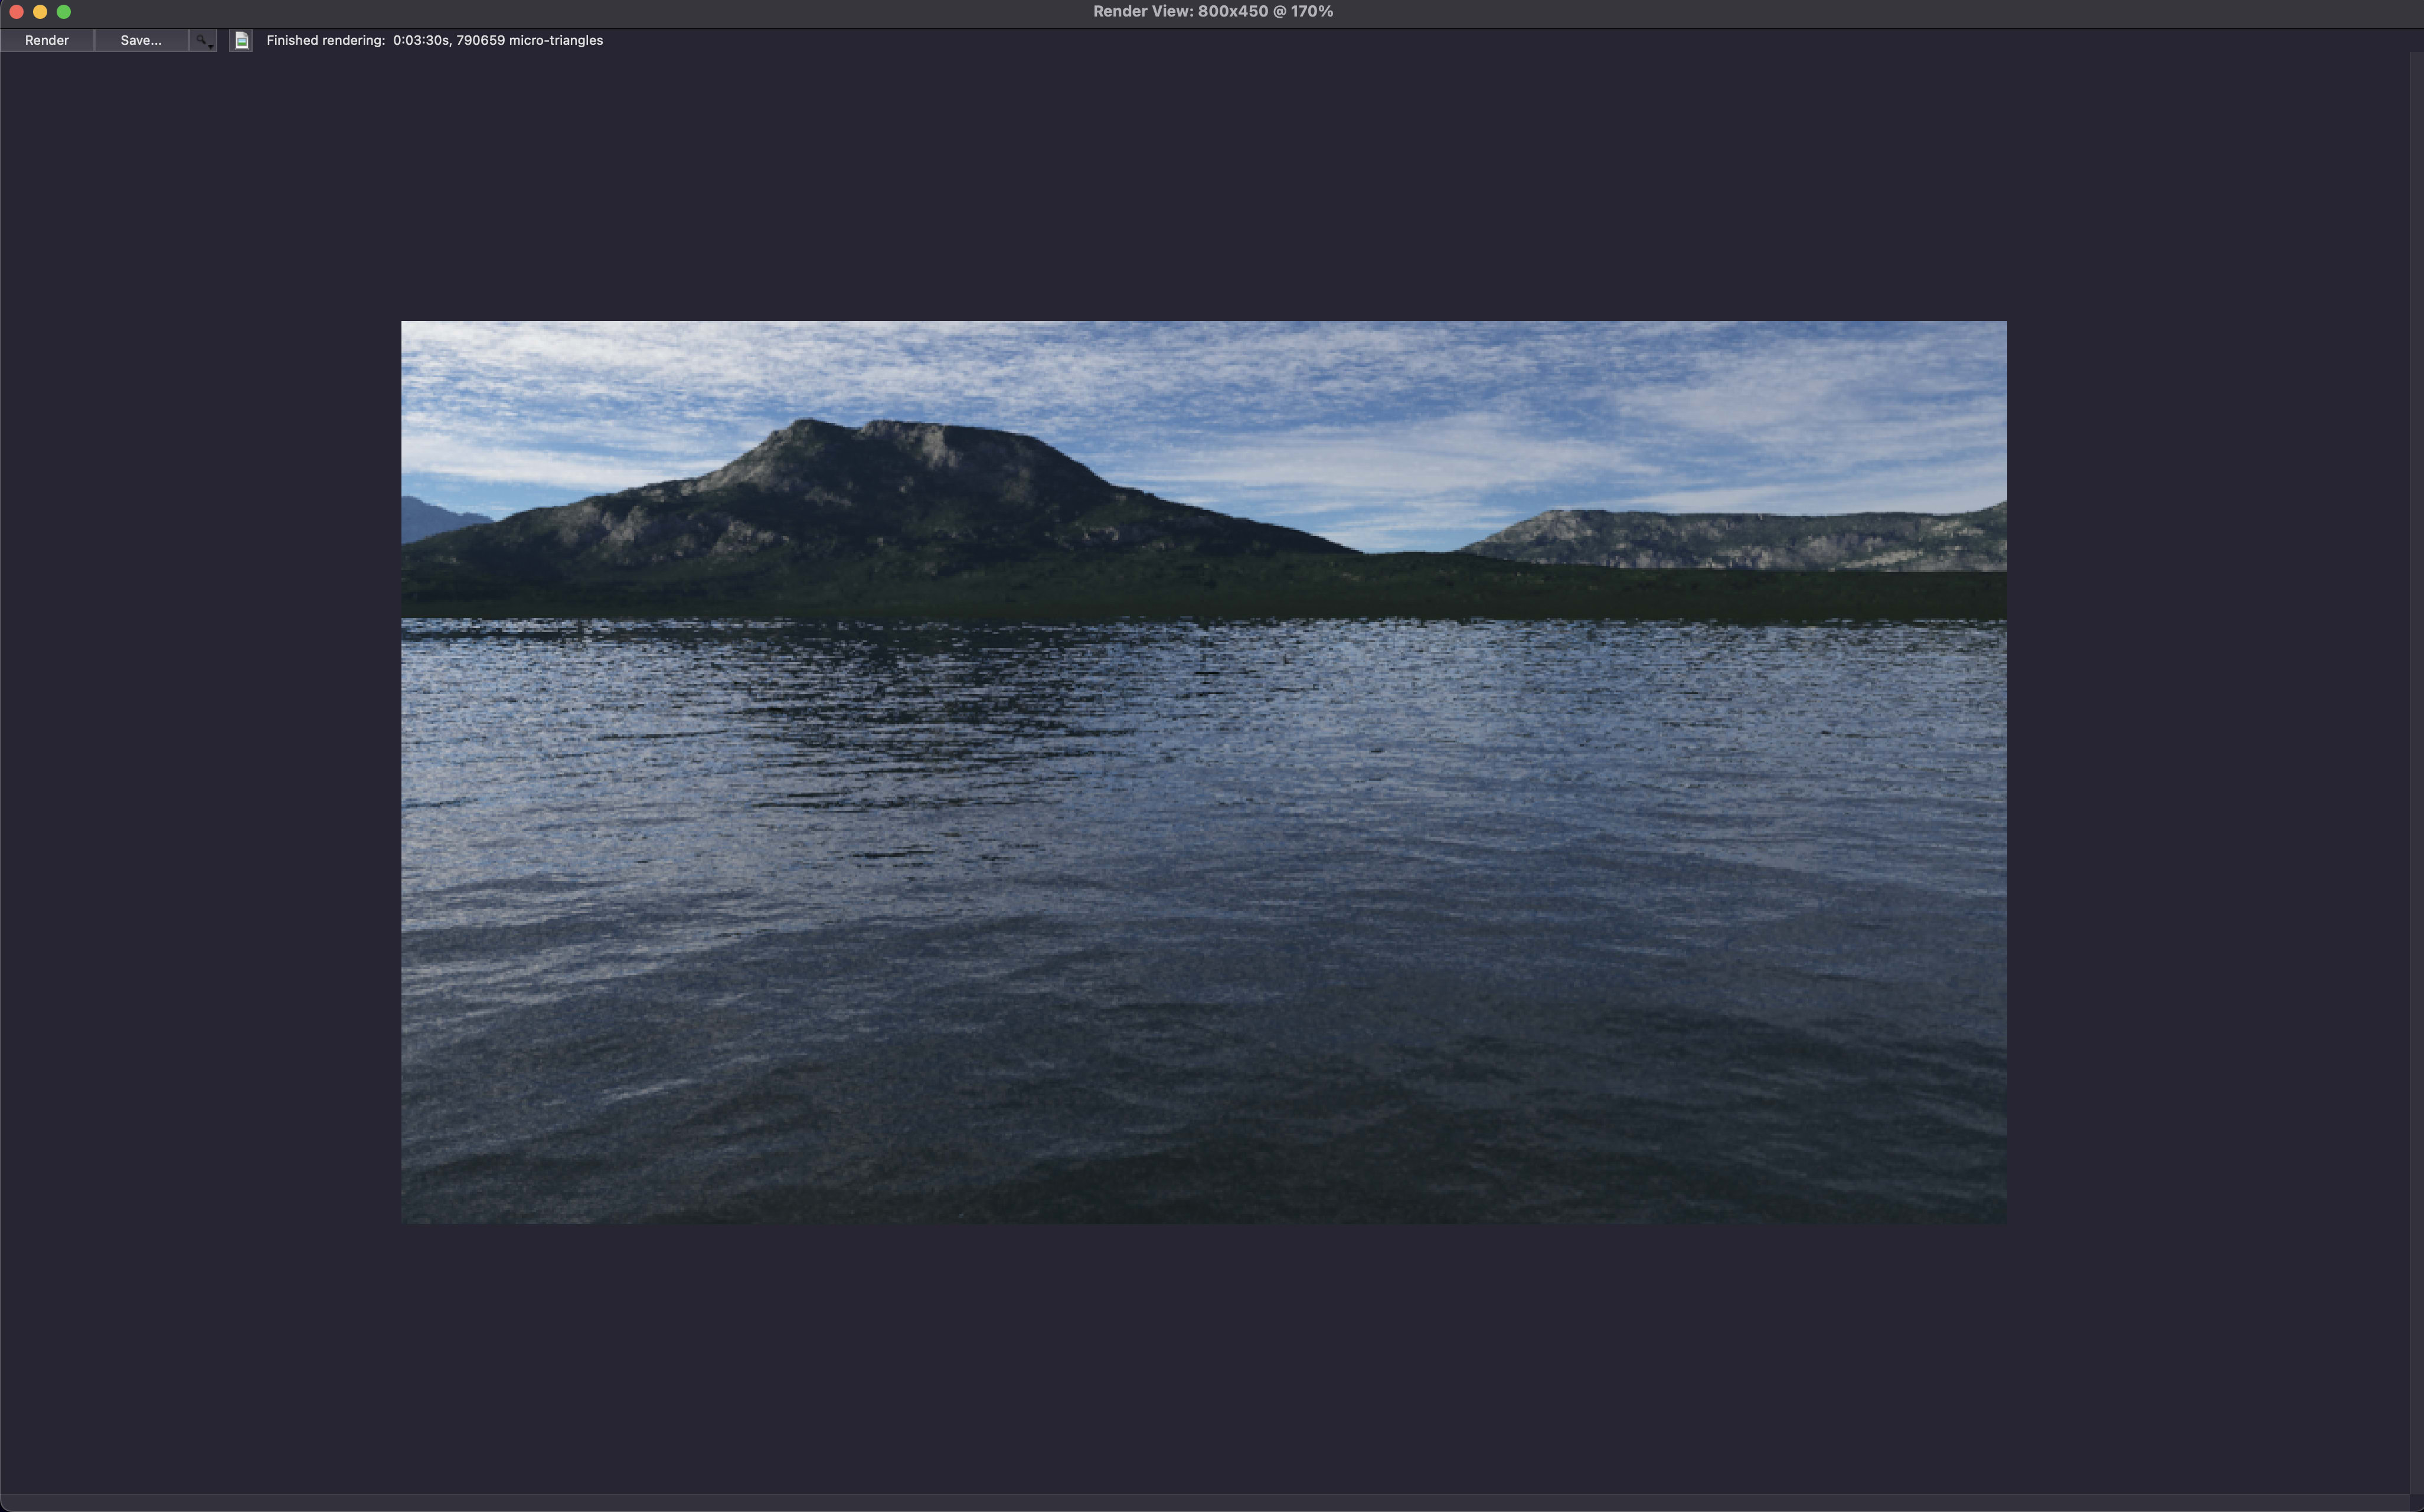
After tilting and panning the viewpoint a bit more, I have gotten the following scenery which looks more realistic as a final result of a mountain surrounded by water.
After I render the project, I get the following scene generated;
Tutorial On Image Synthesis
An amazing tutorial on image synthesis is the one below which discusses 3D-aware image synthesis;